This procedure explains how to set up the Socks server in Internet Options as a Windows-wide setting. Some applications do not refer to Windows-wide settings, but instead refer to their own settings set for each application. For details, please refer to the manual of each application.
Note
Some applications that do not support Socks servers use Sockcap64. Sockcap64 is currently under construction.
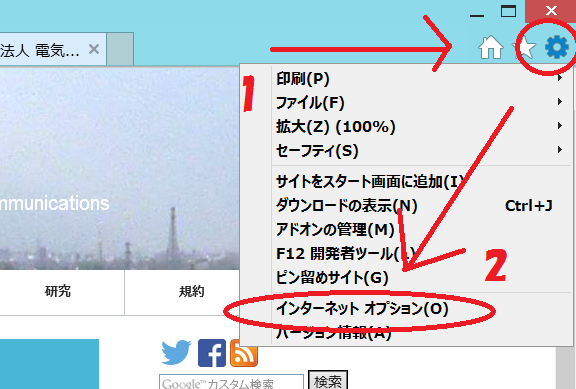
Select Internet Options from Tools on the Internet Explorer menu bar.
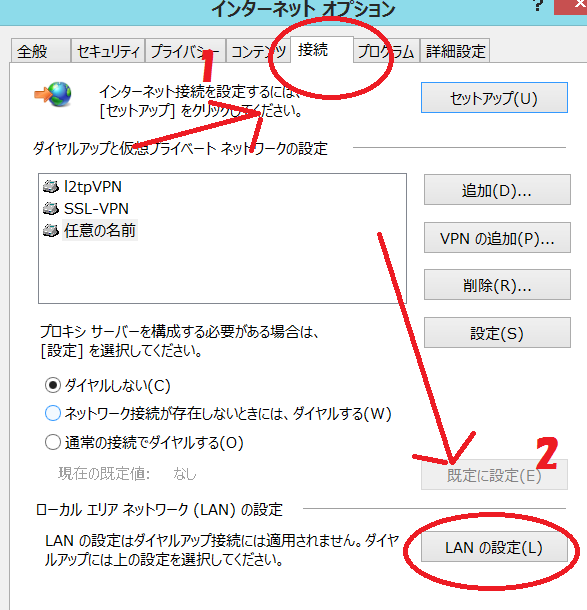
Select Connections at the top of the Internet Options window. Furthermore, press the Local Area Network (LAN) Settings item LAN Settings button at the bottom.
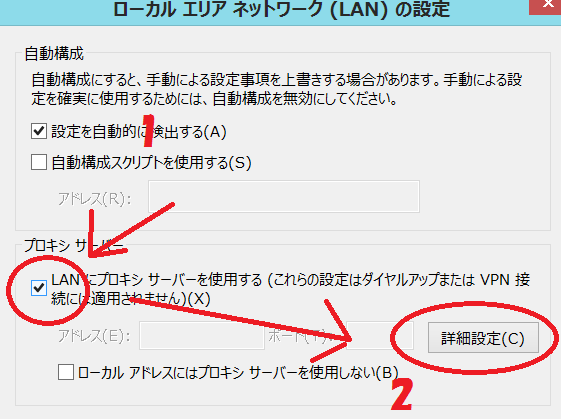
Check the Use a proxy server for LAN checkbox, and then select Advanced Settings.
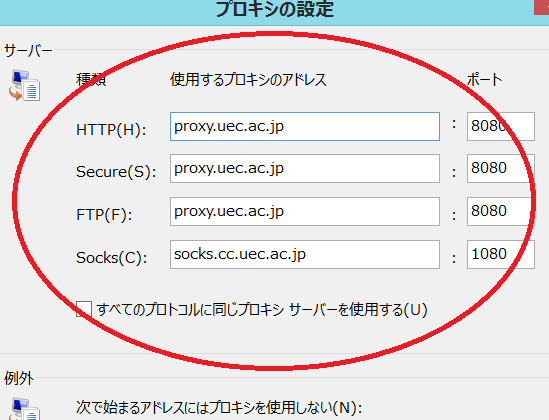
Enter the following information in the proxy settings window and press the OK button.
Note
Using the method in this procedure, it is not possible to set the Socks server for all protocols. Please set up a proxy server for HTTP, Secure (HTTPs), and FTP.
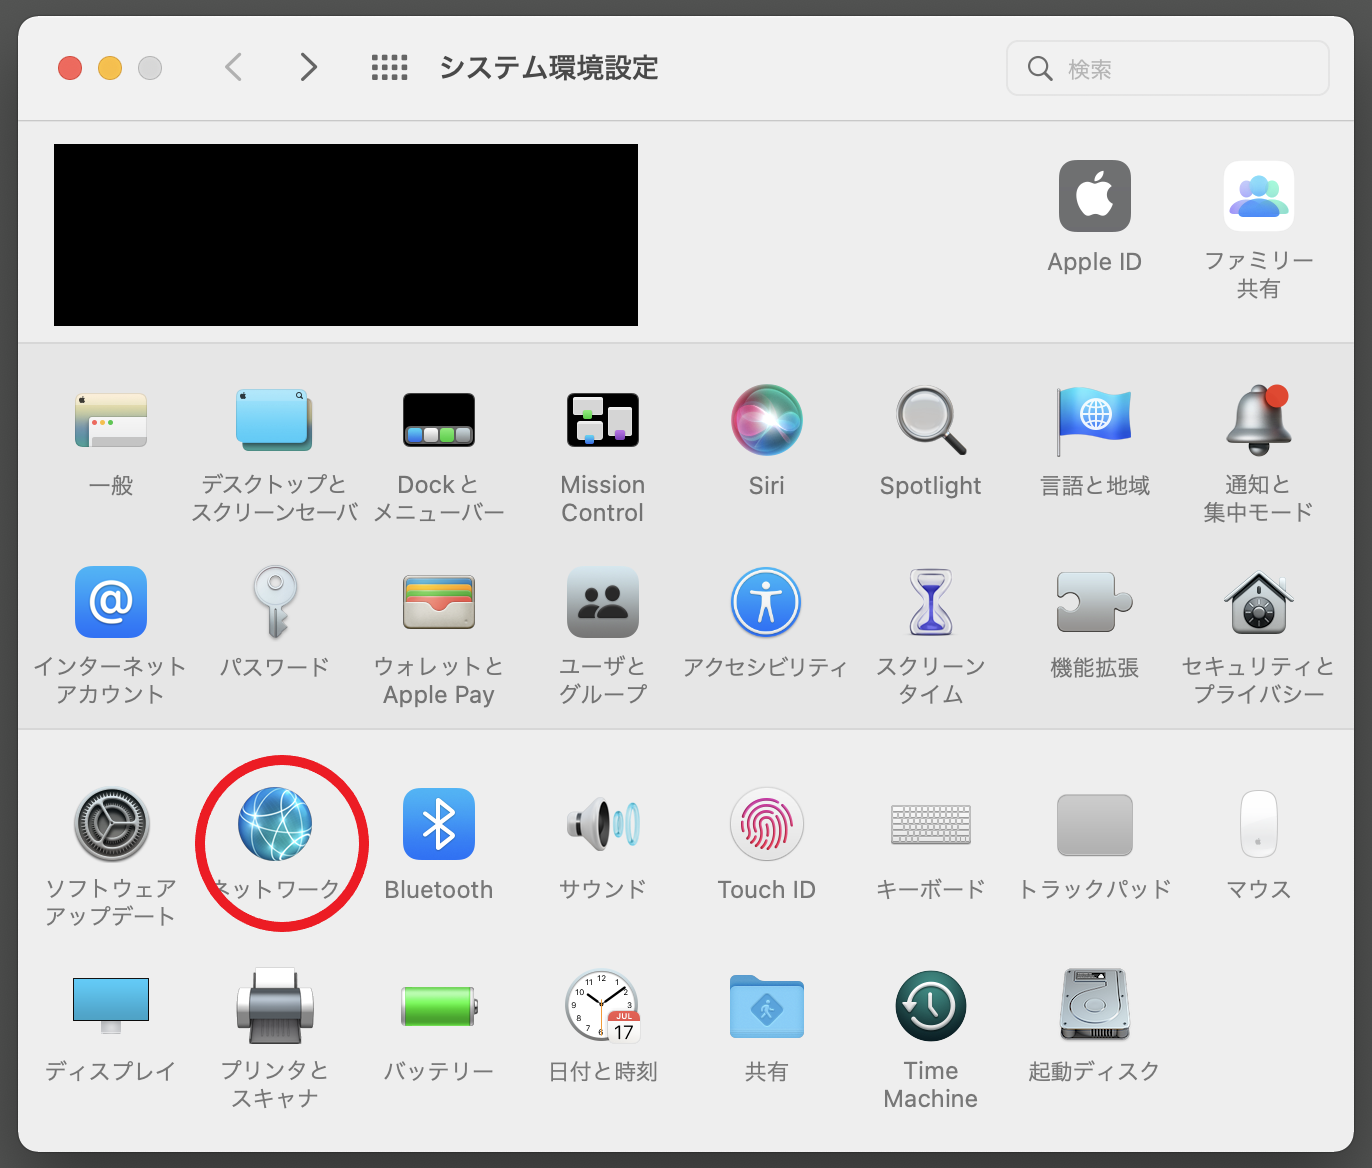
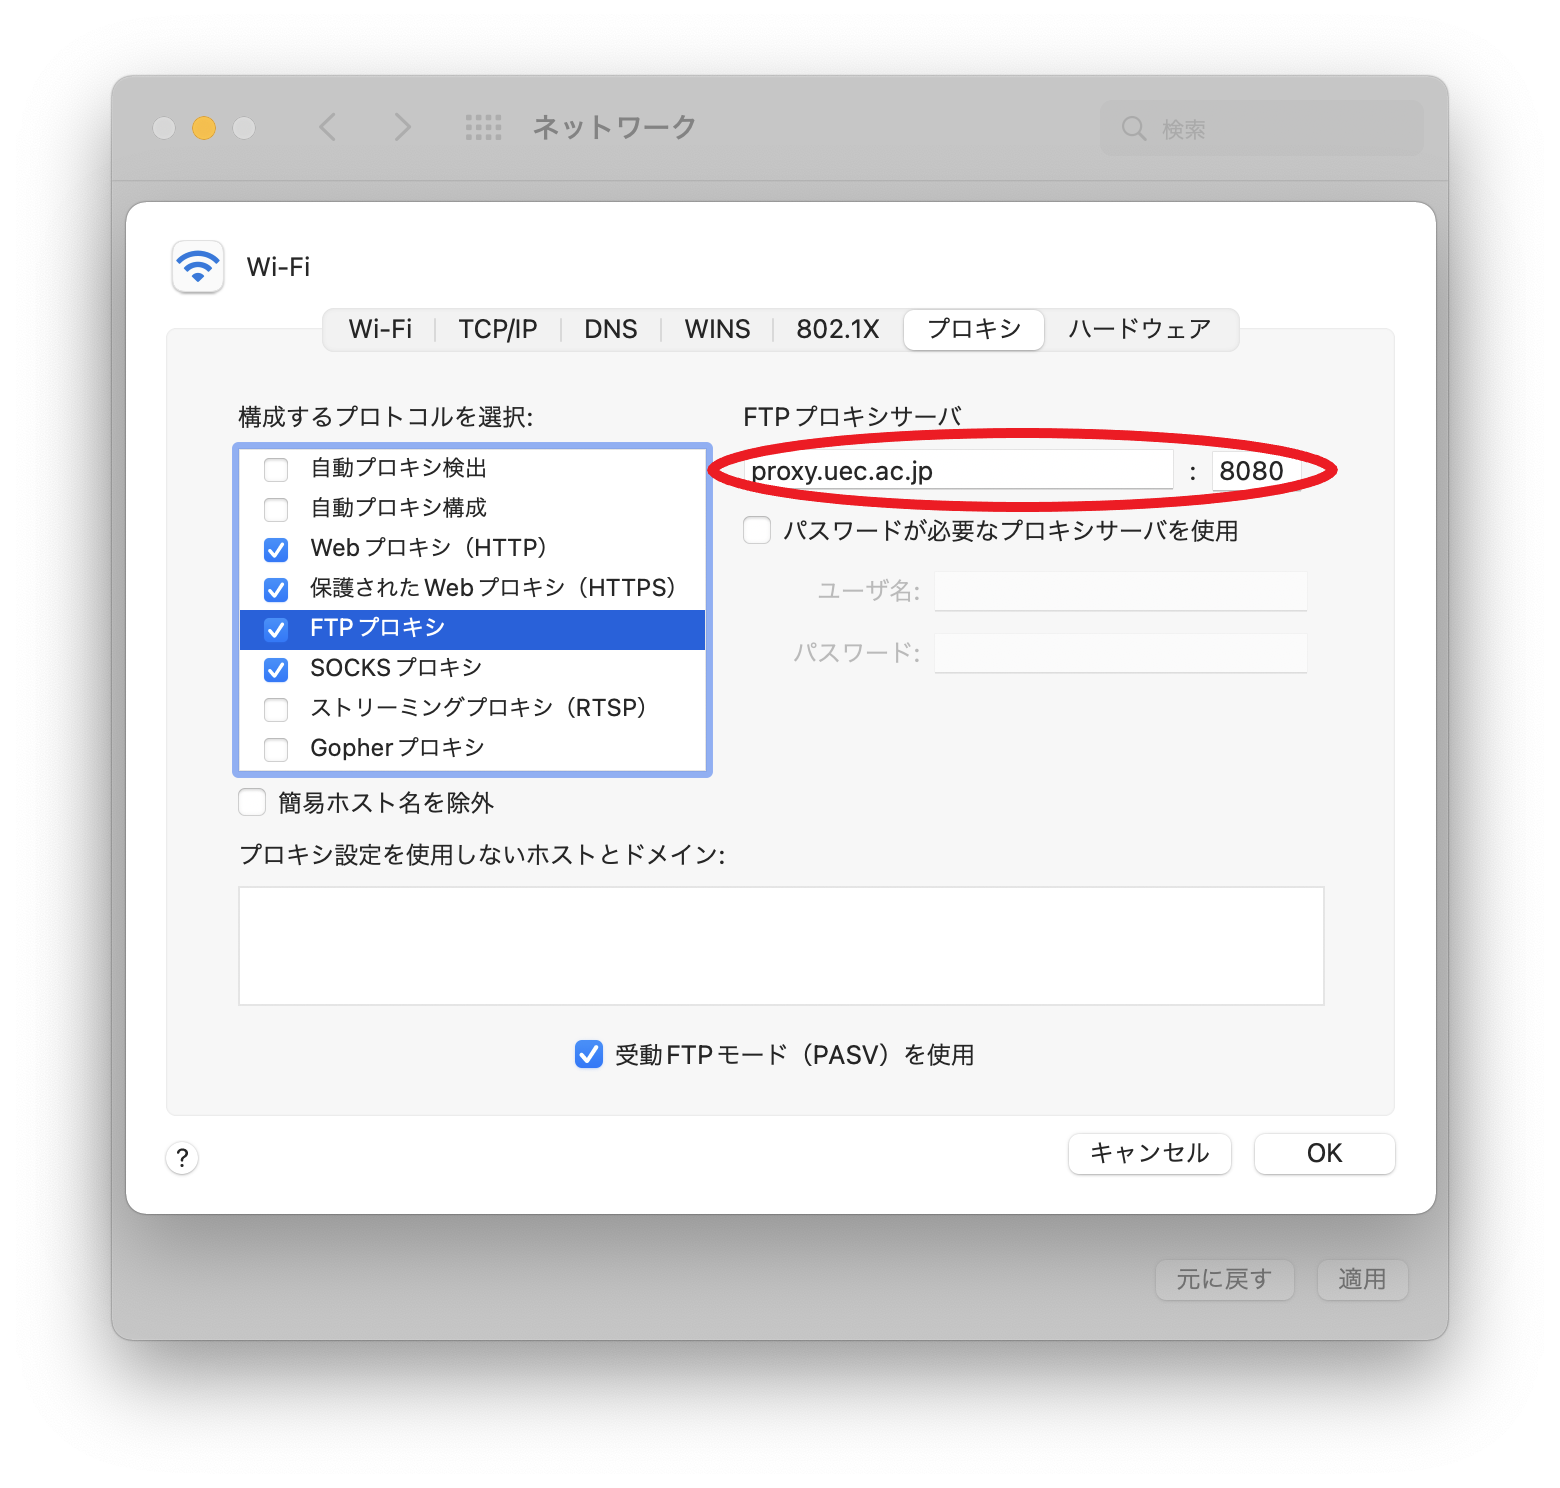
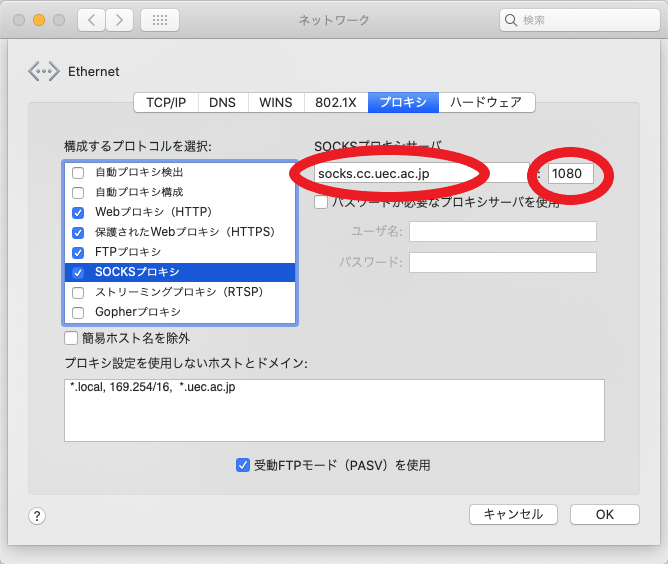
In macOS, by configuring the Socks server for the entire macOS from System Preferences, you can use the Socks server from applications such as web browsers and mailers without having to configure individual settings for each application.
Select Network from System Preferences.
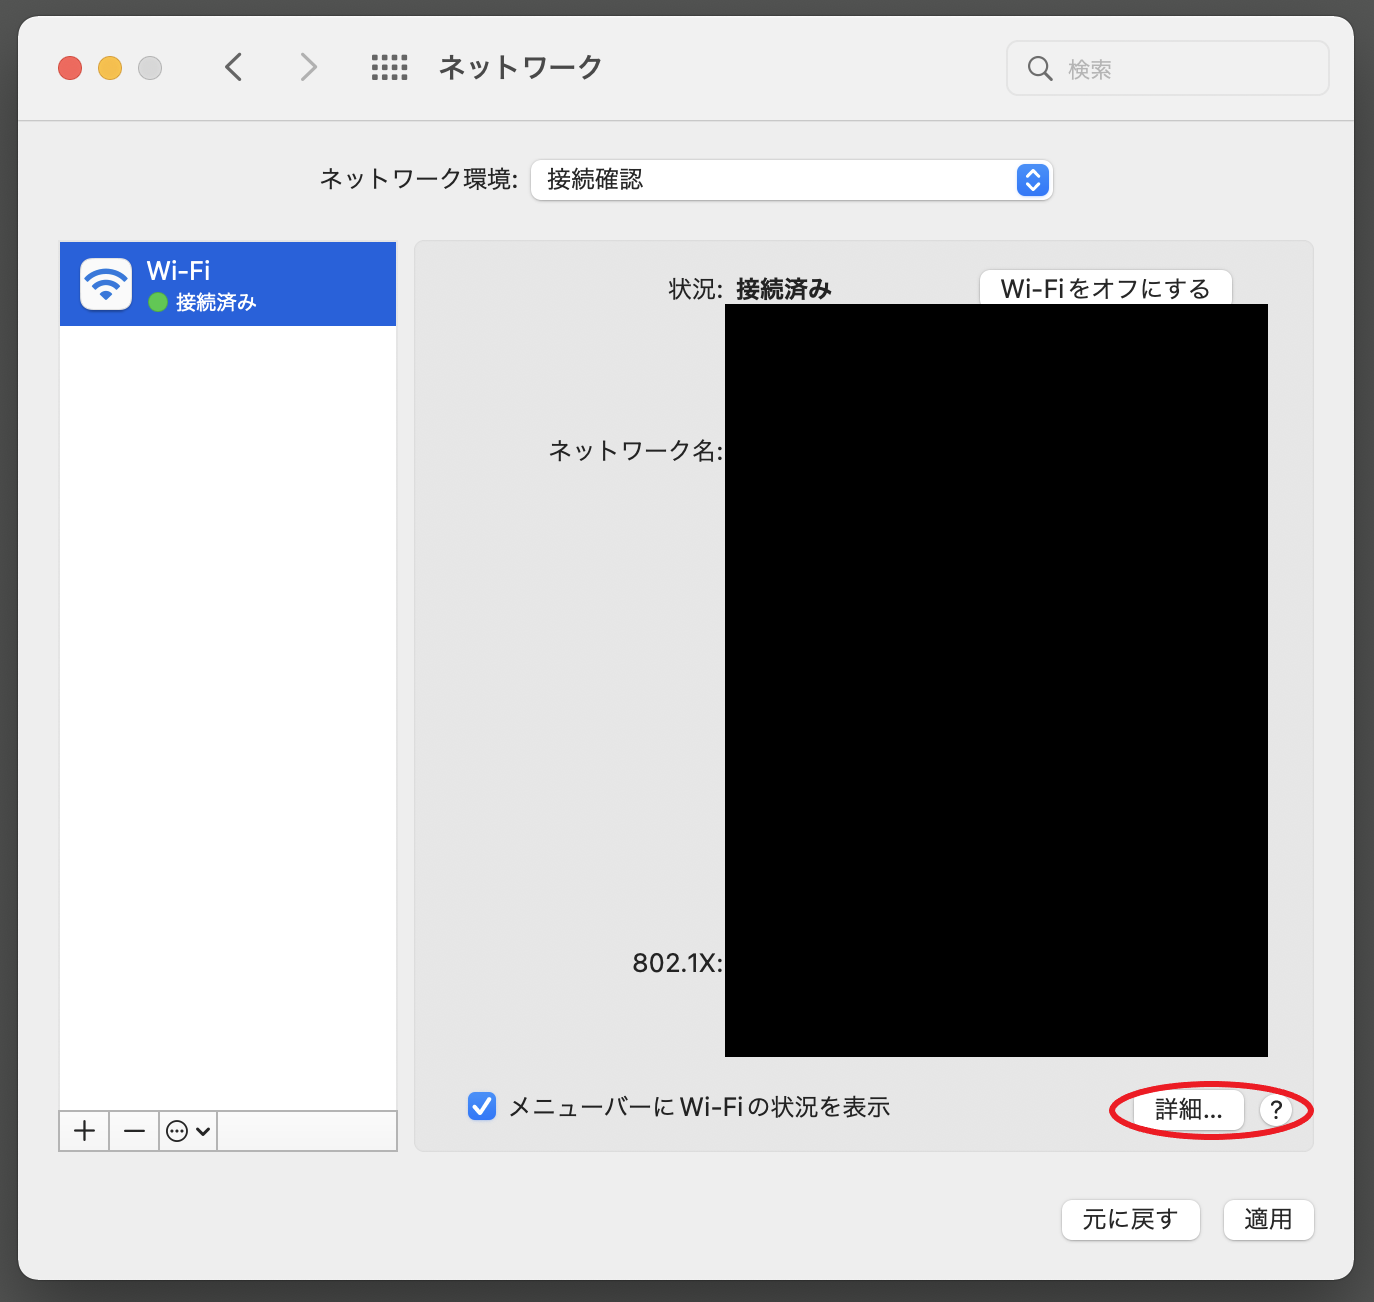
Select the network to use from the Network window and press the Details button.
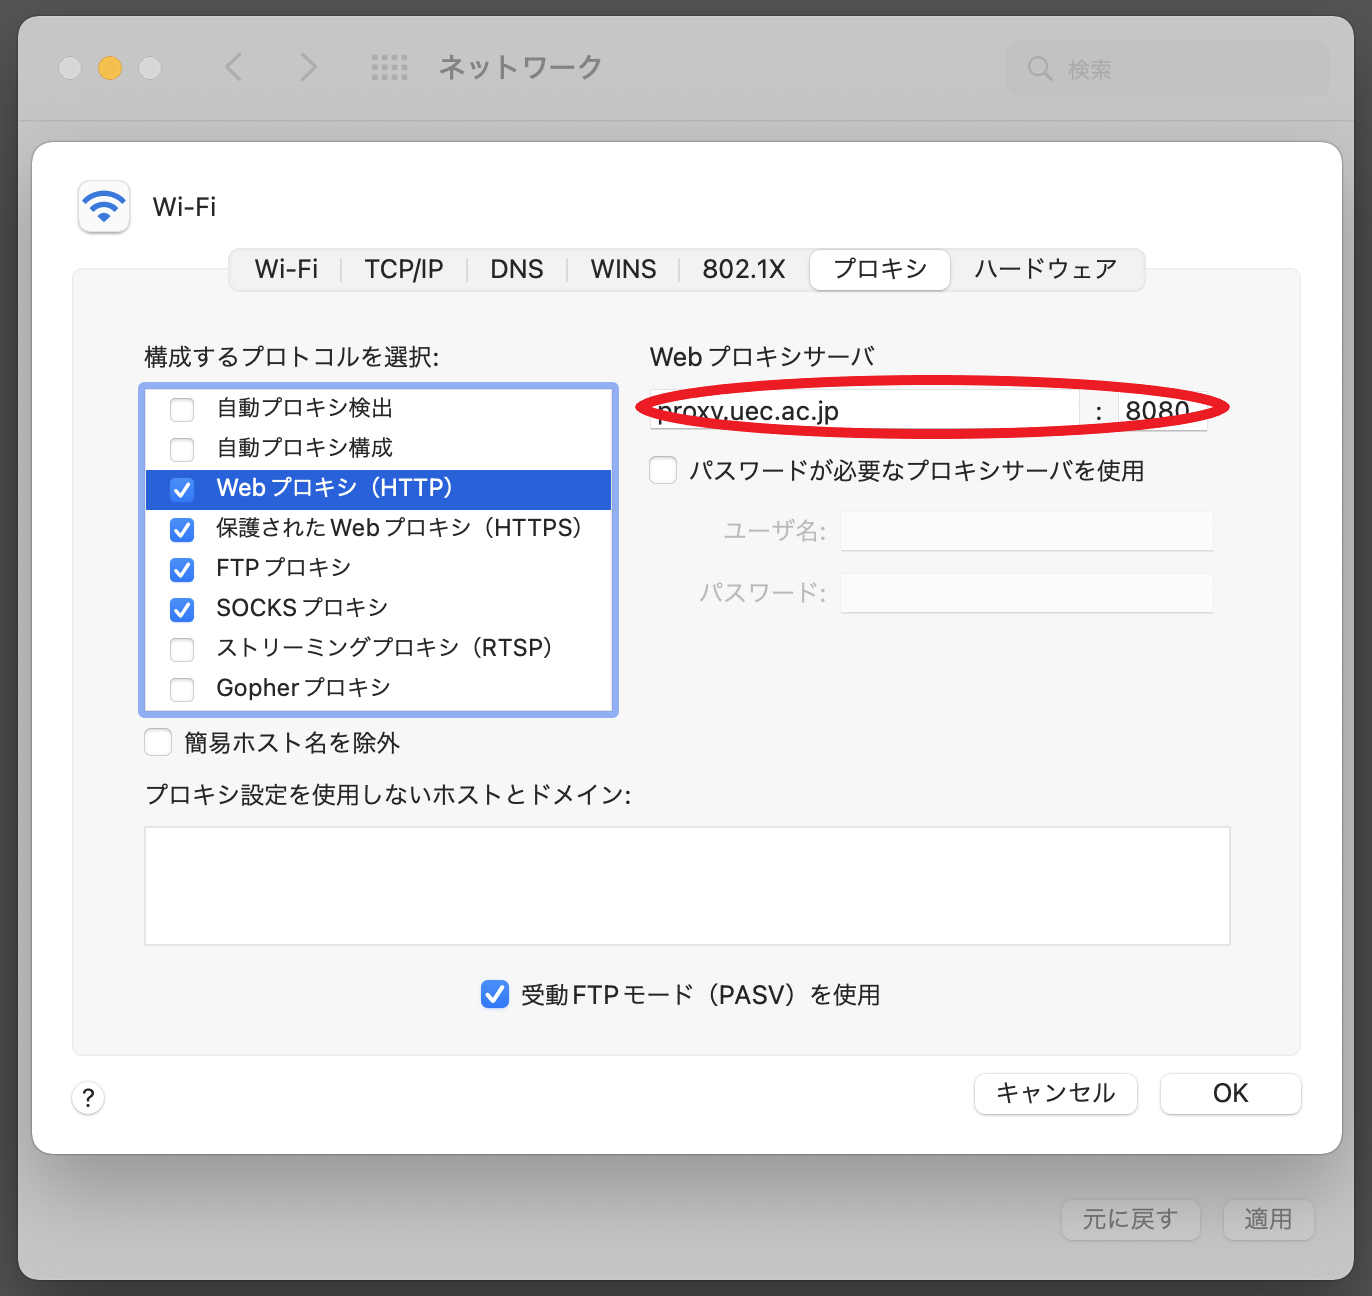
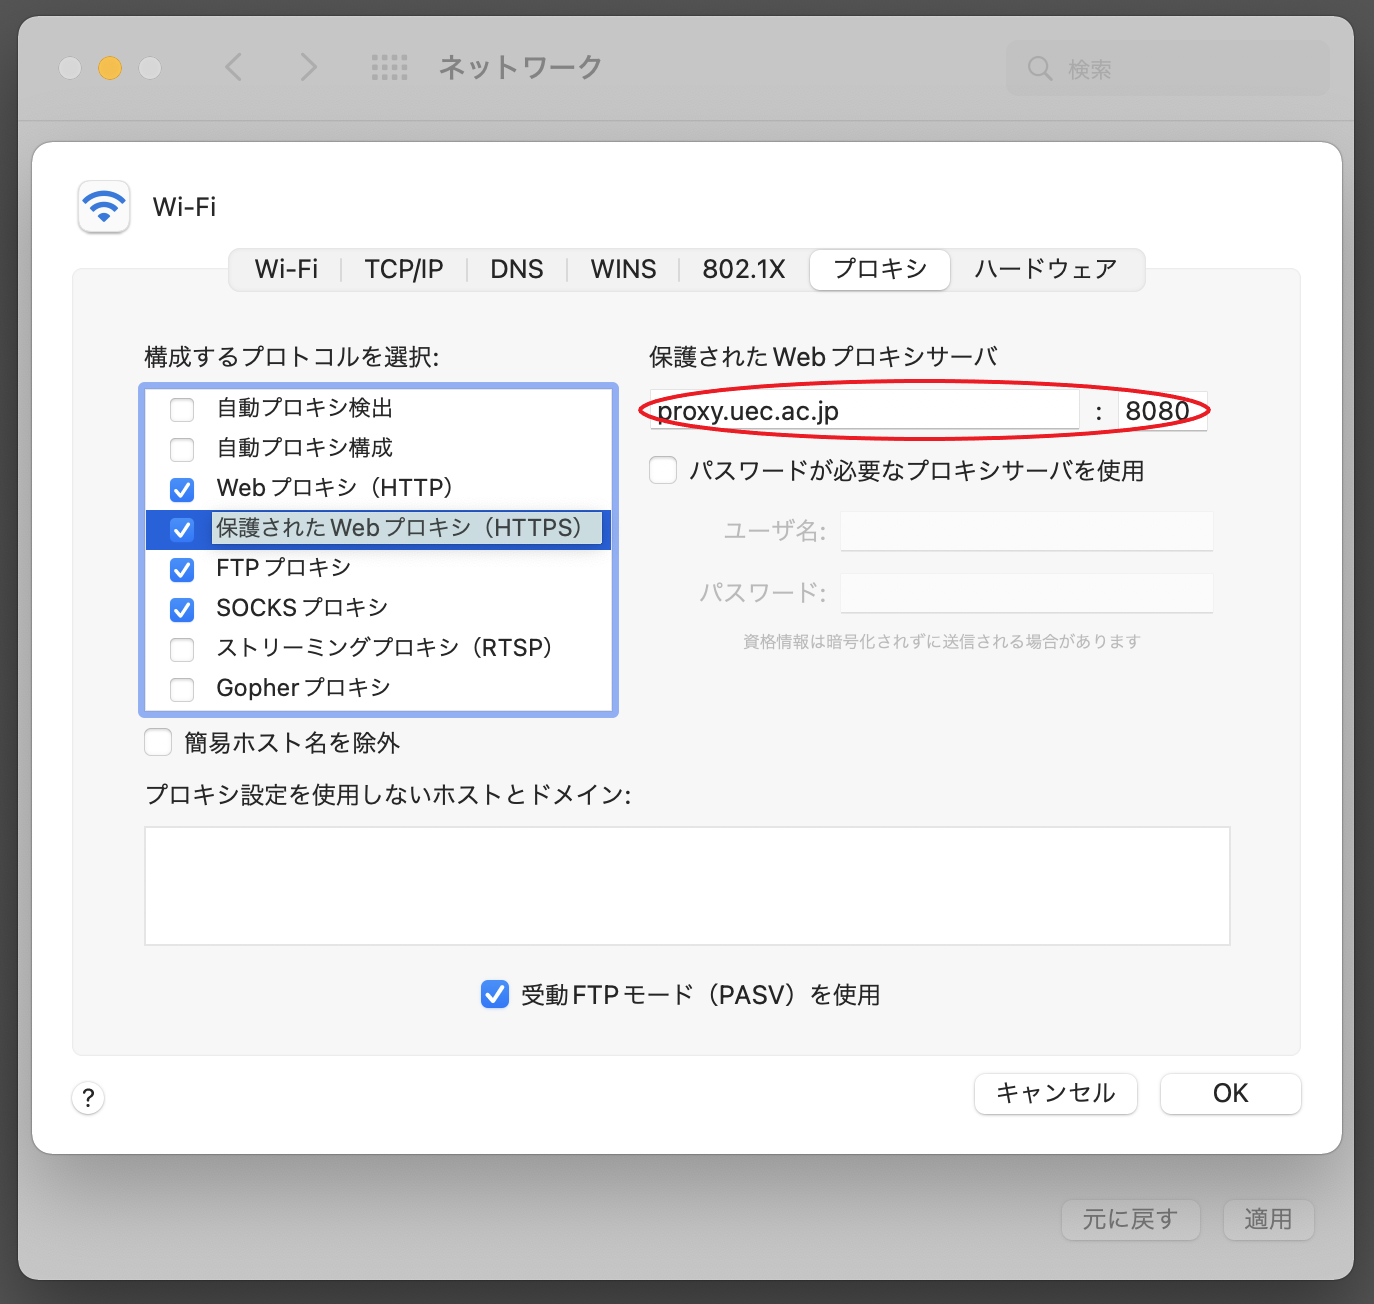
When the window opens, press the Proxy tab at the top. Select the protocols to configure: Web Proxy (HTTP), Secured Web Proxy (HTTPS), FTP Proxy, SOCKS Proxy, enter the Socks server configuration information as below, and press Apply.