Open Lab Network Usage
Flow of Starting Use
The Open Lab network of the Research Promotion Division is jointly managed by the Information Technology Center and the network managers of each building .
If you wish to use the campus network in the open lab, please follow the following procedures.
Connection procedures depending on the location of the open lab
- When using the The Open Lab Network Managed by the Information Technology Center
\(\Rightarrow\) Connecting to the Open Lab Network Managed by the Information Technology Center
- When using a network other than the above
\(\Rightarrow\) Check with the network administrator of each building to find out how to connect.
オープンラボのネットワーク新規配線申請(全オープンラボ共通)
If you would like to use the on-campus network in the open lab, please send the following information to support@cc.uec.ac.jp with the subject line 「オープンラボ:ネットワーク新規配線申請」.
【オープンラボの利用代表者(常勤教職員)】
氏名:
UEC アカウント:
電話(内線可):
所属(研究室名等):

【オープンラボの情報】
建物:
部屋:
情報コンセント番号:
利用開始日:
配線するネットワーク※:
※ オープンラボ用 IP アドレスではなく,部局等のネットワークを利用する場合のみ記入
Note
Representative users of the open lab are limited to full-time faculty members of our university.
Connecting to the Open Lab Network Managed by the Information Technology Center
The Open Lab Network Managed by the Information Technology Center
次のオープンラボ ネットワークは,情報基盤センターが管理しています. ご利用の際は,Operation Policy をご確認のうえ, Connection Procedure に沿ってご利用ください.
東 3 号館 618 号室,620 号室,626 号室,701 号室,726 号室のオープンラボ
東 9 号館の全オープンラボ
東 35 号館の全オープンラボ
All of the Open lab in Building W-11 1st to 3rd floor
上記以外の場所にあるオープンラボのネットワークは原則として, オープンラボがある各建屋の 各建物のネットワーク管理者 が管理しています.
Operation Policy
The operational policy for The Open Lab Network Managed by the Information Technology Center is summarized below. For other open lab network operations, please check with the network administrator of each building .
The open lab network managed by the Information Technology Center is provided as a public network within the university. Unlike the network of each department, the primary responsibility for use is not the Information Infrastructure Center, but the user and the representative user of the open lab.
本学および情報基盤センターの各種規定 に沿った運用をお願いします.
Basically, it is used with a private IP address for open labs that is automatically assigned (DHCP) by the Information Technology Center.
In the following cases, communications may be cut off without prior notice
本学および情報基盤センターの各種規定 に則さない運用がされている場合
In the event of an information security incident, etc.
If the fixed IP address is being used on a device different from the one applied for.
Connection Procedure
When connecting to The Open Lab Network Managed by the Information Technology Center, the オープンラボのネットワーク新規配線申請(全オープンラボ共通) is required in advance. After applying, please connect the device to the network using the following method.
Use IP address other than open lab IP address
Note
Please check with the network administrator of each building for information on how to connect to networks at open labs other than The Open Lab Network Managed by the Information Technology Center.
Note
To ensure security, please use the Open Lab network with a private IP address in principle.
グローバル IP アドレスを申請した場合でも,利用が認められない場合もあります.あらかじめご了承ください.
If you need email, DNS, or web services to be published externally, please consider using a virtual domain server.
学外から学内プライベートネットワークにアクセスする場合は,Remote Access をご利用ください.
オープンラボ用個人認証による接続(IP アドレス変動、プライベート IP アドレスのみ)
UEC account users can use the open lab network through personal authentication. If you are using a PC terminal, please use this method.
The connection procedure is as follows.
Please connect the device to the information outlet applied for using the オープンラボのネットワーク新規配線申請(全オープンラボ共通).
Please use your UEC account to authenticate using the following steps for each OS.
Windows 11
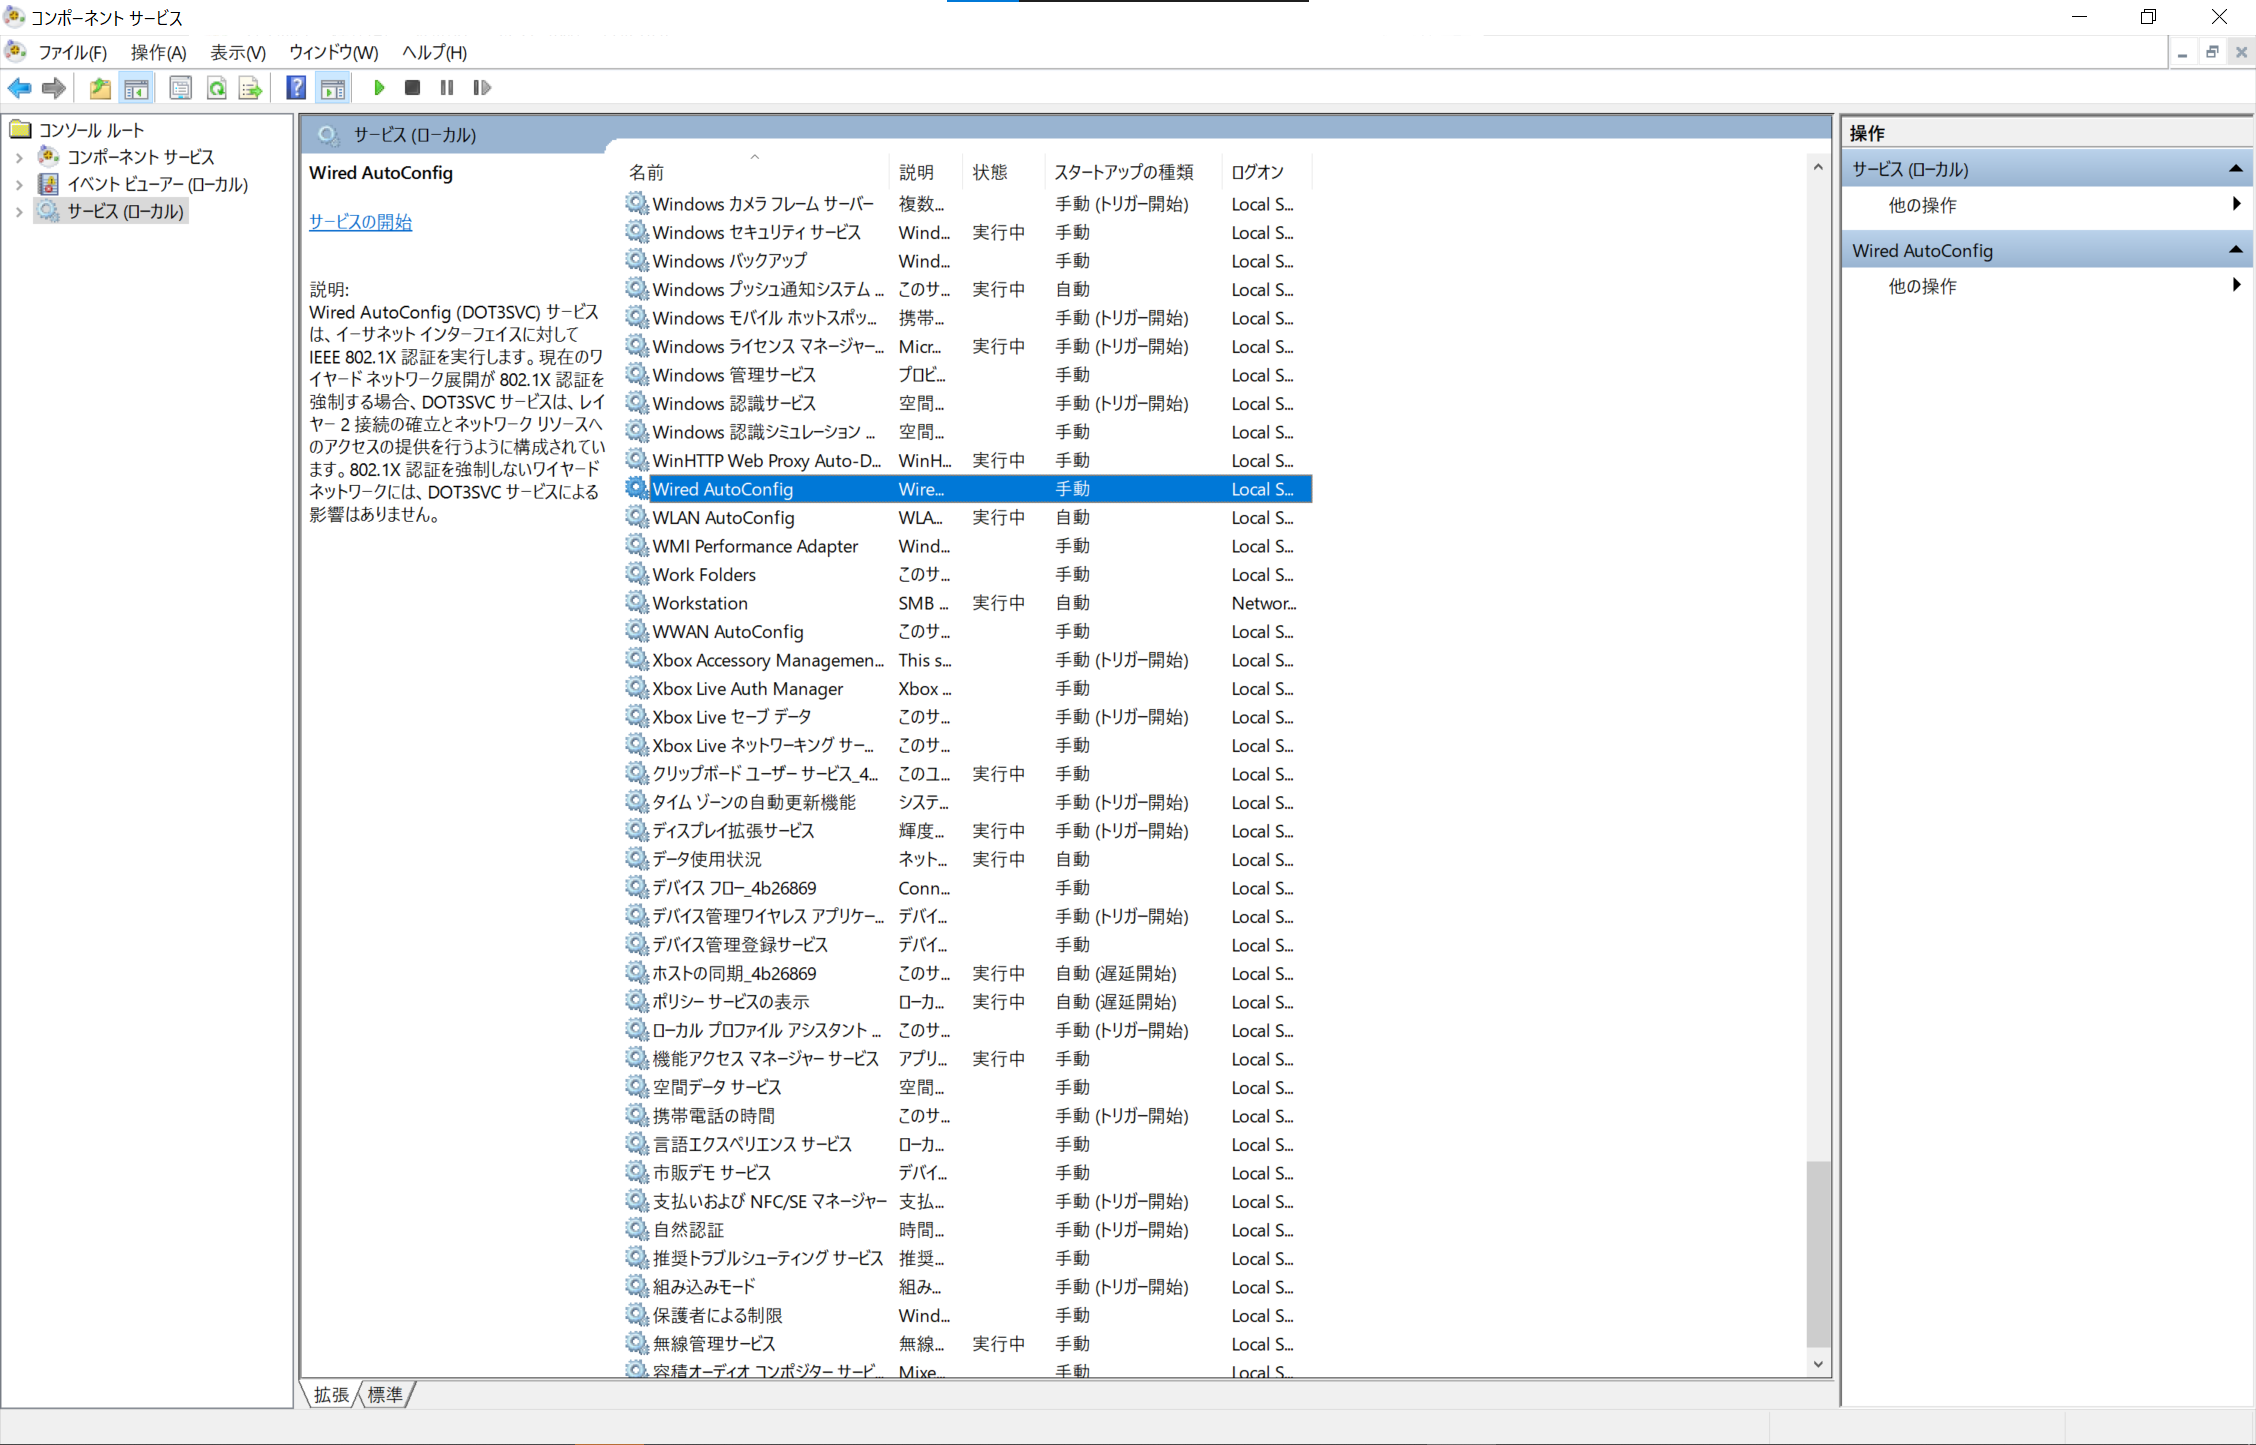
Start the authentication service (
Wired AutoConfig).
Press the Start button , type services.msc in the search box, and press the Enter key.
Double-click Wired AutoConfig and open its properties.
Press the Start button.
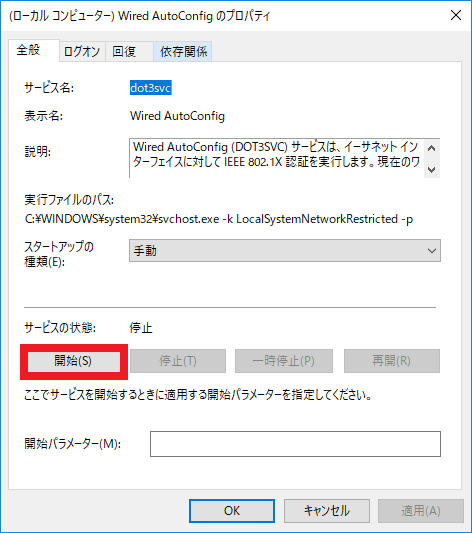
Note
If you set the startup type (E) to Automatic in this window, the authentication service will always start when the OS starts.
Press the OK button and close the window.
Close the service.
Configure authentication (802.1x).
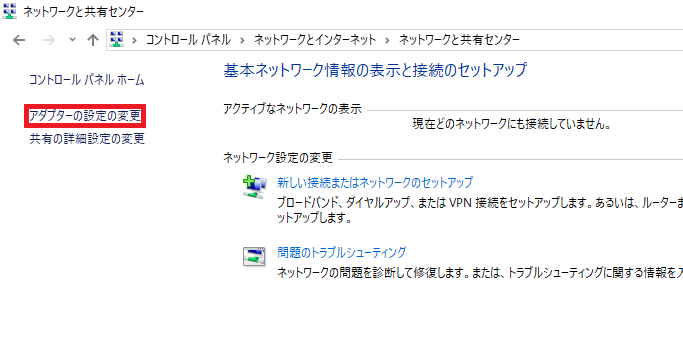
Open Network and Sharing Center.
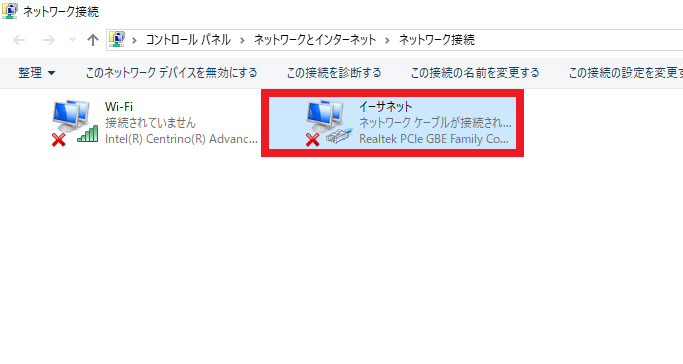
Click Change adapter settings.
Right-click on Ethernet and select Properties(R).
Click the Authentication tab and configure the following settings.
Check Enable IEEE 802.1X authentication (N).
Select network authentication method (M): Select Microsoft: Protected EAP (PEAP) and click the Settings button.
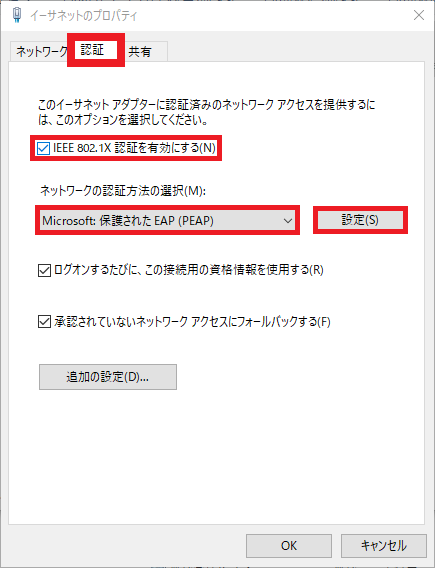
In the window that appears, uncheck Verify certificate and verify server ID (V).
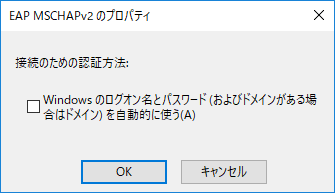
Select Authentication Method (S): Make sure that it is set to Secure Password (EAP-MSCHAP v2), and click Configure(C)….

接続のための認証方法: で Windows のログオン名とパスワード… のチェックを外し, OK ボタンを押してウィンドウを閉じる.
Click the OK button to close the protected EAP properties window.
Click Additional Settings (D)….
Check Specify authentication mode (P) and select User authentication.
Click Save Credentials (C).
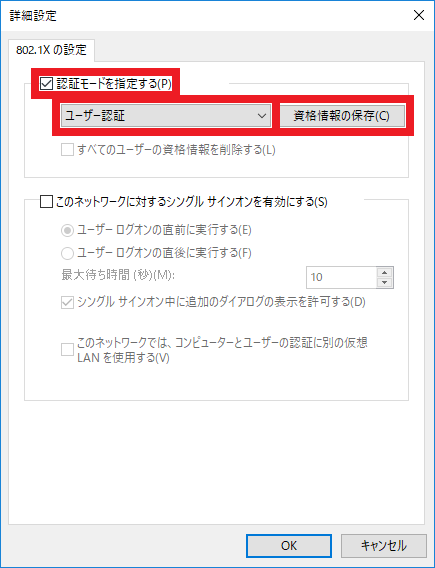
ユーザ名 と パスワード 欄にそれぞれ,UEC アカウントのユーザ名とパスワードを入れる.
Note
Username and password can be omitted. In that case, an authentication window will be displayed each time you connect.
Press the OK button to close the Ethernet properties window.
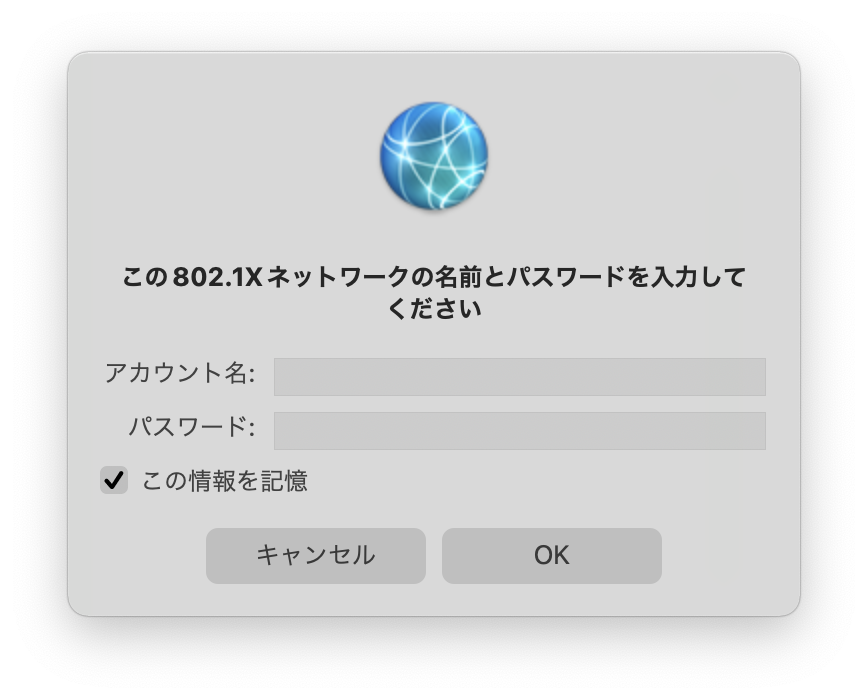
Authenticate.
When the authentication screen appears, enter your UEC account ID and password, and press OK.
Note
It may take several minutes for the authentication screen to appear.
macOS
LAN ケーブル接続後,認証画面が表示されるのを待つ.
Note
It may take several minutes for the authentication screen to appear.
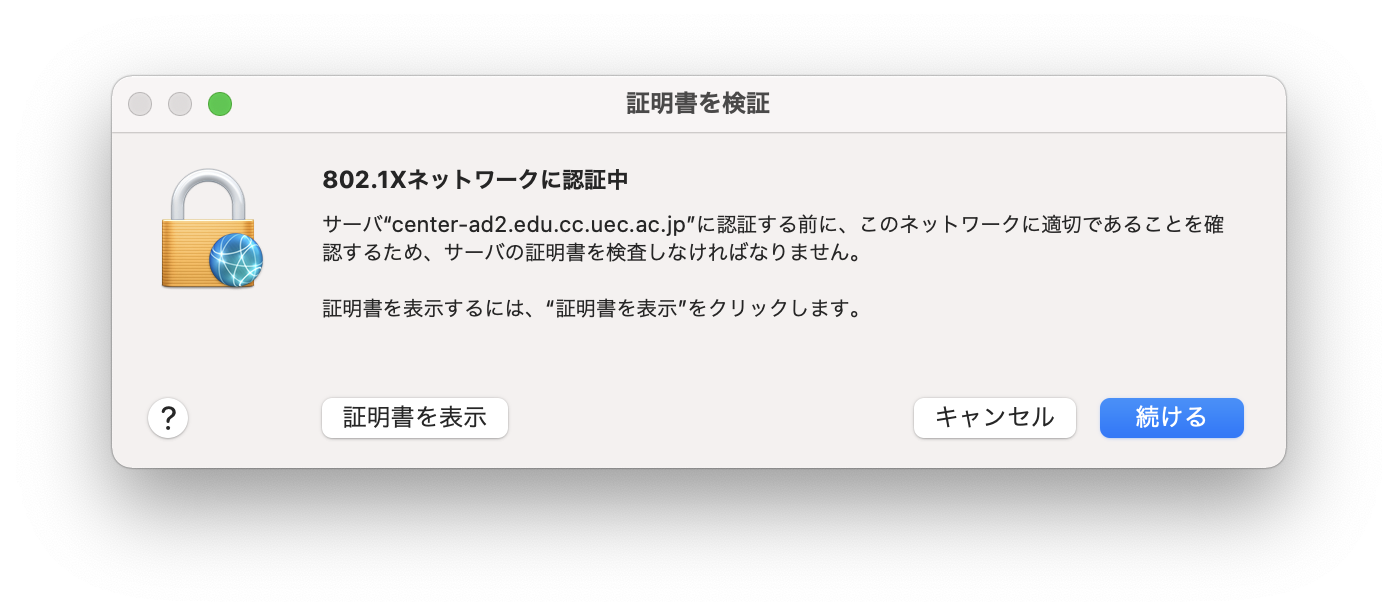
Enter the UEC account ID and password on the authentication screen.
When the Verify Certificate window appears, click Continue.
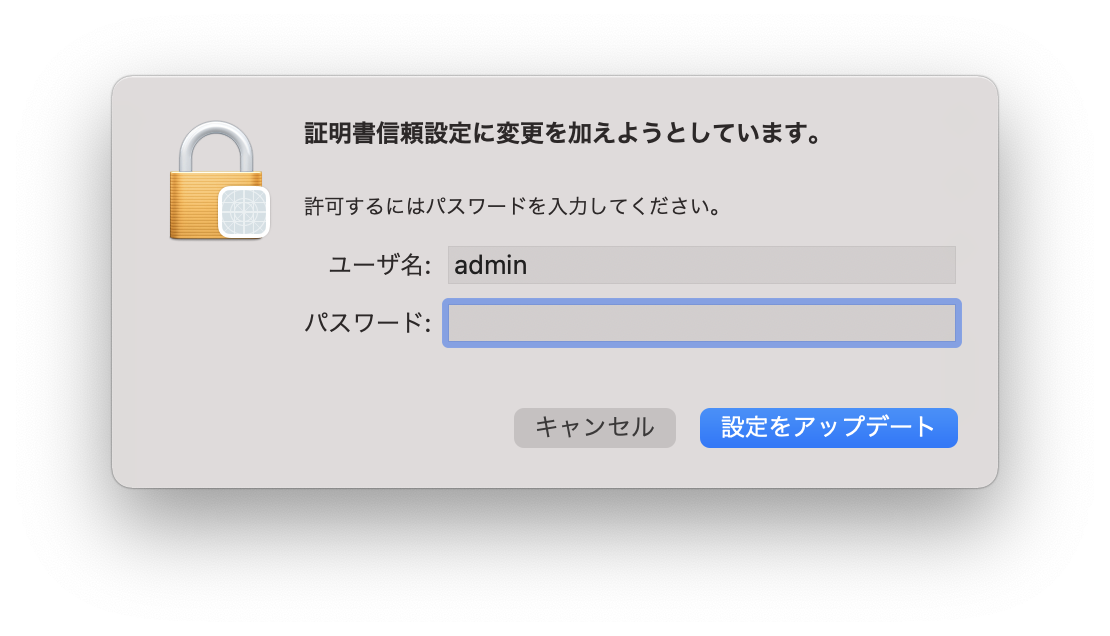
証明書信頼設定に変更を加えようとしています。 と表示されたら,macOS の管理者アカウントの ID とパスワードを入力する.
UNIX(Linux 等)
The setting method differs depending on the distribution. The basic flow is to install the supplicant for authentication using the method for each distribution, and configure the following items related to 802.1x using the network configuration tool for each distribution.
certification
PEAP
CA certificate
none
PEAP version
automatic
internal authentication
MSCHAPv2
Below, we will explain the setup procedure for CentOS 7 as a specific example.
CentOS 7
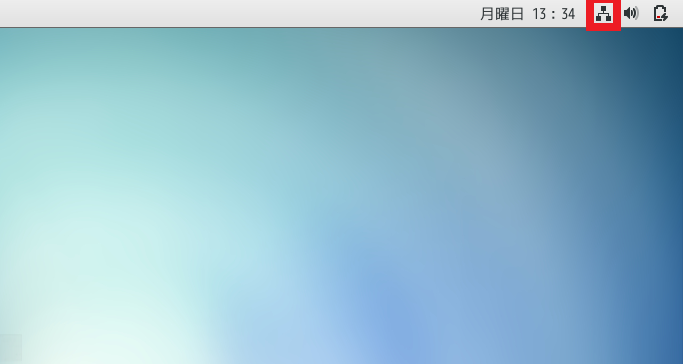
Click the
settings icon\(\Rightarrow\) wired settings at the top right of the screen, open the network window.
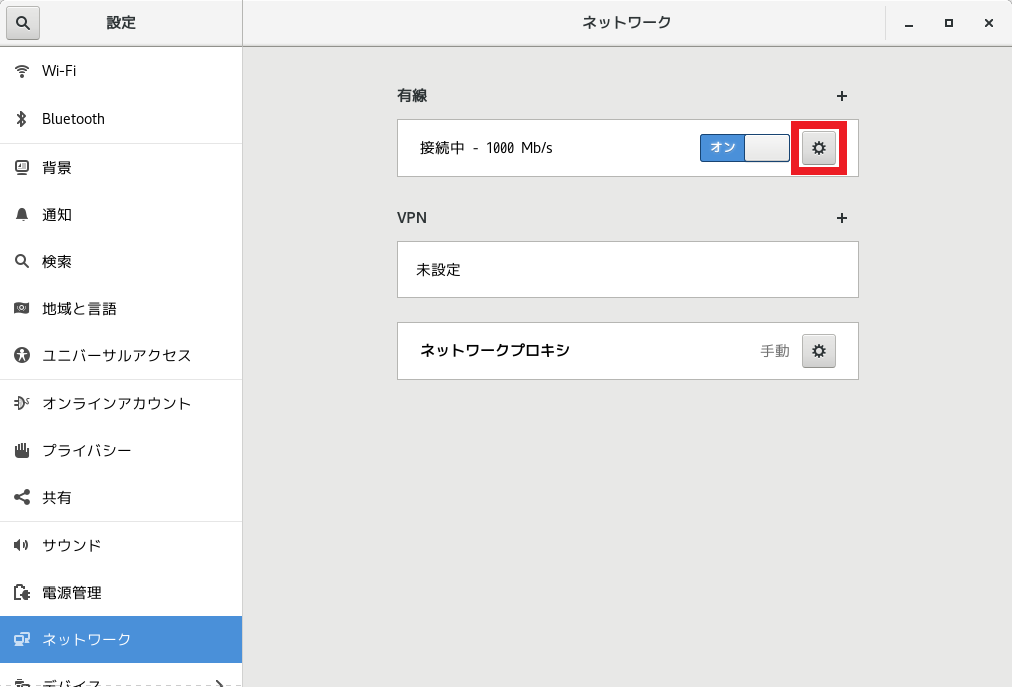
Click the
settings iconin the network window to open a new profile window.
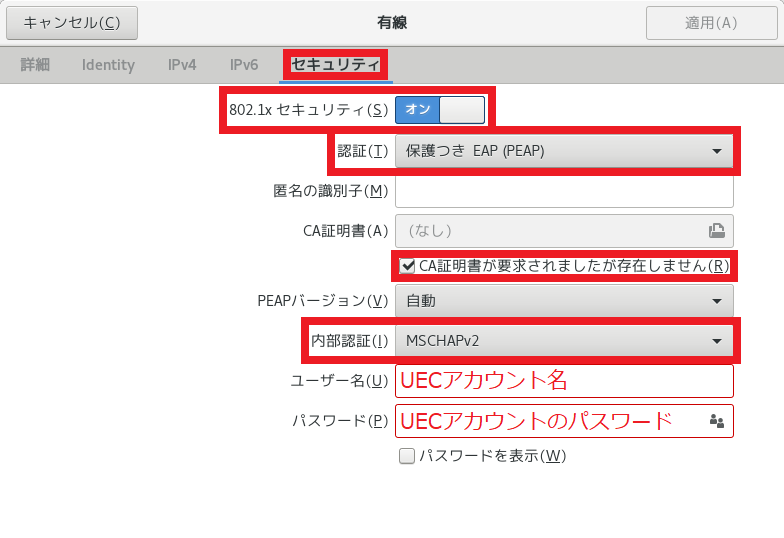
Go to the Security tab and turn on 802.1x security.
Set Authentication to PEAP, check CA certificate was requested but does not exist, and set Internal Authentication to MSCHAPv2.
ユーザー名 に UEC アカウント名を, パスワード にそのパスワードを入力し, 適用 をクリックする.
オープンラボ用機器認証による接続(IP アドレス固定,グローバル IP アドレスも利用可)
Device MAC address registration
以下の内容を 情報基盤センター オープンラボ担当(support@cc.uec.ac.jp) 宛に 件名を「オープンラボ:機器登録 申請」として お送りください.
【オープンラボの利用代表者】
氏名:
UEC アカウント:
電話(内線可):
所属(研究室名等):

【機器情報(複数ある場合はコピーして記入)】
希望ホスト名(候補を 3 つ。oplab.cc.uec.ac.jp ドメイン以外を希望する場合は FQDN):
MAC アドレス:
オープンラボ(建屋,部屋):
接続先(情報コンセント番号等):
IP アドレスの種別(プライベート/グローバル):
OS:
機種(メーカ,型番等):
使用目的:
Warning
登録された機器は 希望ホスト名.oplab.cc.uec.ac.jp として DNS の正引き/逆引きを登録します. 他ドメインを希望する場合は,各ドメイン管理者にホスト名の登録を依頼し,申請時にその FQDN(ドメイン名を含む全体)をお知らせください.
An authentication screen may also be displayed for registered devices. In that case, please close the authentication screen without entering anything.
OS は,主に使用するものを記入してください.ネットワーク機器等(ルーター,スイッチングハブ,ファイアウォール等)で専用 OS を使う場合は,空欄で構いません.
Connection and communication confirmation
機器登録が完了次第,UEC アカウントのメールアドレスに登録完了通知があります. プライベート IP アドレスを希望された場合は,機器の DHCP を有効にしてください.なお,グローバル IP アドレスの場合は,申請受領後にアドレスをご連絡しますので,3 のグローバル IP アドレス利用に必要な手続きを行ってください. 設定後,学内 サーバ(www.uec.ac.jp 等)へ疎通確認を行ってください. (プライベート IP アドレスの場合は DHCP で接続情報を提供するため,基本的にアドレスを通知しません.)
- For global IP address
Global IP Address の流れに沿って, グローバル IP アドレス利用申請書 を提出し, グローバル IP アドレスの使用許可を受けてください. 使用許可を受けるまでは,学外への接続はできません.
グローバル IP アドレスの利用許可は,オープンラボの利用状況とは 独立に審査されます.申請理由等によっては,利用が許可されない 場合もありますので,あらかじめご了承ください.グローバル IP アドレスの 利用が却下された場合は, 情報基盤センター オープンラボ担当(support@cc.uec.ac.jp) にご連絡ください. IP アドレスの種別をプライベート IP アドレスとして新たな IP アドレスの割り当てを行います.
Device registration change
オープンラボ用機器認証による接続(IP アドレス固定,グローバル IP アドレスも利用可) で登録した機器に割り当てられた IP アドレスを別の機器で利用する場合は, 以下の内容を 情報基盤センター オープンラボ担当(support@cc.uec.ac.jp) 宛に 件名を「オープンラボ:機器登録 変更 申請」として お送りください.
Warning
固定で割り当てられた IP アドレスを申請と異なる機器で利用している場合,予告なく通信を遮断することがあります. あらかじめご了承ください.
【オープンラボの利用代表者】
氏名:
UEC アカウント:
電話(内線可):
所属(研究室名等):

【登録を変更する機器の情報(複数の場合はコピー記入)】
オープンラボ(建屋,部屋):
現機器 MAC アドレス:
新機器 MAC アドレス:
新機器 OS:
新機器 機種(メーカ,型番等):
新機器 使用目的:
Device registration cancellation
オープンラボ用機器認証による接続(IP アドレス固定,グローバル IP アドレスも利用可) で登録した機器が不要になった場合は, 以下の内容を 情報基盤センター オープンラボ担当(support@cc.uec.ac.jp) 宛に 件名を「オープンラボ:機器登録 解除 申請」として お送りください.
【オープンラボの利用代表者】
氏名:
UEC アカウント:
電話(内線可):
所属(研究室名等):

【登録を解除する機器の情報(複数の場合はコピー記入)】
MAC アドレス:
オープンラボ(建屋,部屋):
登録解除日:
※ 登録解除日以降は,機器を接続できなくなります.
Wireless LAN usage in open lab
オープンラボで利用されている各部屋(東 3 号館を除く)では, 学内無線 LAN サービス UEC Wireless が利用できます. 学外の利用者向けに,UEC Guest Wireless および eduroam も利用できます. ノート PC やモバイル機器の接続や,一時的なネットワークへの接続には UEC Wireless の利用をお勧めします.