Automatic detection by WPAD (some supported OS only)
Specify a domain that includes uec.ac.jp as the DNS suffix using DHCP or manually.
The following campus networks can be accessed without going through a proxy server. However, access to some networks may be restricted by the administrator.
UEC global network:
130.153.0.0/16
192.50.30.0/23
Proxy excluded addresses:
130.153.0.0/16
172.21.0.0/16
192.168.0.0/16
Generally, there are the following methods for proxy settings.
automatic detection
Detects proxy settings and configures them automatically. It only works if your network has proxy information distributed by a DHCP server.
automatic configuration script
Configure the proxy using the automatic configuration script (PAC, Proxy Auto-Config) provided by the Information Technology Center.It functions in an environment that can connect to the Information Technology Center’s web server.
Manual configuration
Set the proxy server manually. Compared to the other methods above, this method requires more settings, but it works stably in many environments.Please try this method even if the above automatic detection or automatic configuration script methods do not work.
Note
It may be possible to configure multiple of these settings at the same time, but please note that depending on some OS or applications, the priority of the settings may be different or some settings may not function effectively.
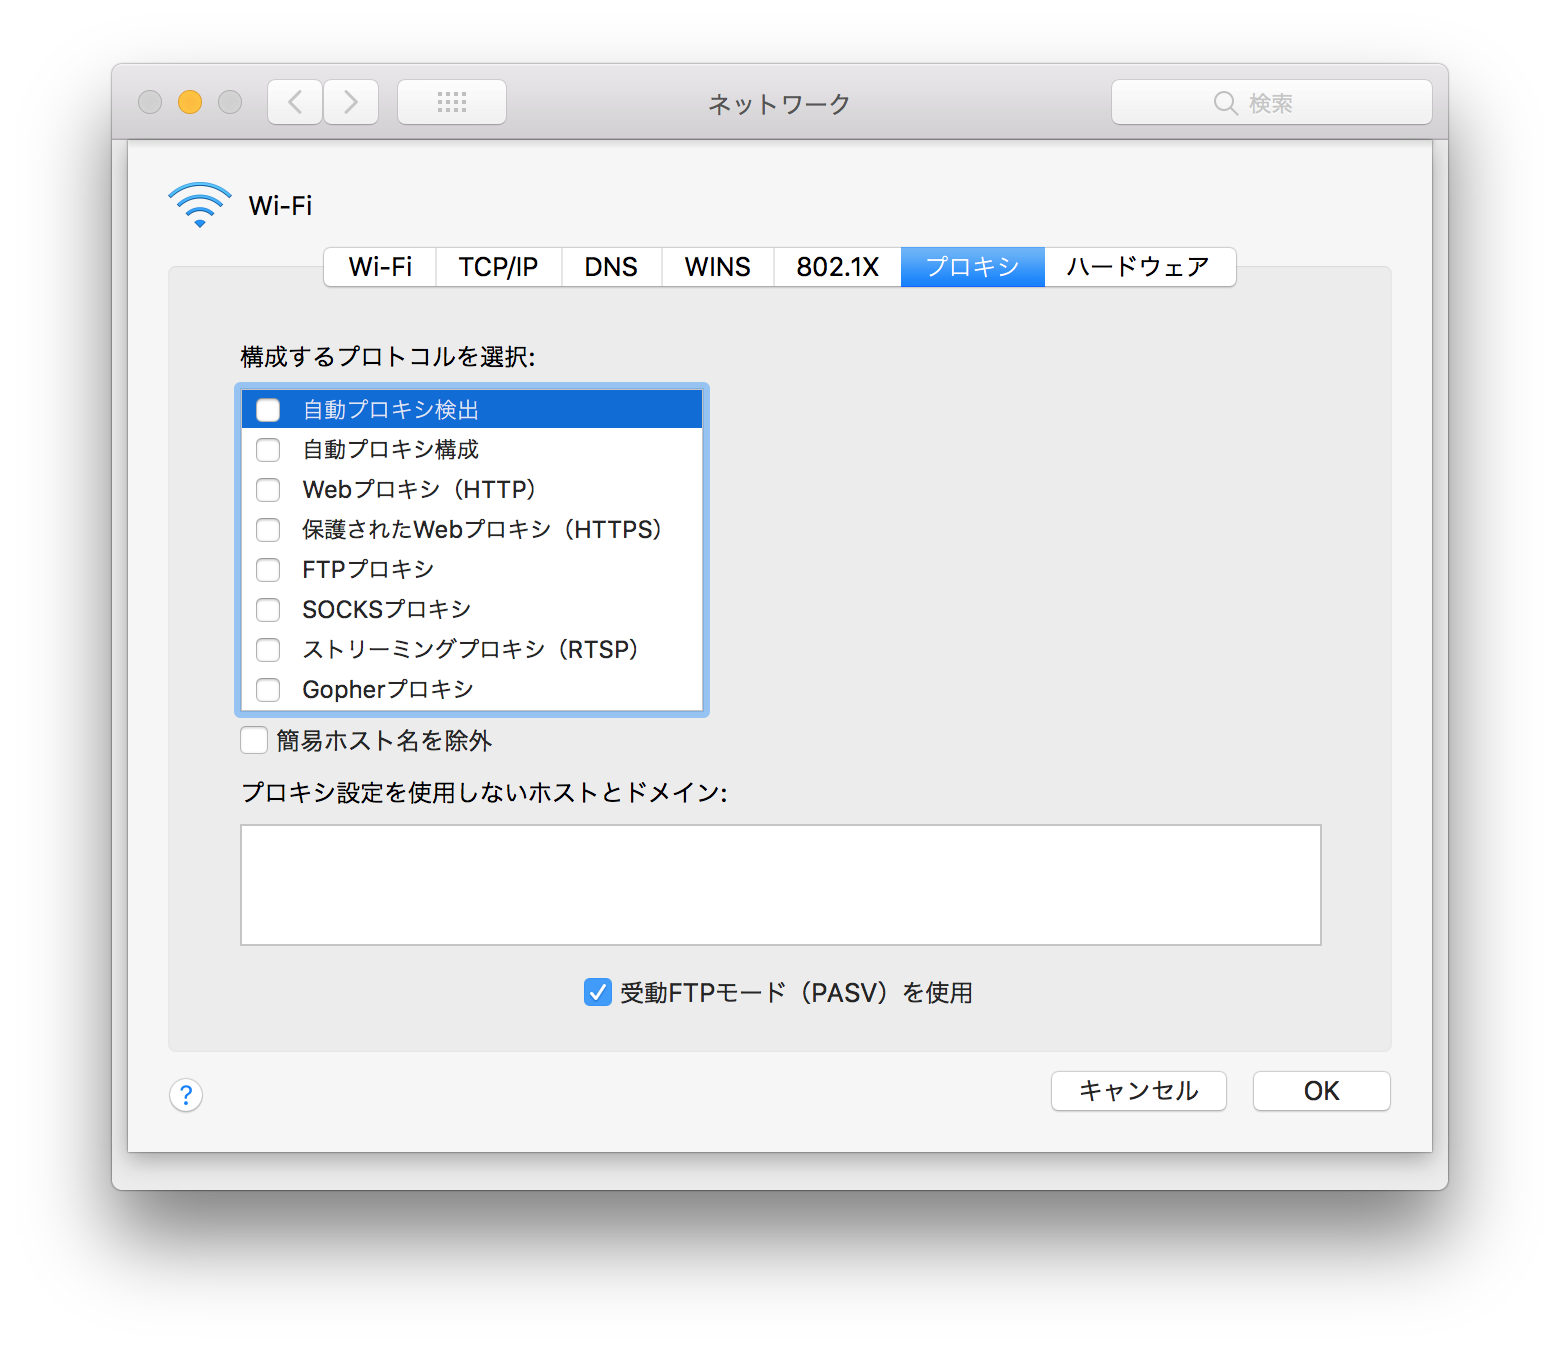
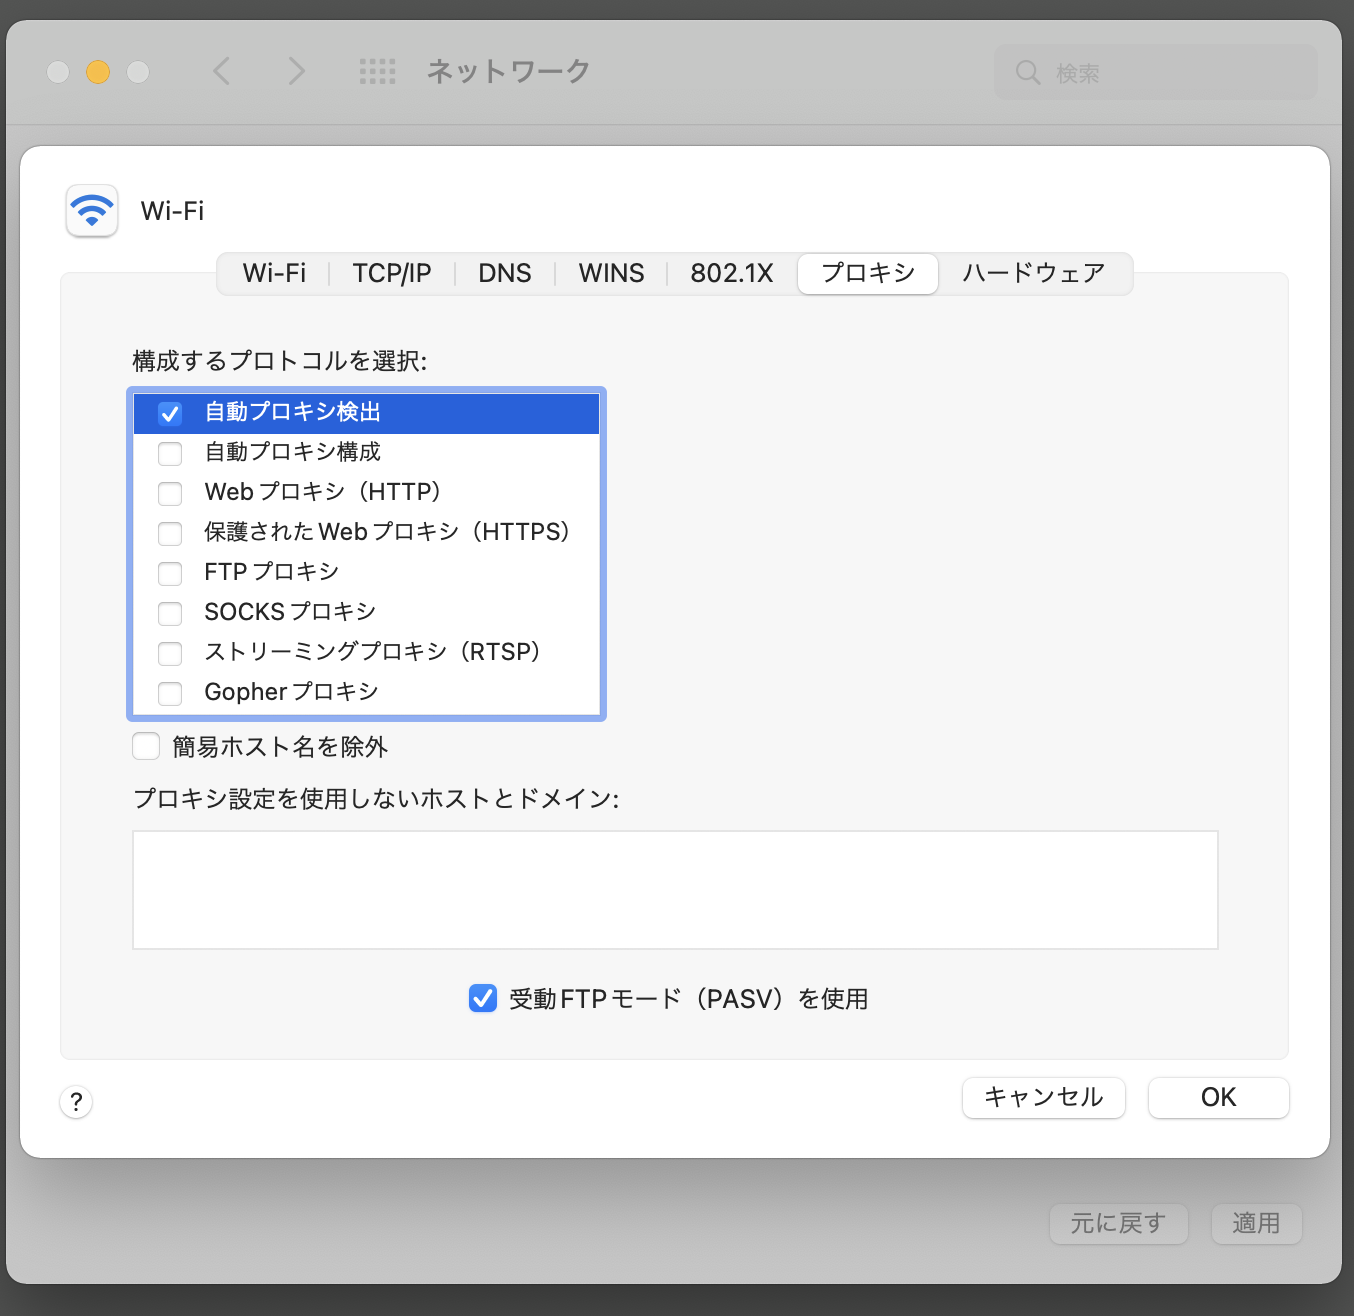
On the proxy settings screen, turn on Automatically detect settings. The settings are now complete.
Warning
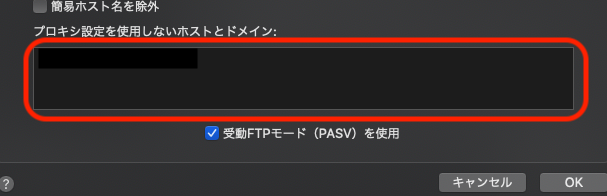
You can access the on-campus site without going through a proxy server. You can access the campus site without going through a proxy server. If necessary, please refer to here to configure exception settings for the proxy server in the red frame below.
Enter http://proxy.uec.ac.jp/ in Script address according to the contents of Automatic setting PAC in Basic information. Then press the Save button immediately there.
Warning
You can access the on-campus site without going through a proxy server. You can access the campus site without going through a proxy server. If necessary, please refer to here to configure exception settings for the proxy server in the red frame below.
On the proxy settings screen, turn Automatically detect settings to Off and turn Use a proxy server below to On.
According to Basic information, enter proxy.uec.ac.jp in Address, 8080 in Port, and: Click the guilabel:Save button.
Warning
You can access the on-campus site without going through a proxy server. You can access the campus site without going through a proxy server. If necessary, please refer to here to configure exception settings for the proxy server in the red frame below.
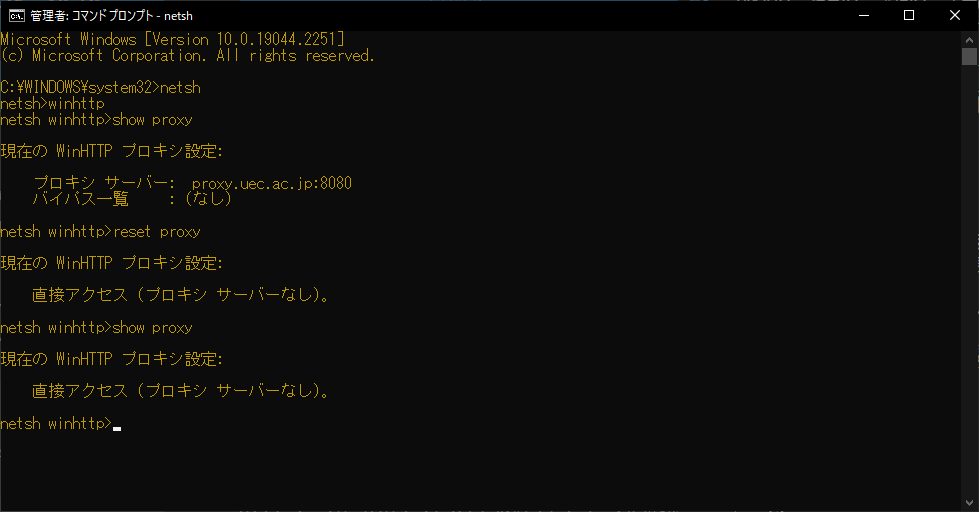
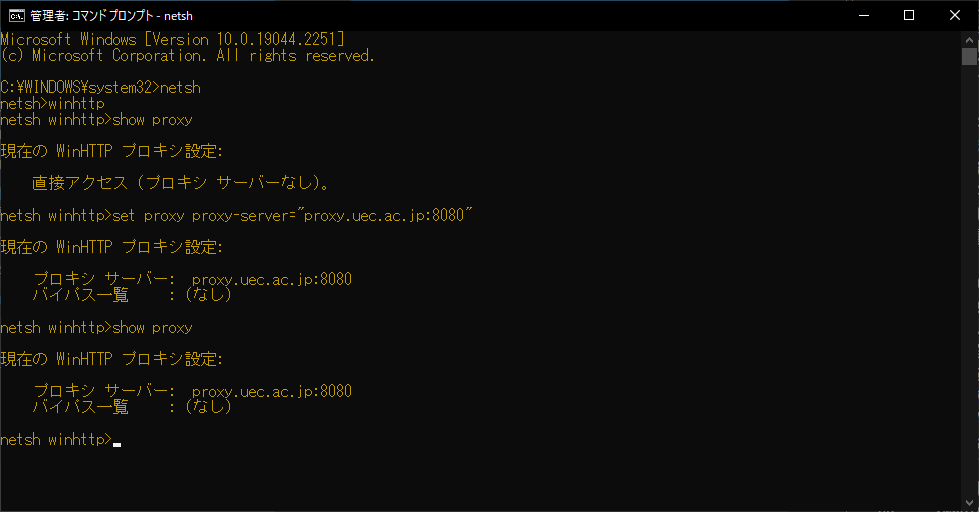
Some of the communication functions of Windows, such as Windows Update, depend on WinHTTP. When using a proxy with Windows Update, separate WinHTTP settings are required. Below, we will explain the procedure for setting up a WinHTTP proxy.
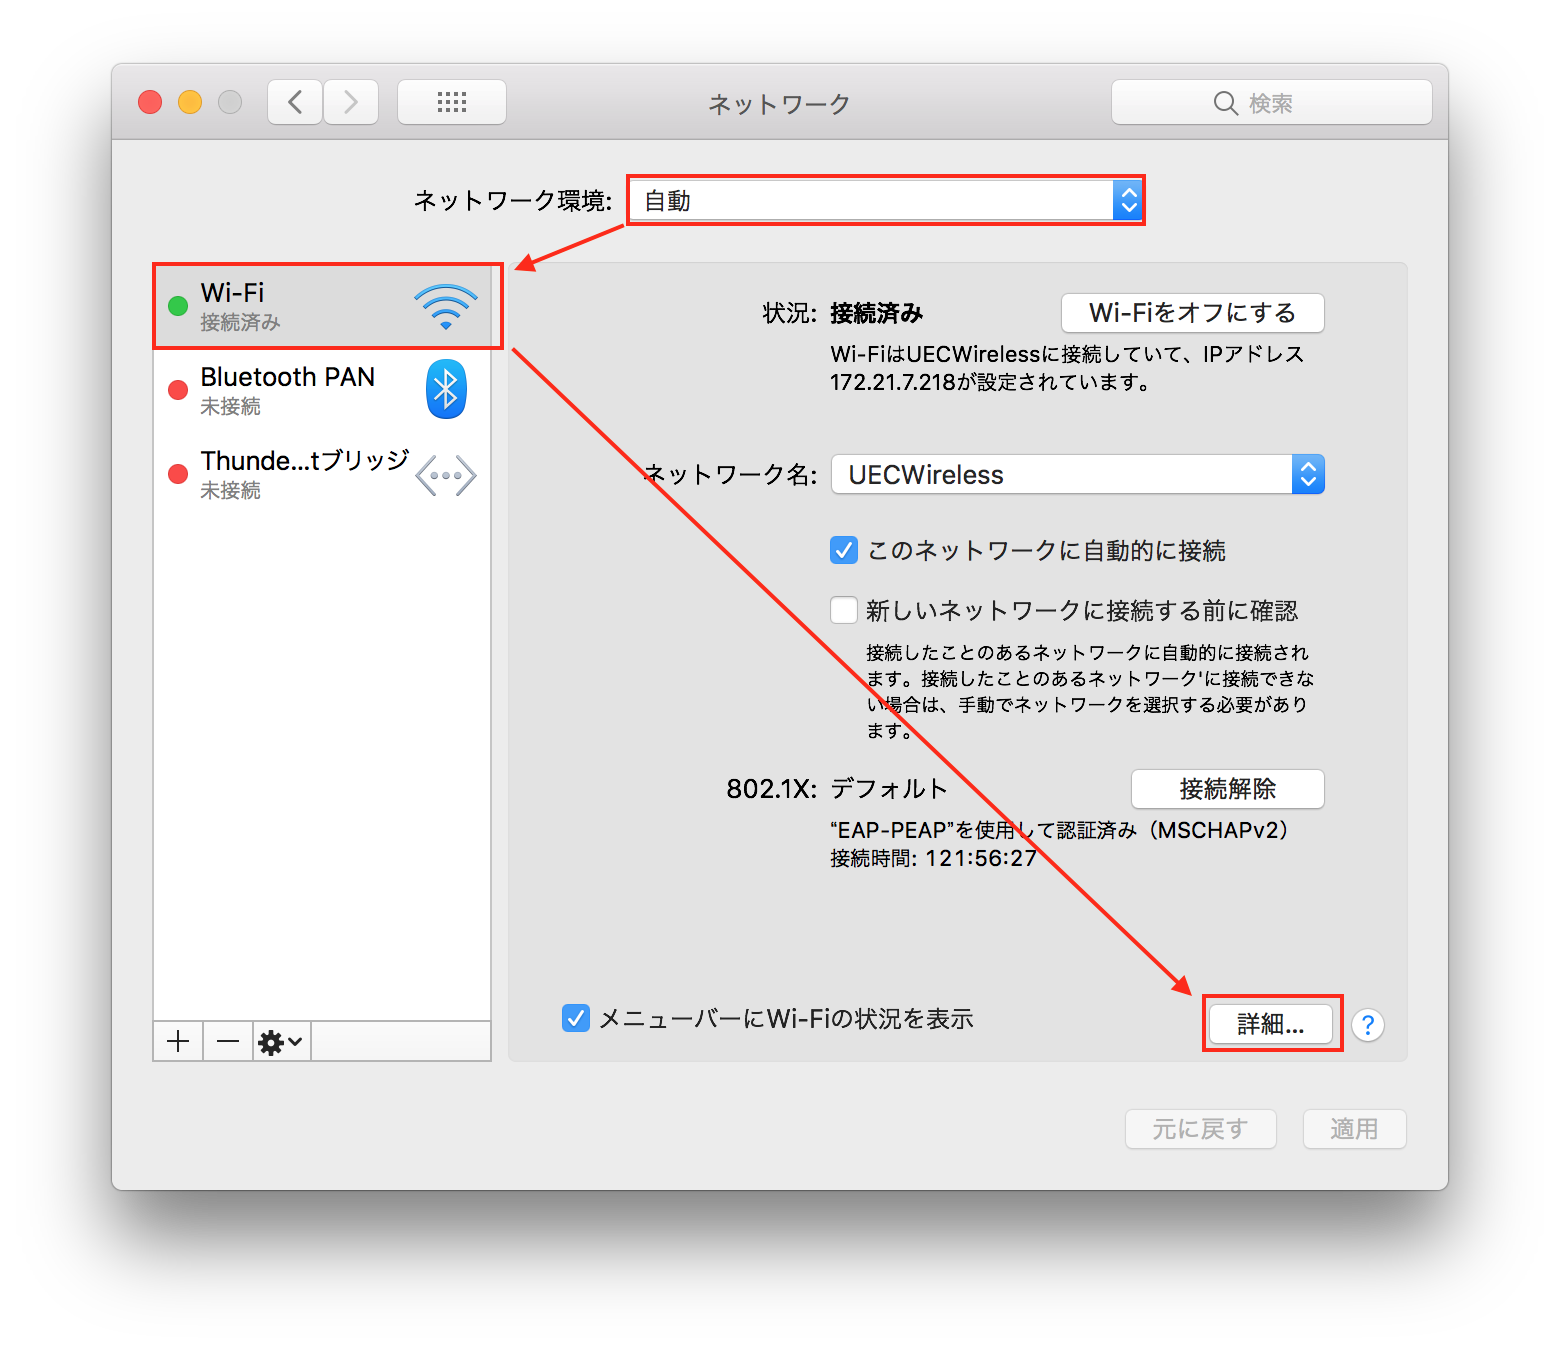
Click on the Apple menu () \(\Rightarrow\)Network Environment\(\Rightarrow\)Network Environment Settings to display the Network settings window.
According to your network environment Select Network configuration and then select a network interface such as Wi-Fi. Next, press the Details button to display the proxy settings screen.
The setting example and display will differ depending on your network. Please select the network configuration and network interface according to your current network.
(If the proxy settings screen is not open) Follow How to open the settings screen to open the Firefox proxy settings screen.
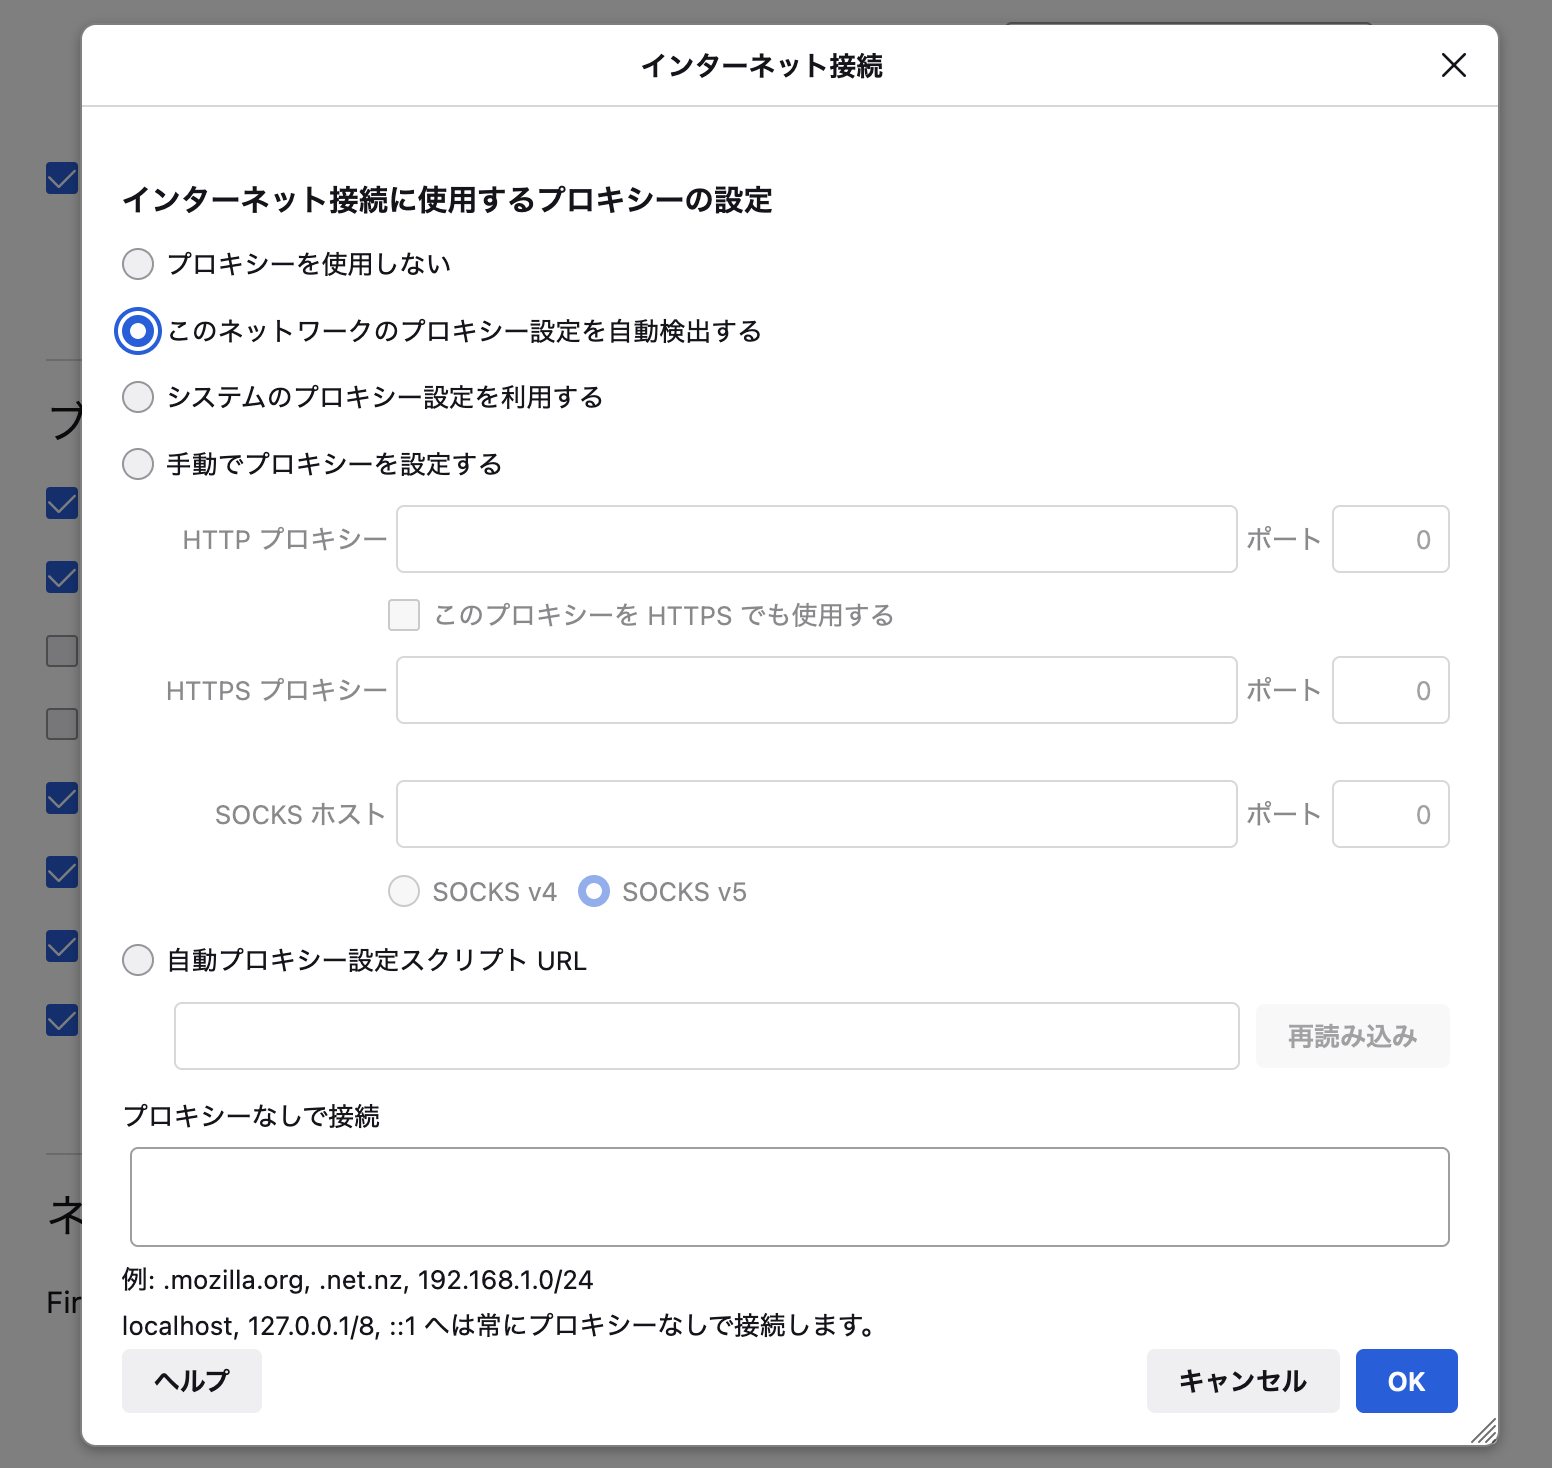
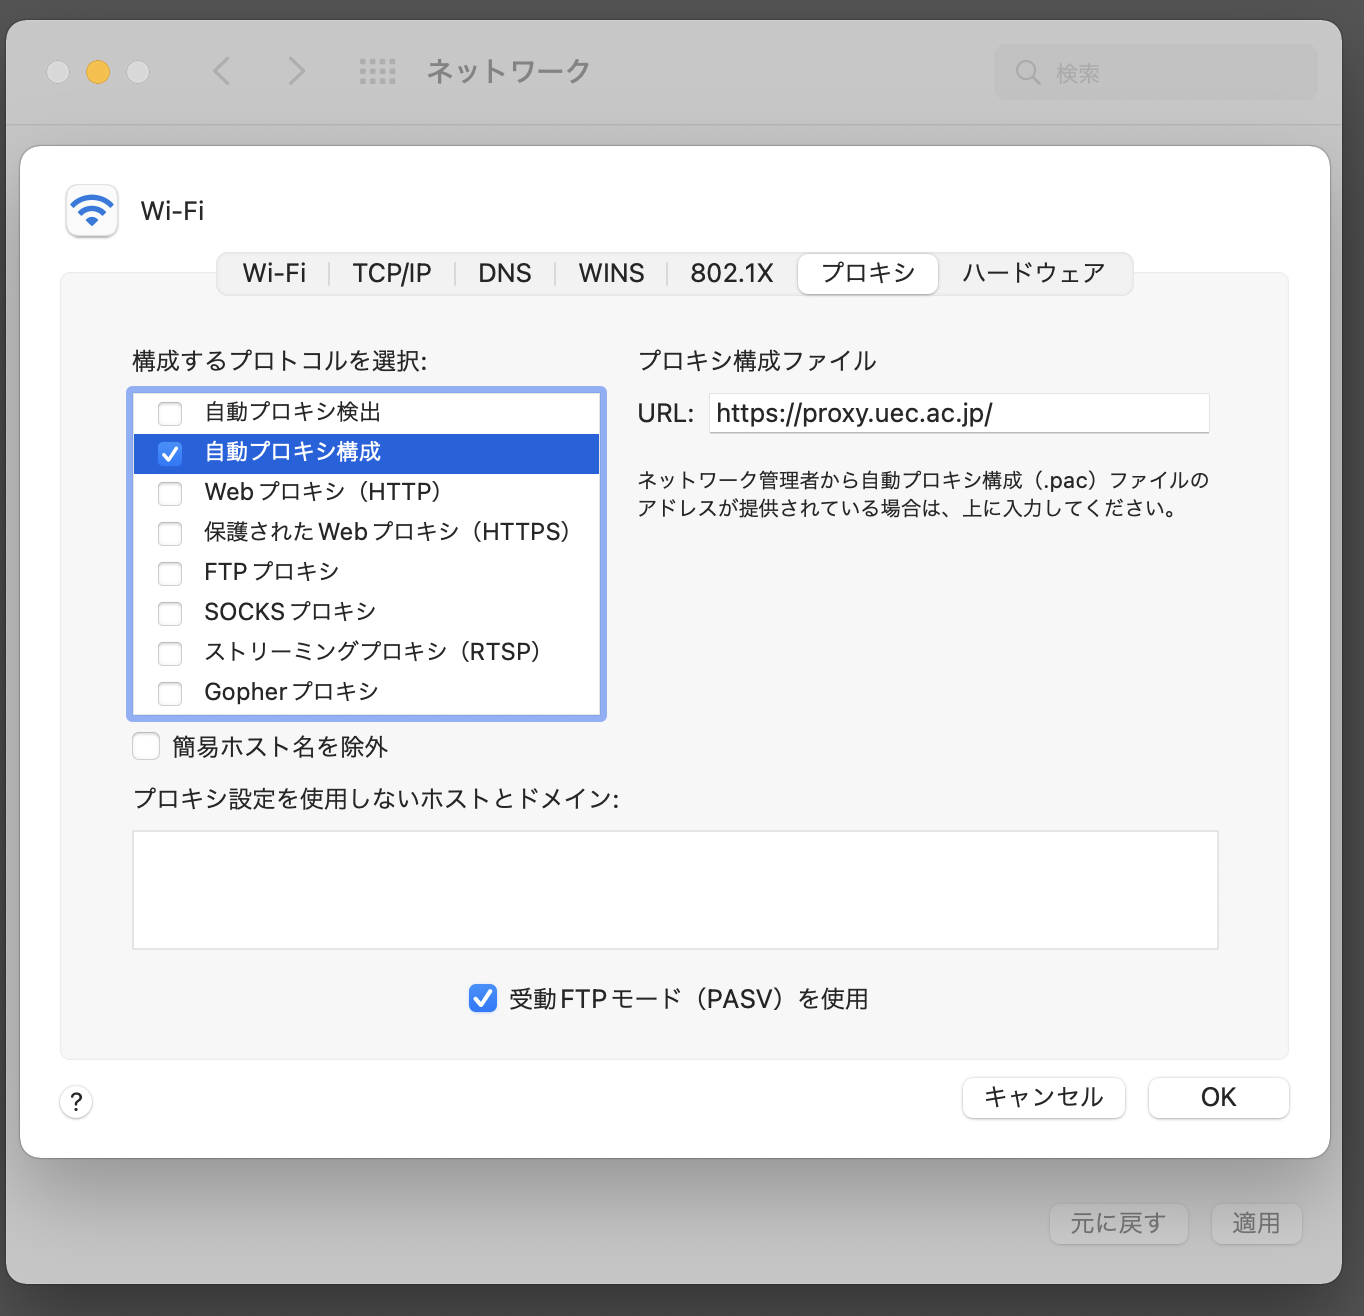
Select 自動プロキシ構成 (Automatic proxy configuration) on the proxy settings screen, enter http://proxy.uec.ac.jp/ in プロキシ構成ファイル (the proxy configuration file) input field according to the basic information, and press the OK button.
Warning
You can access campus sites without going through a proxy server. If necessary, refer to here and perform exception settings for the proxy server.
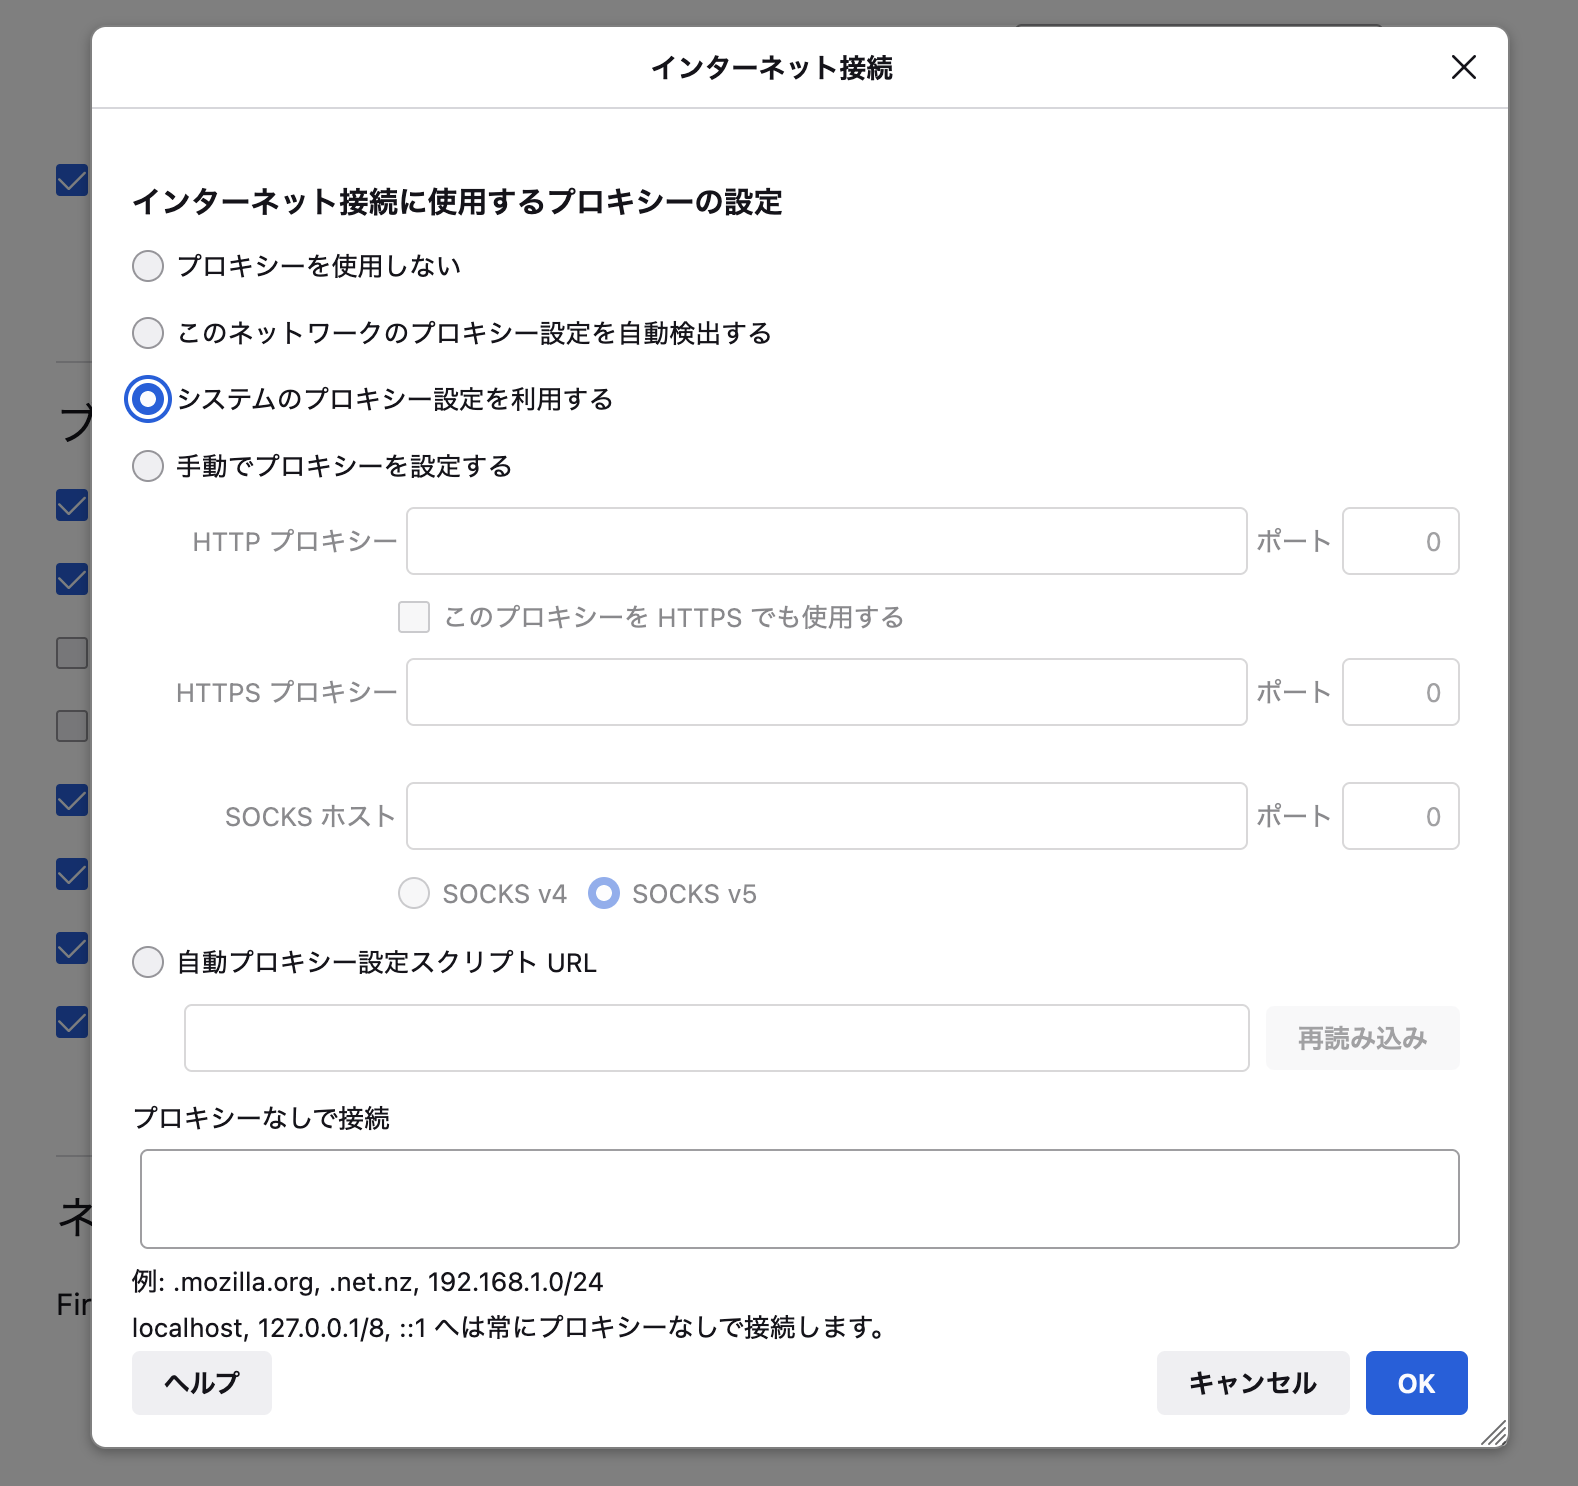
(If the proxy settings screen is not open) Follow How to open the settings screen to open the Firefox proxy settings screen.
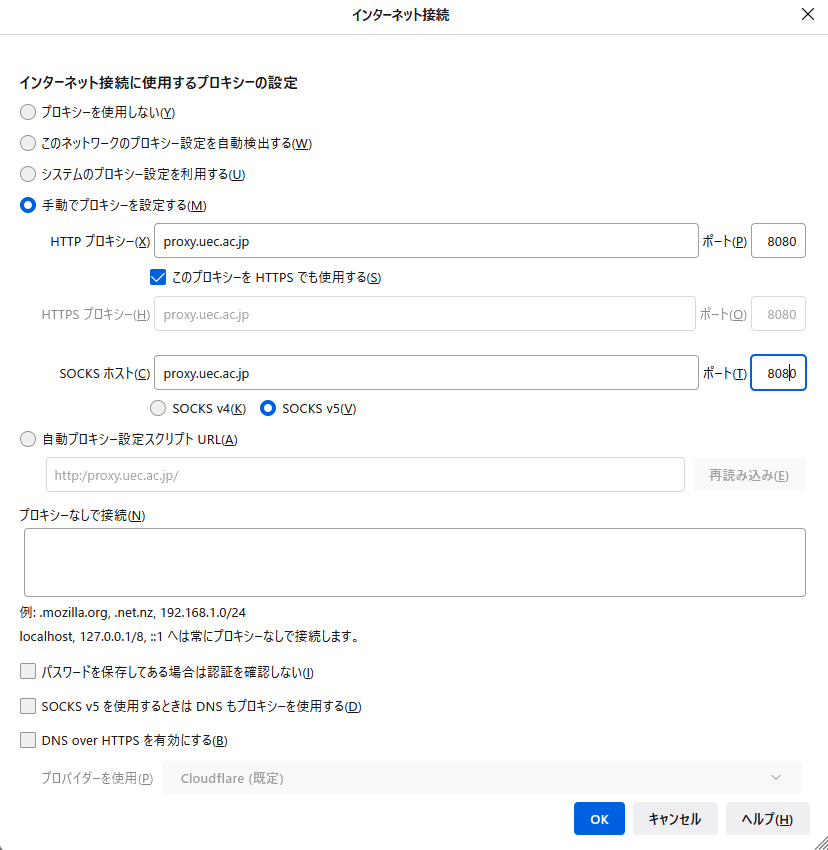
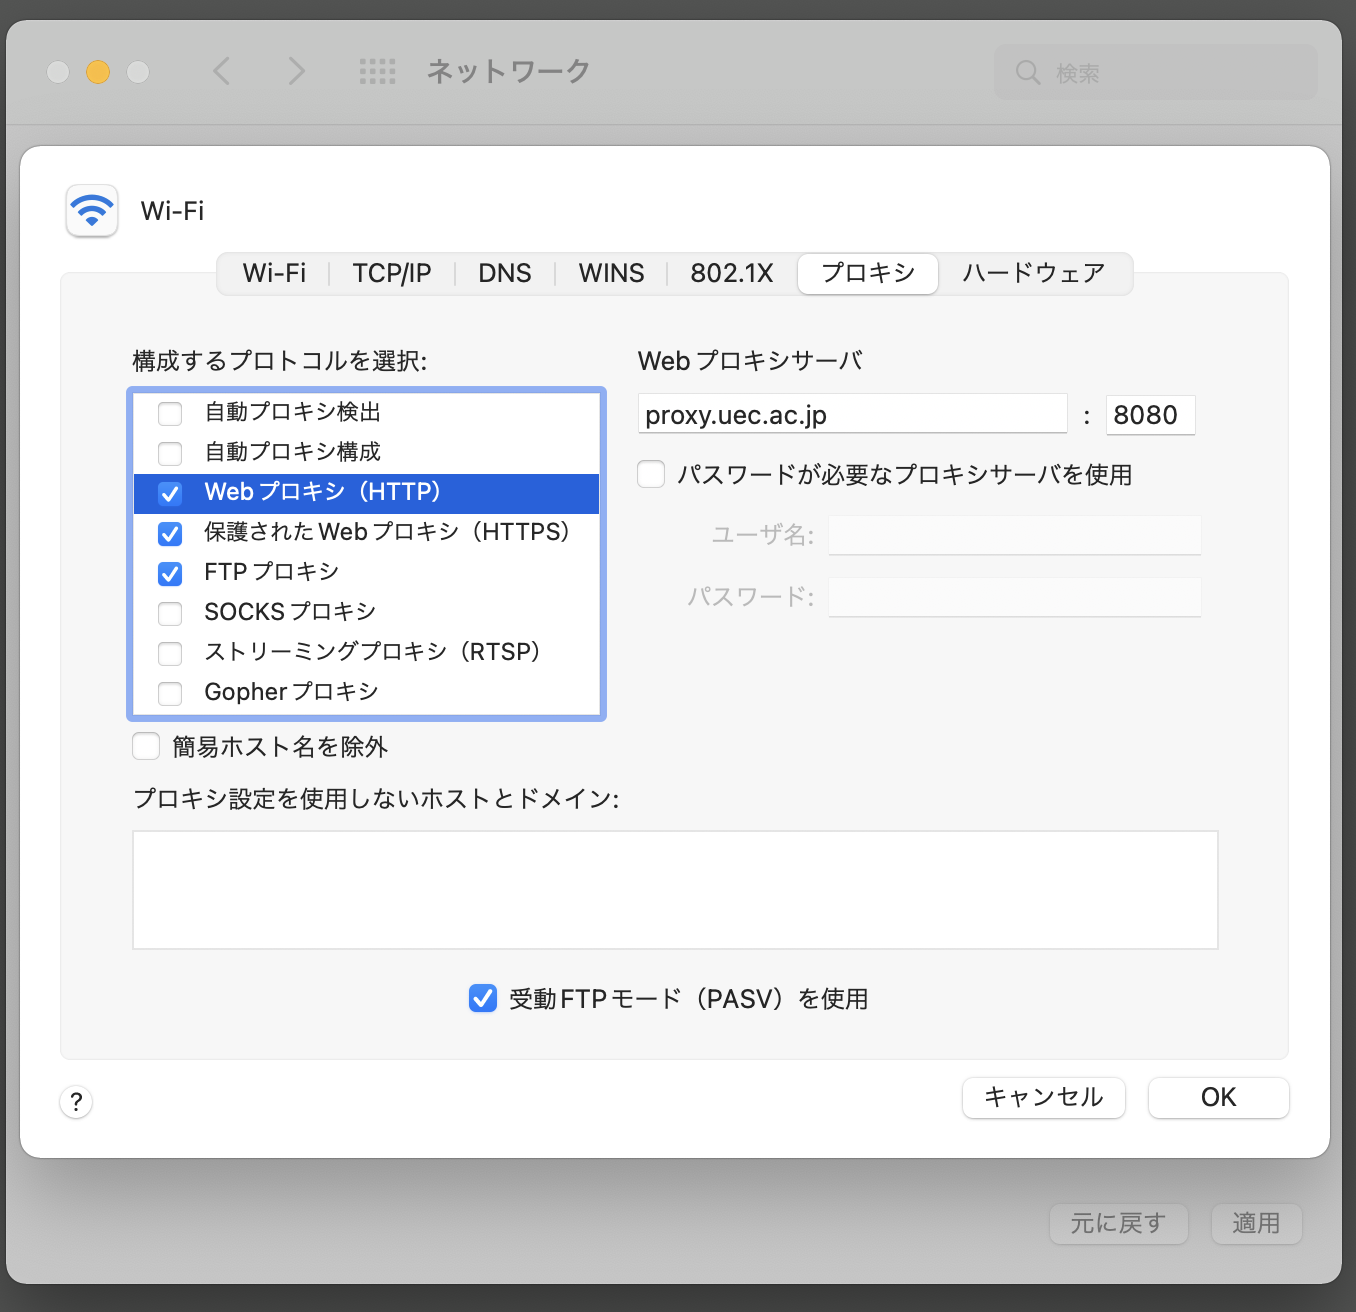
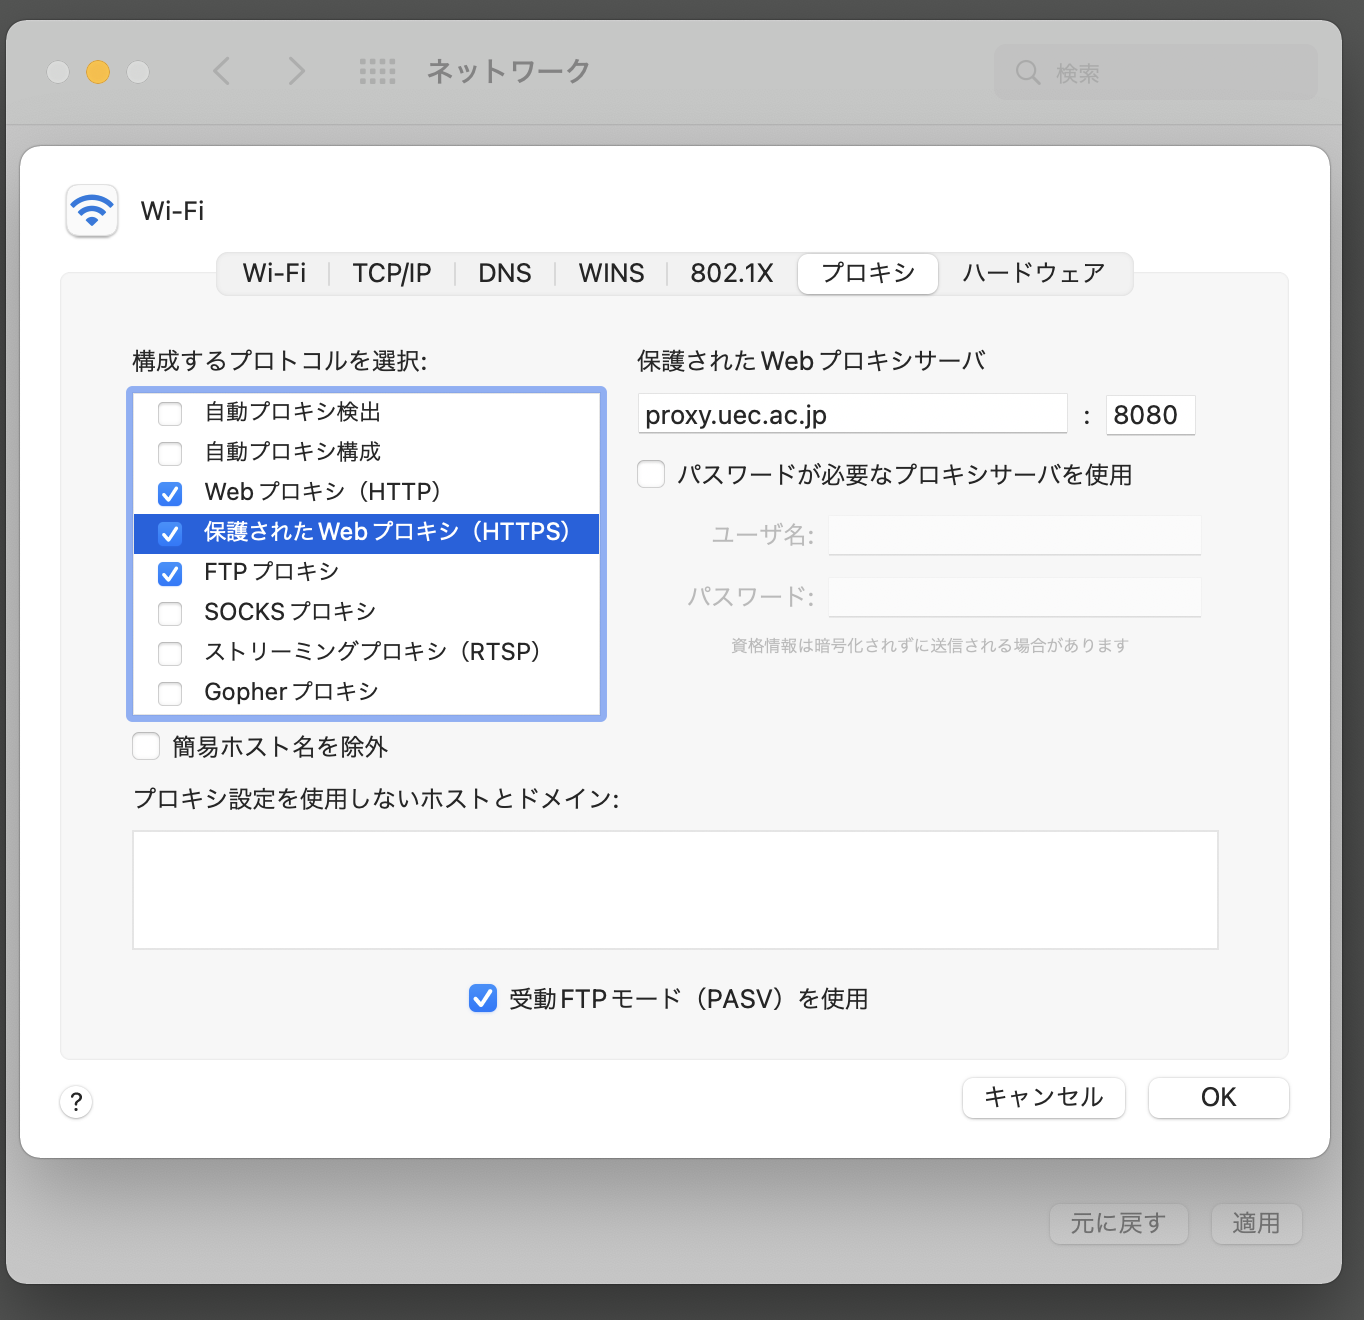
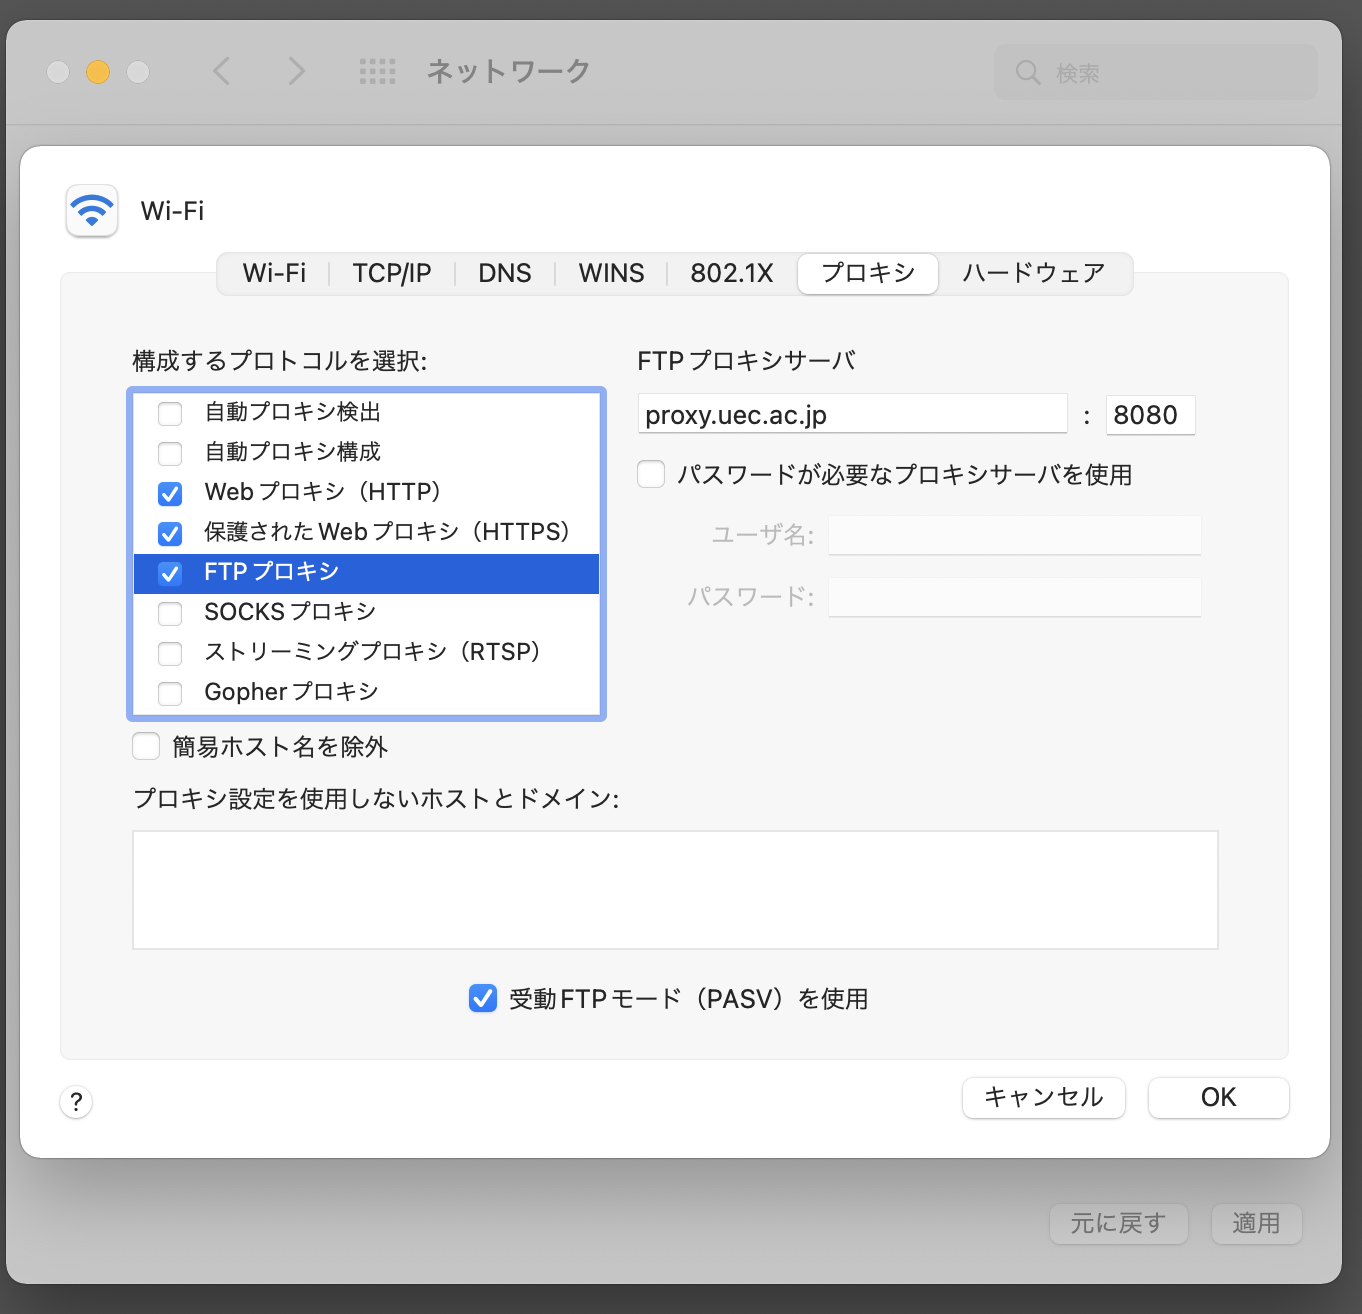
In the proxy screen settings, check all of the following, and according to the basic information, enter proxy.uec.ac.jp in the server and 8080 in the input field to the right of it. Finally, press the OK button.
(If the proxy settings screen is not open) Follow How to open the settings screen to open the Firefox proxy settings screen.
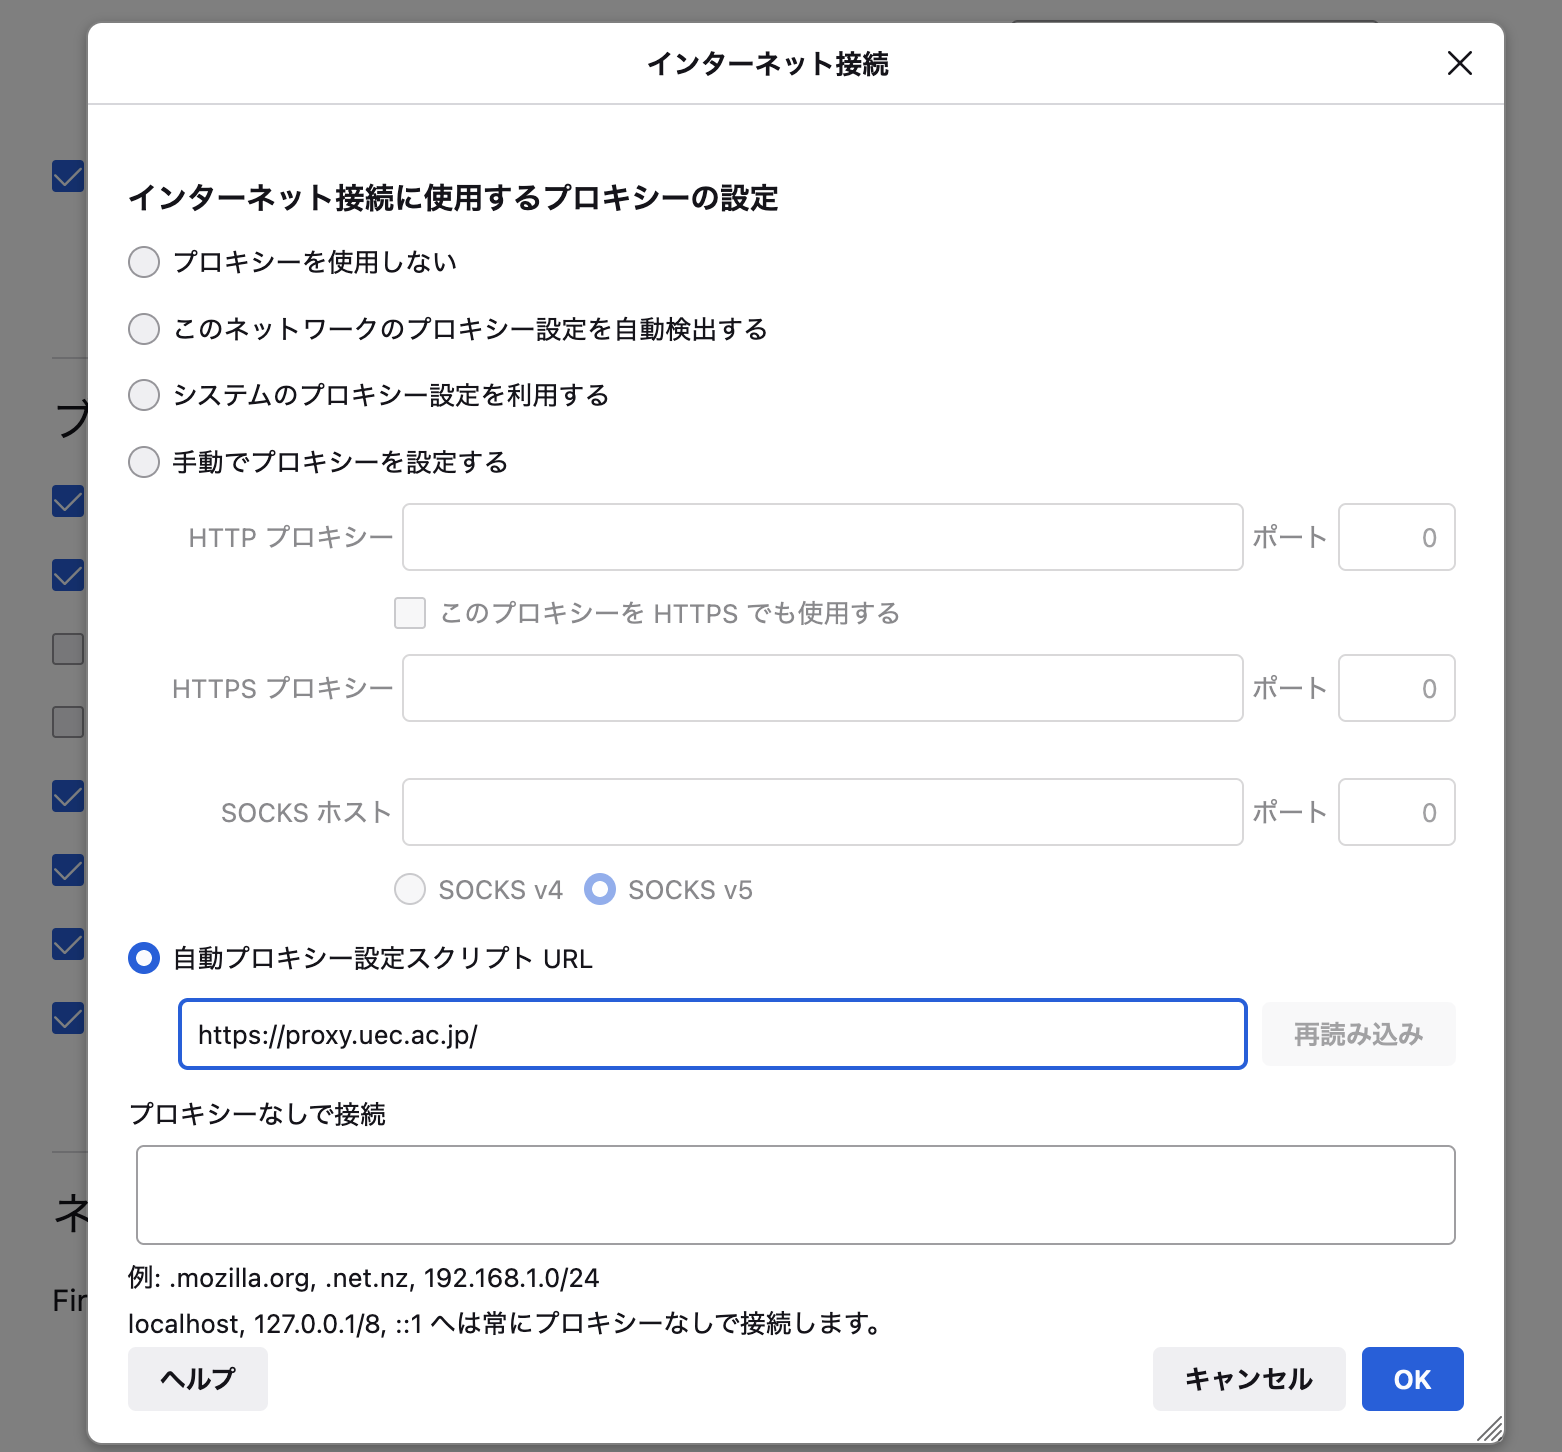
Select 自動プロキシ設定スクリプト (Automatic proxy setting script) on the proxy setting screen, enter http://proxy.uec.ac.jp/ in the input field directly below according to the basic information, and press the OK button.
(If the proxy settings screen is not open) Follow How to open the settings screen to open the Firefox proxy settings screen.
Select Manually configure proxy on the proxy settings screen, enter proxy.uec.ac.jp for address and 8080 for port according to the basic information in the input field directly below, and press the OK button.
Warning
You can access on-campus sites without going through a proxy server. If necessary, please set exceptions for the proxy server in the プロキシなしで接続 (Connect without proxy) section, referring to here.
On UNIX systems such as Linux and macOS, proxy settings can be applied to commands executed on the terminal by setting them as environment variables in shell configuration files.
If you need to communicate outside the university, such as installing or updating software using commands on a terminal, or using a web interface, please try this procedure.
The setting method differs depending on the type of shell you are using. You can check your shell by running the following command in the terminal.
There are multiple configuration files for the shell, and you can choose which one to use depending on when you want to enable the settings and what you want to apply the settings to. This procedure is just an example. For details, please refer to the manual of each shell.
 ) \(\Rightarrow\) Network Environment \(\Rightarrow\) Network Environment Settings to display the Network settings window.
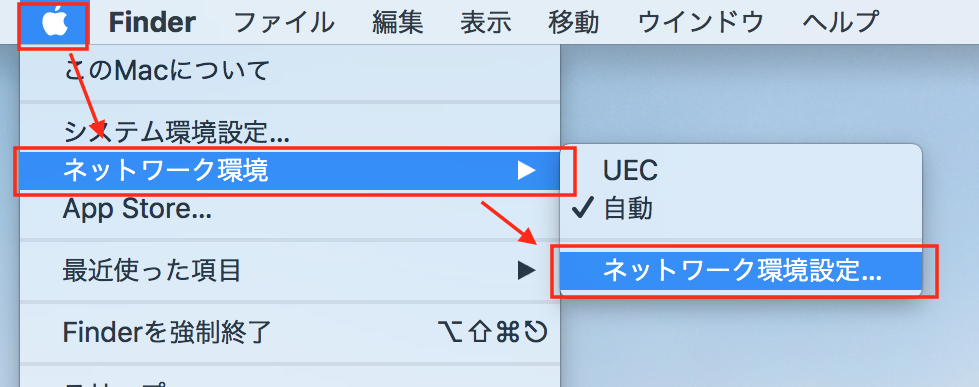
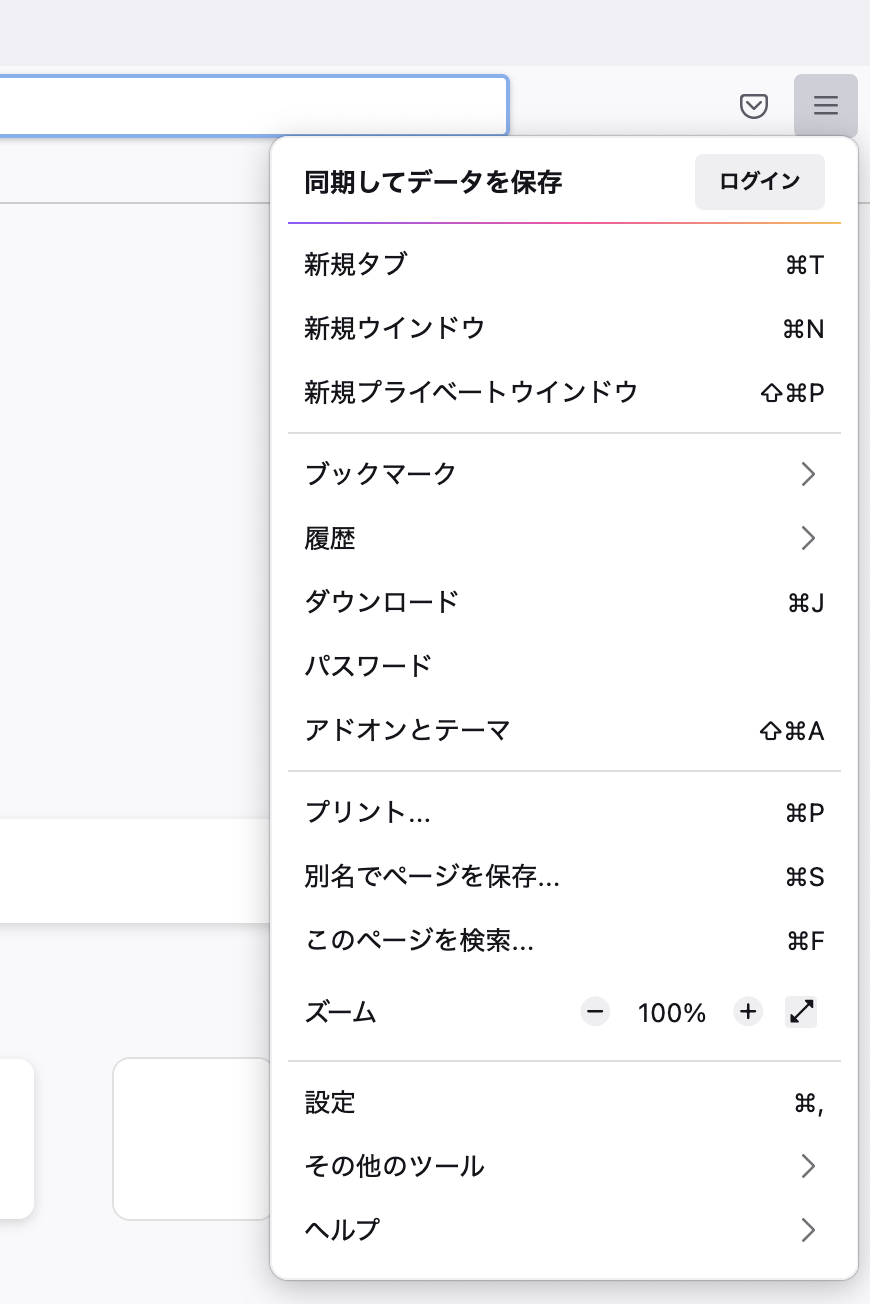
 ) in the upper right corner of the Firefox screen, then click オプション (Options) (or 設定 (Settings)) to open the settings screen.