Windows 11 (24H2)
Follow the steps below to set it up.
VPN Connection Check
Click the Start button (
 ) and click the Settings (
  ) button.
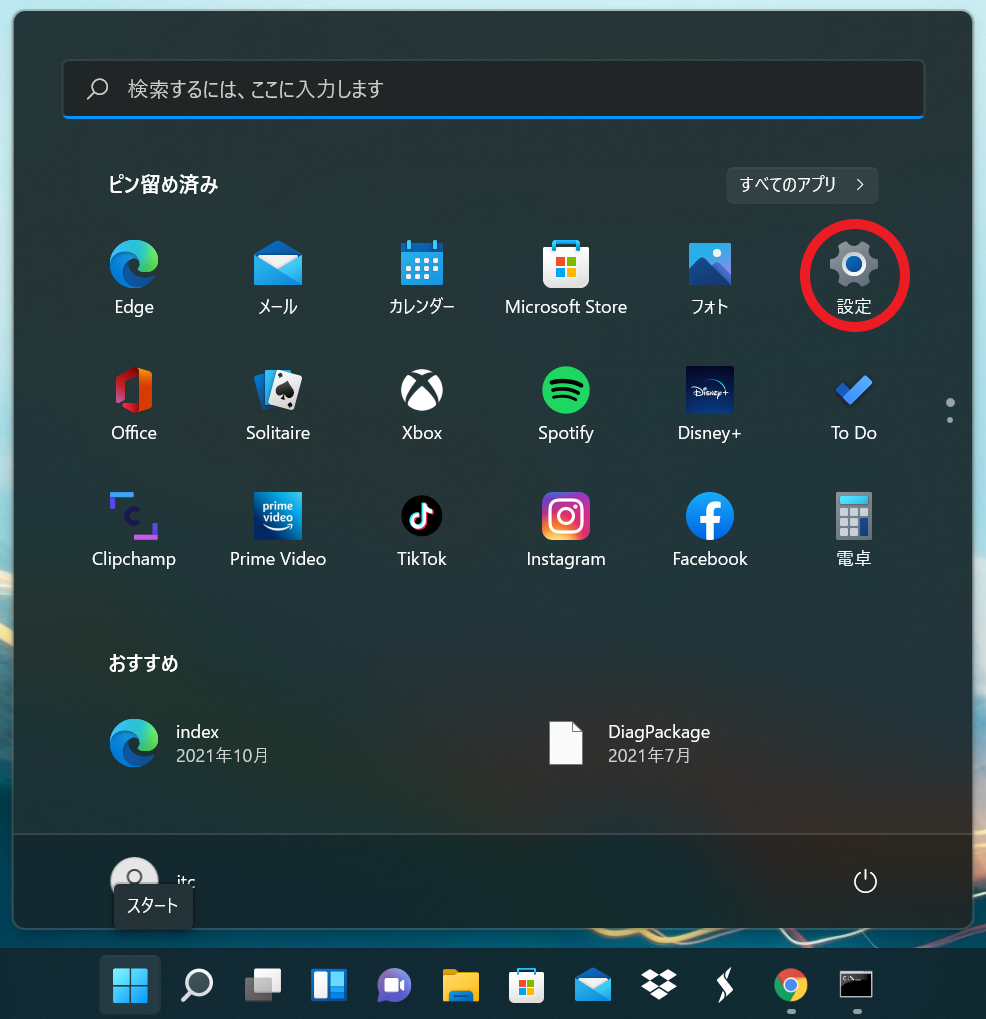
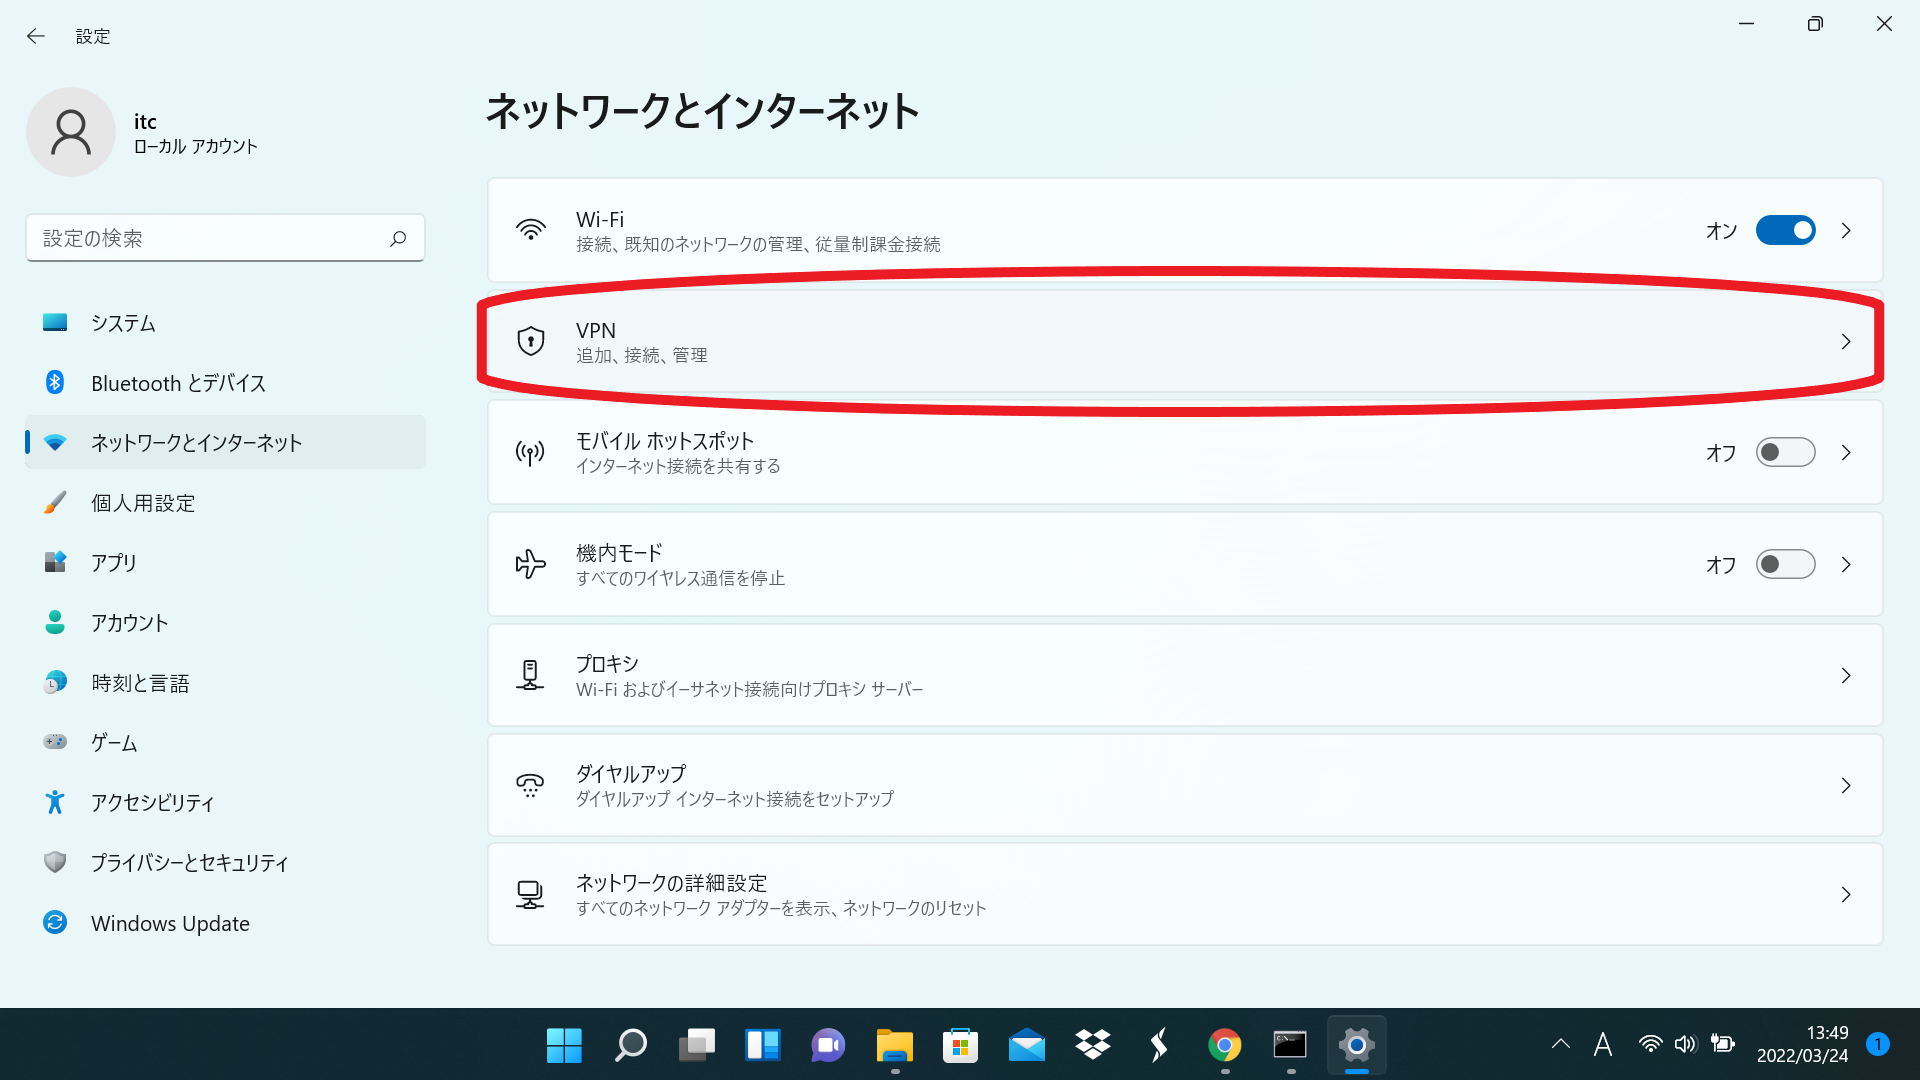
Click Network and Internet \(\Rightarrow\) VPN \(\Rightarrow\) Add a VPN connection.
\(\Downarrow\)

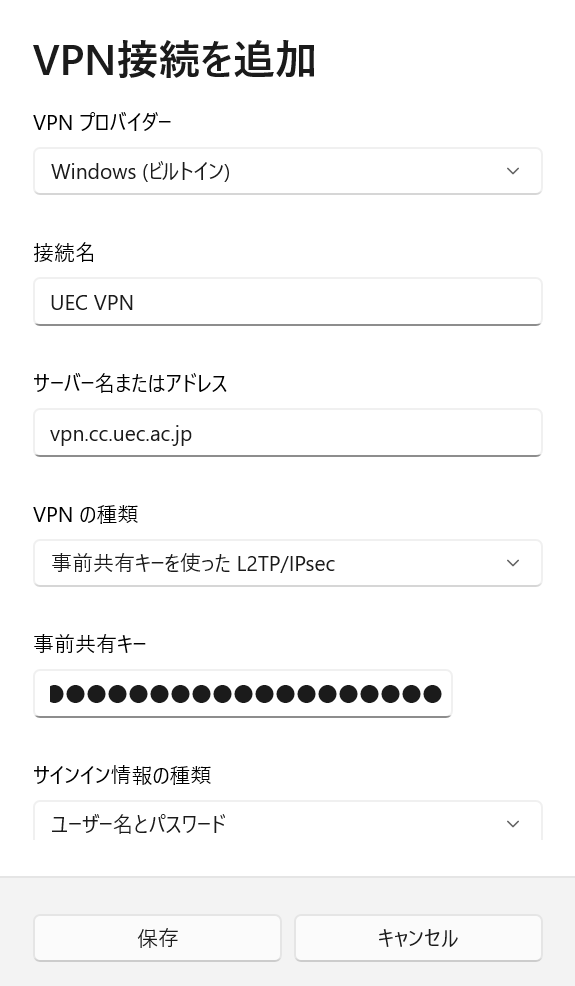
- Add VPN screen, enter the following information and press the Save button.
Next, proceed to VPN connection check.
VPN provider
Windows (built-in)
Connection name
Any name (
UECin the example)Server name or address
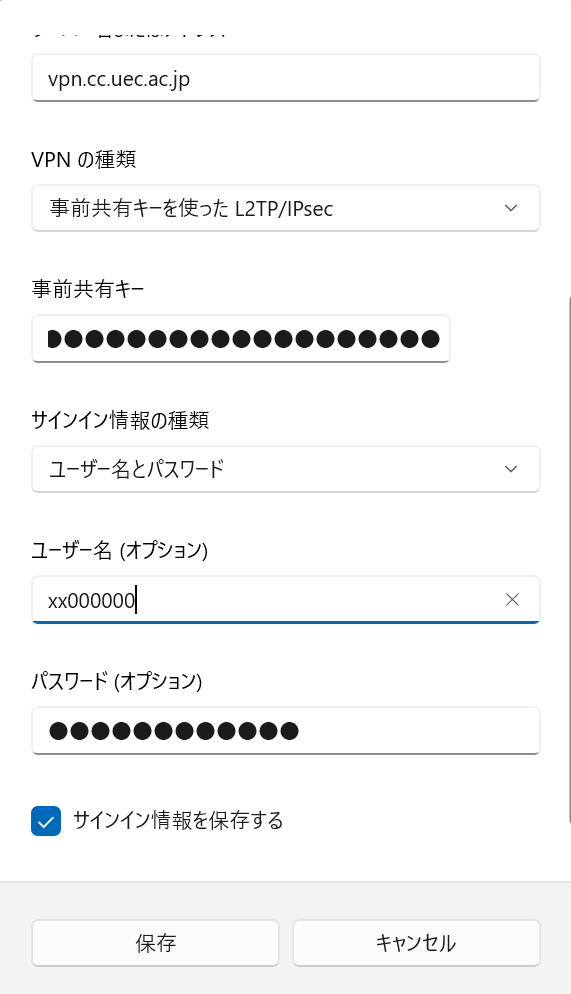
vpn.cc.uec.ac.jpVPN type
L2TP/IPsec with pre-shared key
Pre-shared key
Pre-shared key of VPN pre-shared key distribution page
Configure sign-in information
Username and password
Username (optional)
UEC account name
Password (optional)
UEC account’s password
Remember my sign-in information
check
Warning
The pre-shared key is updated around October every year. Please note that specific update dates will be announced via campus email and the Information Technology Center webpage .