The “Virtual Machine Rental Service” has stopped accepting new applications due to aging equipment. If you are currently using the service, please migrate to the University-wide Virtualization Infrastructure (HCI) service as soon as possible.
This is a service for renting out virtual machines. The use is limited to research and educational purposes. The performance and operation of virtual machines is best-effort.
The purpose of use is to support research and research education.
Operation is on a best-effort basis. Please refrain from using the system for mission-critical applications.
The allocation of computing resources to the virtual machine is as follows.
CPU: Up to 1 core, both 32 bit and 64 bit are available.
RAM: Up to 2GB
Storage: up to 150GB
If you wish to use more than one, please contact us.
Please refrain from performing high-load operations such as scientific and technical calculations or dumping the entire storage.
Applications for use of the library should be submitted by full-time faculty and staff. If you wish to use the library for club activities, the advisor of the club should apply.
Be sure to run VMware tools on the virtual machine. Virtual machines that are not running VMware Tools will be stopped or deleted without notice.
Be sure to take the following measures for security. If the security measures are not sufficient, the virtual machine will be stopped or deleted without notice.
Update your OS and applications regularly.
Install a reliable security product for your operating system (especially Windows), and update it periodically.
Unnecessary ports and services should be closed or stopped.
Please apply for the continuation of use in April every year. If there is no application for continued use in April, the virtual machine will be deleted.
We do not provide support for virtual machine servers and their clients, nor for the operating systems and software of virtual machines. Please prepare the OS and application software by yourself.
Due to disk space limitations, the snapshot function is not available.
Please send the following information to vmrental@cc.uec.ac.jp with the subject line “Application for Private Cloud Use”. We will send you the information you need to use the virtual machine by e-mail.
To apply for continued use of the private cloud, please send the following information to vmrental@cc.uec.ac.jpby the end of April each year with the subject line “Application for Continued Use of Private Cloud”.
Please send the following information to vmrental@cc.uec.ac.jp with the subject line “Application for termination of private cloud usage”.
氏名:
所属:
メールアドレス:
仮想マシン名:
利用IPアドレス:
仮想マシンサーバユーザー名:
Warning
After applying for termination, the virtual machine will be deleted completely. Please back up your data appropriately before submitting the termination request.
Prepare a Windows PC to access the virtual machine.
In order to access a virtual machine, dedicated client software (vSphere Client) is required.Please prepare a Windows PC to install the client software.**Microsoft .NET Framework** should be installed on your PC.
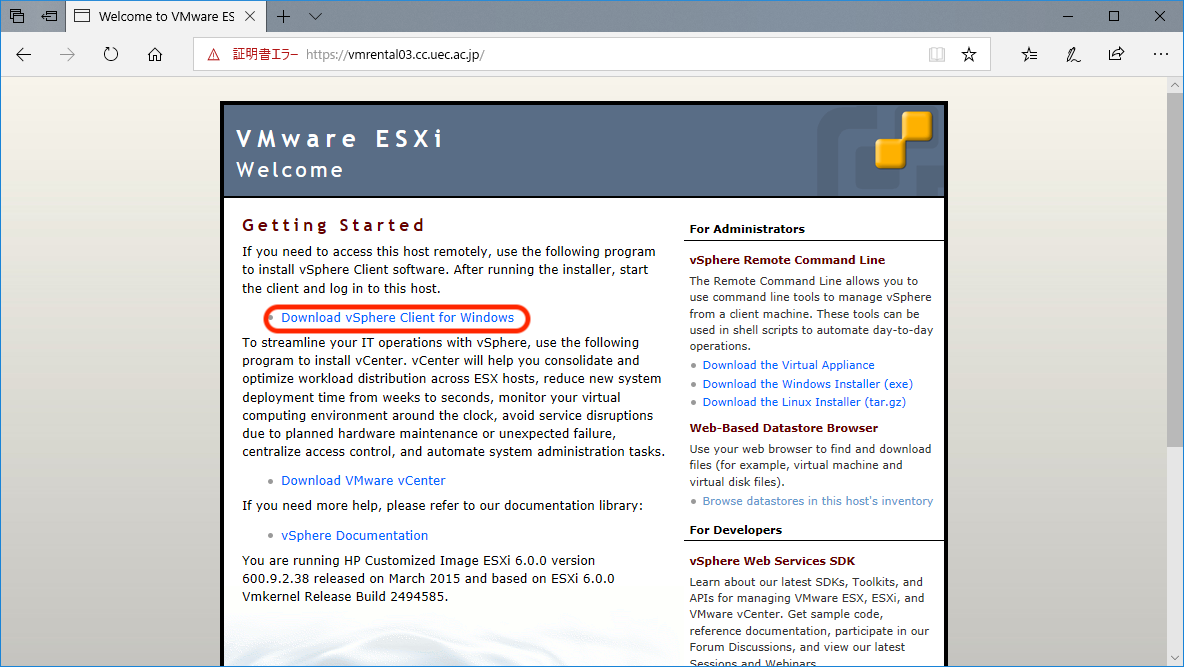
Access the client software vSphiere Client download page.
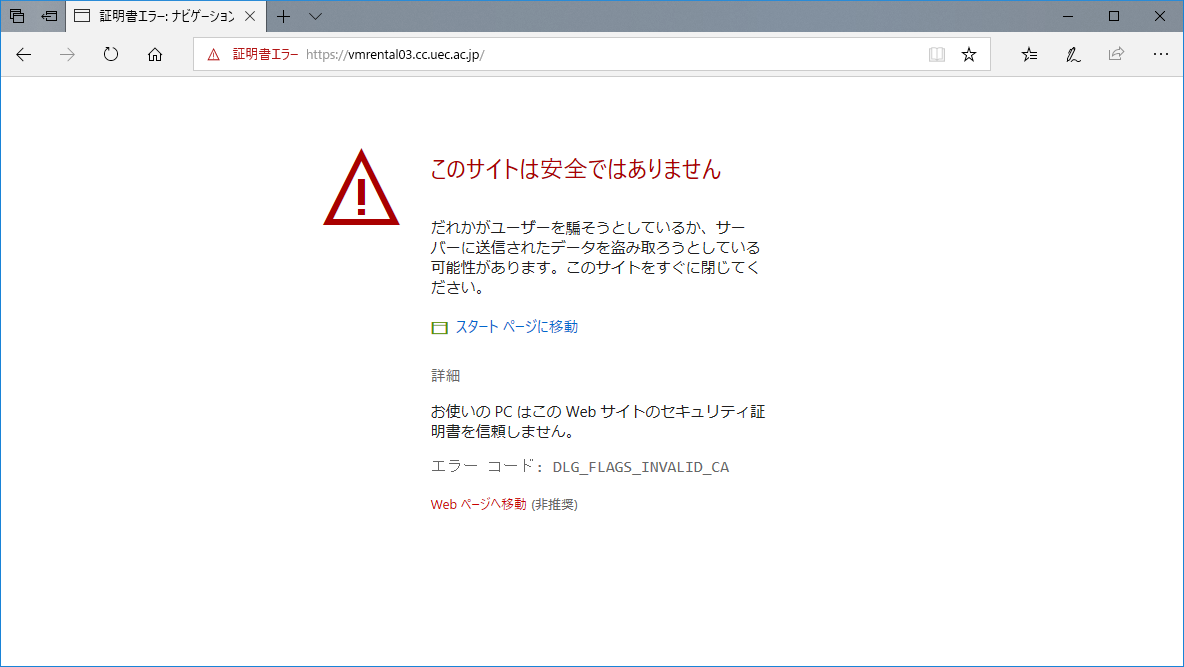
Please access http://仮想マシンサーバホスト名/ from your browser. The host name of the virtual machine server is written in the e-mail sent by the Information Technology Center at the time of application. You will get a message that there is a problem with the security certificate, but you can continue browsing.
Download the vSphiere Client.
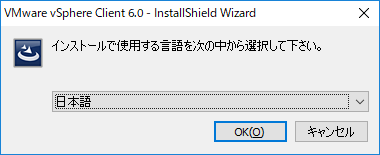
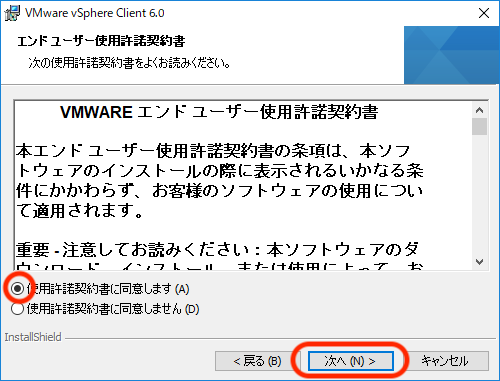
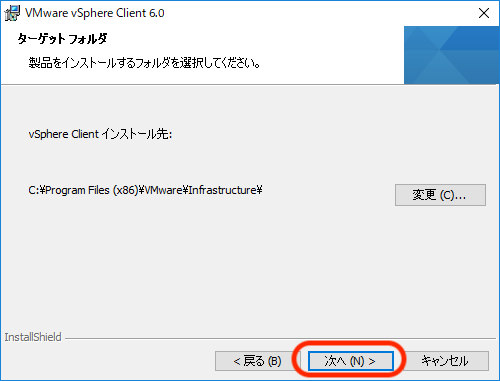
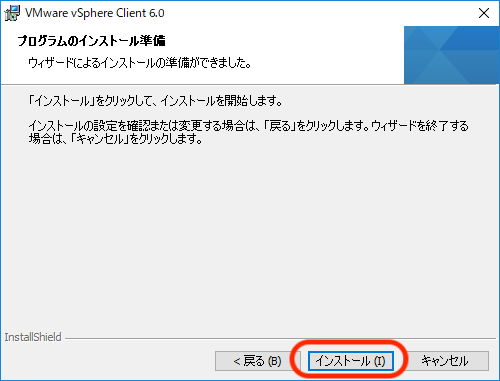
Follow the instructions on the screen to install the vSphiere Client as shown below.
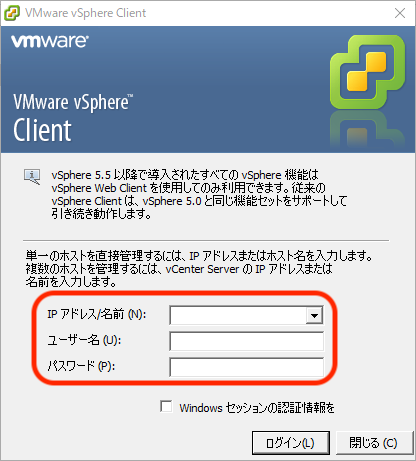
Start the vSphere Client, enter the following information as notified by the Information Technology Center, and click ログイン .
IP address/name
Virtual machine server name
User Name
User account name
password
initial password
Caution
The display of this screen may be corrupted depending on the version of Windows.
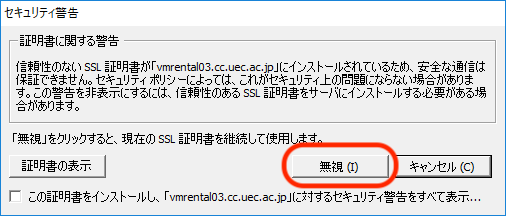
You will be warned about the SSL certificate, click 無視 .
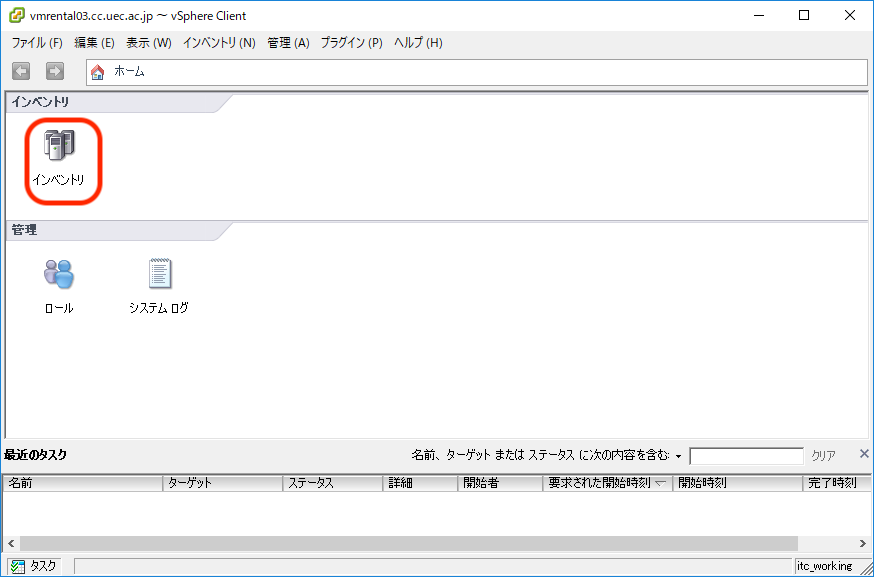
If the connection is successful, the following screen will appear, click インベントリ .
Click the name of the virtual machine you have applied for from the virtual machine server names on the left side of the screen. The details of the virtual machine will be displayed on the right side of the screen.
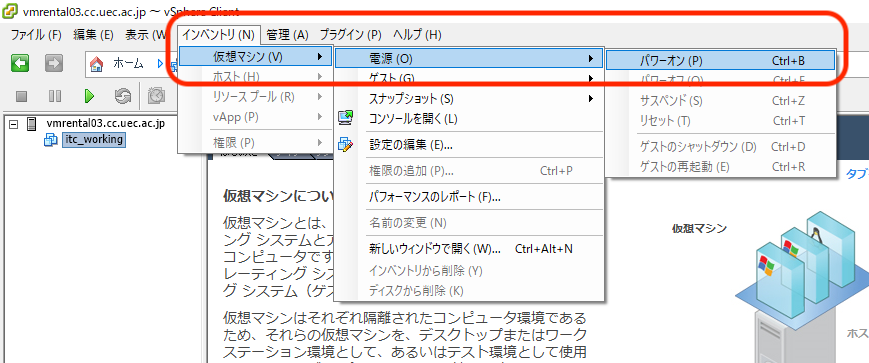
From the top menu, click インベントリ\(\Rightarrow\)電源\(\Rightarrow\) Select パワーオン , and turn on the virtual machine.
If you want to use the console, click on the コンソール tab. If the startup screen of the virtual machine is displayed, the startup is successful.
Installing and initially configuring the OS on the virtual machine
Install the OS.
It is necessary to insert the installation CD-ROM into the CD-ROM drive of the Windows PC and mount it in the virtual machine, or to save the ISO image file of the CD-ROM in the Windows HDD and mount it. In this article, we will use an example of installing from an ISO image that has been saved on a PC.
Prepare the installation media. Please refer to the manual of each OS for specific instructions.
Set the virtual machine to パワーオン and open the console screen.
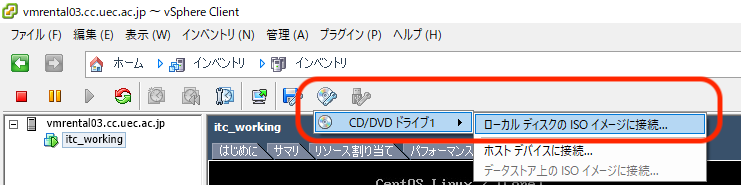
Select ローカル ディスクのISOイメージに接続 from the CD-ROM icon on the toolbar.
インベントリ\(\Rightarrow\)仮想マシン\(\Rightarrow\)ゲスト\(\Rightarrow\)Ctrl+Alt+Deleteの送信 Click in this order to soft-reset the virtual machine.
When the OS installation screen is displayed, follow the installation procedure for each OS.
Configure the network settings. The items to be configured are as follows.
IP address
As stated in the e-mail from the Information Technology Center
subnet mask
Default gateway
DNSサーバ
130.153.26.5 and 130.153.8.66
Required Install the VMware Tool according to the manual for each OS.
CentOS and other operating systems allow you to install Open VM Tools from the standard software repository.