Thunderbird (Automatic Configuration)

Hint

This is the easiest setting method.

  1. Download and Install Thunderbird

Hint

If you have already installed Thunderbird, please skip this step and proceed to the next step.

お使いのウェブ ブラウザで, https://www.thunderbird.net/ にアクセスし, Download をクリックするとインストール用ファイルが ダウンロードされます.

../../../_images/mail_thunderbird_autoconf_01-01.png

This is an example of Google Chrome. For other browsers, double-click the downloaded installer to run it.

\(\Downarrow\)

../../../_images/mail_thunderbird_autoconf_01-03.png

Follow the instructions on the screen and press Next, Install, Finish to proceed.

  1. Starting Thunderbird

Start the installed Thunderbird. After startup, the Set up an existing email address window shown in the image below will be displayed.

../../../_images/mail_thunderbird_autoconf_02-01.png

Hint

If the window shown in the figure does not appear, click Mail surrounded by the red frame in the figure below.

../../../_images/mail_thunderbird_autoconf_02-02.png
  1. Enter Name, UEC Mail Address and Password

Please enter the following information.

Your name:

Full name

Mail address:

<UEC account name>@edu.cc.uec.ac.jp

Hint

If UEC Account ID is x9999999 \(\Rightarrow\) x9999999@edu.cc.uec.ac.jp

Password:

UEC account password

../../../_images/mail_thunderbird_autoconf_03.png

click continue

\(\Downarrow\)

../../../_images/mail_thunderbird_autoconf_04-01.png

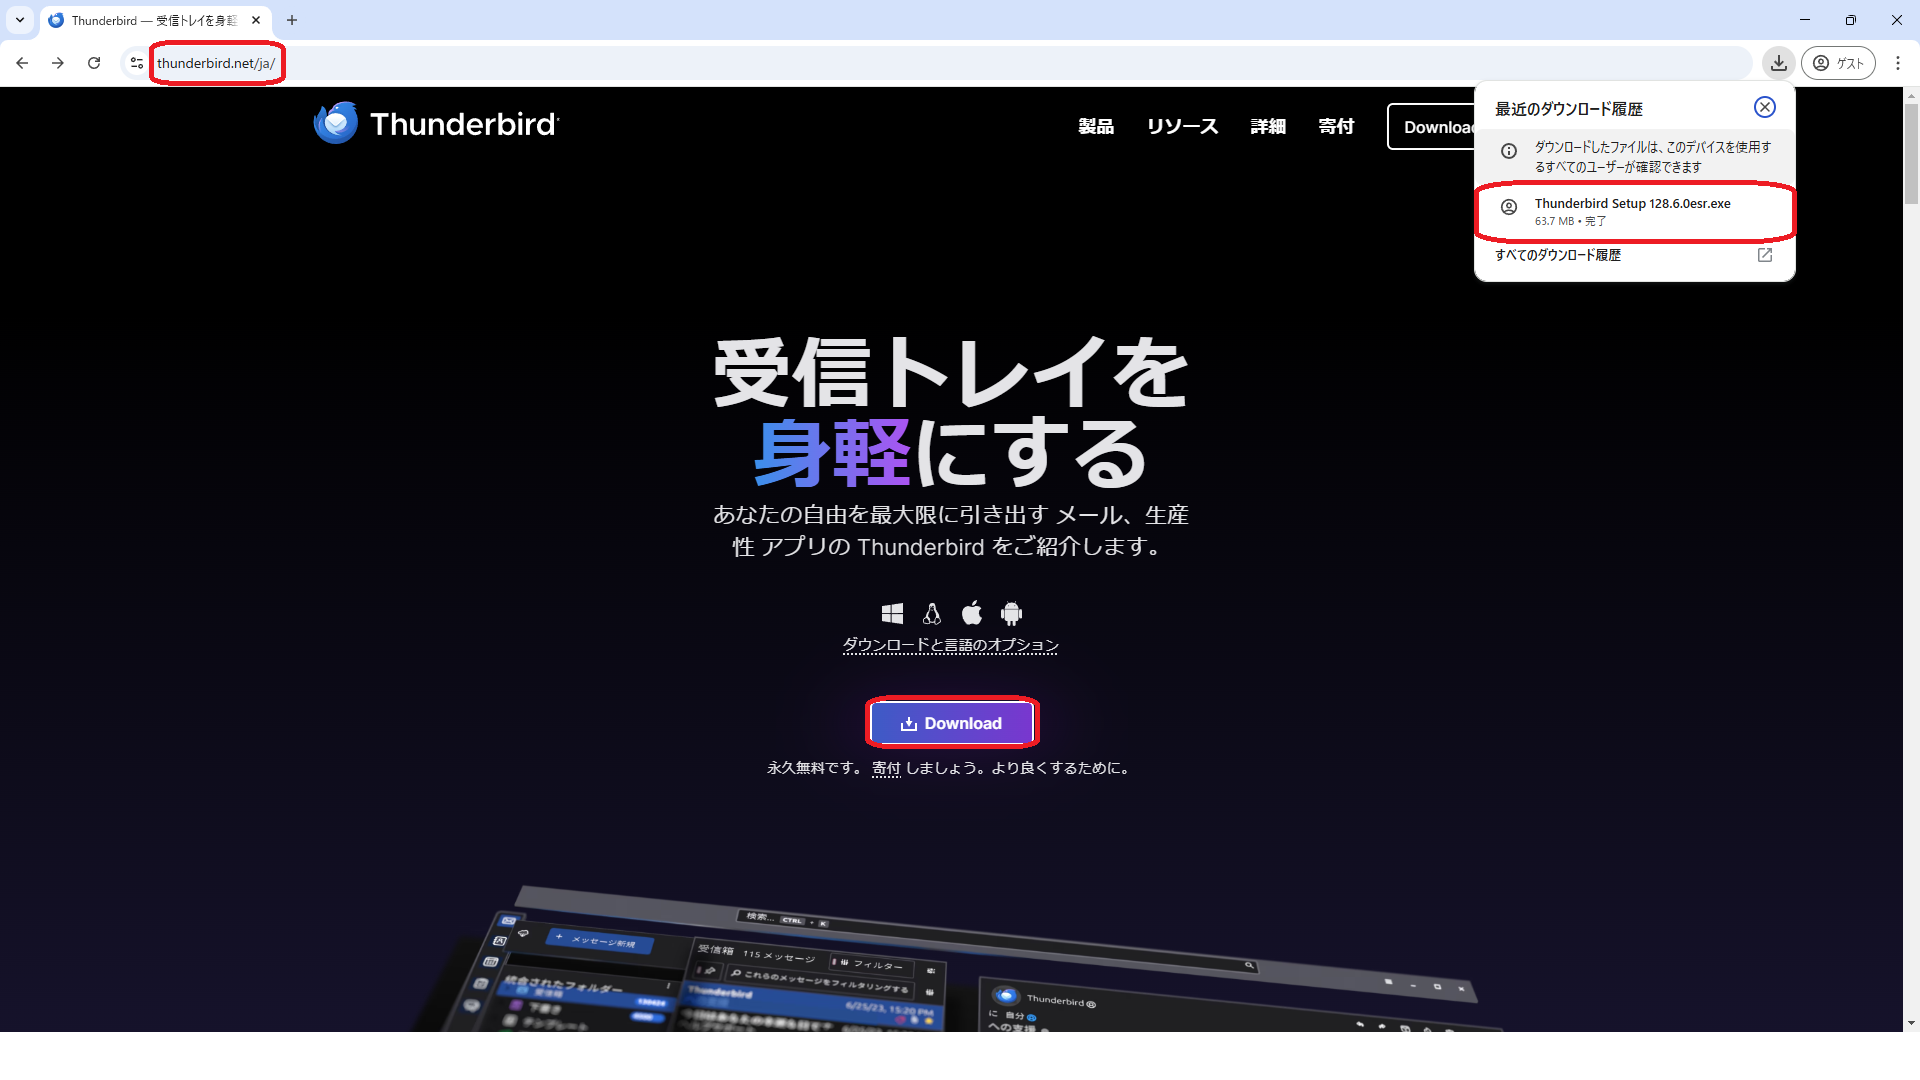
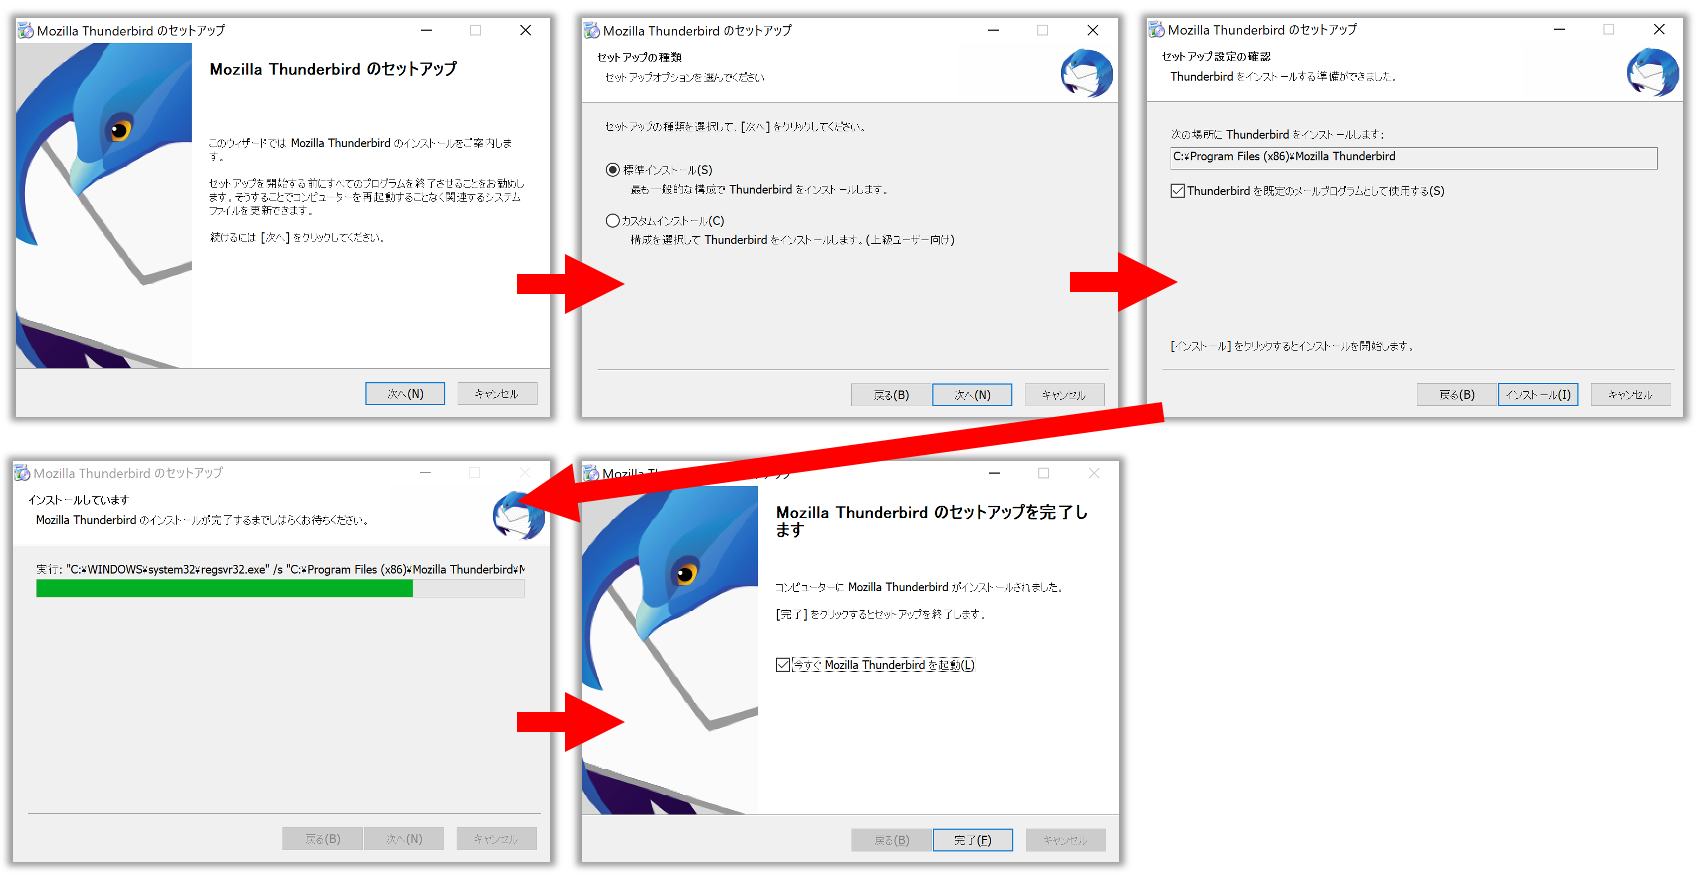
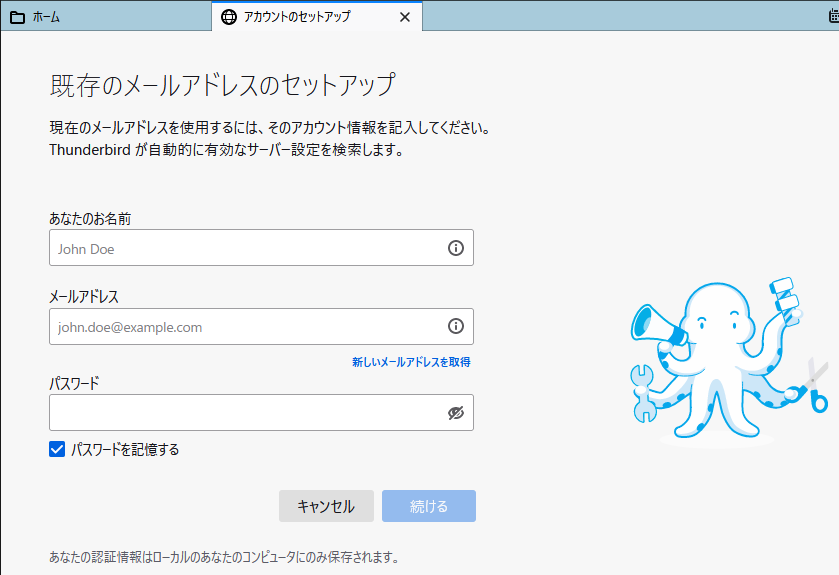
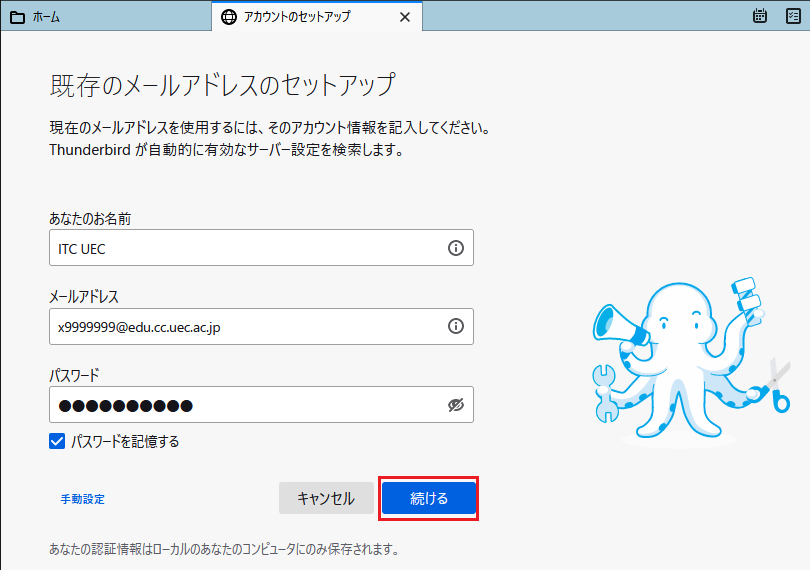
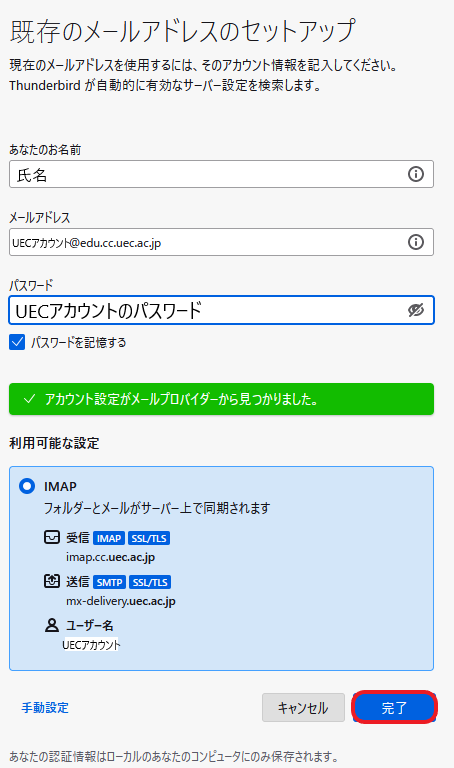
The required settings will be automatically filled. After checking, click Finish.

Hint

If either or both of your email address and password are incorrect, the following error will be displayed.

../../../_images/mail_thunderbird_autoconf_05a.png

Hint

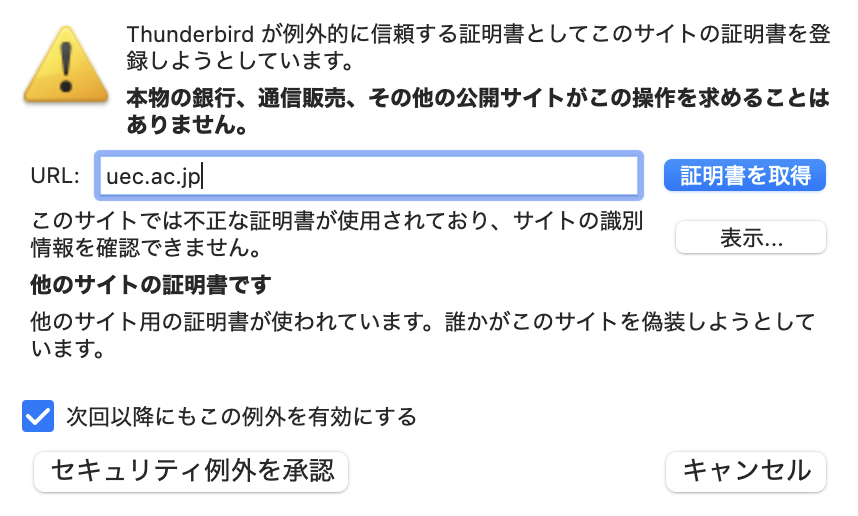
A security warning screen like the one below may appear. For this setting, please temporarily approve the security exception and proceed with the setting.

../../../_images/mail_thunderbird_autoconf_exception01.png
  1. Checking

If the settings are successful, you can check the received email by clicking Inbox of the email address of your UEC account.

FAQ