Subdomain DNS Record Management System
Subdomain managers and administrators can register and change subdomain records for the domain they are responsible for from the subdomain management system.
Caution
This procedure applies only to domains whose on-campus DNS subdomains are managed by the university-wide DNS server.
If you are using a virtual domain server or a department-specific DNS server as your DNS server, you cannot update using this method.
If you would like to manage your own campus DNS subdomains on the campus-wide DNS server, please contact support@cc.uec.ac.jp
Login
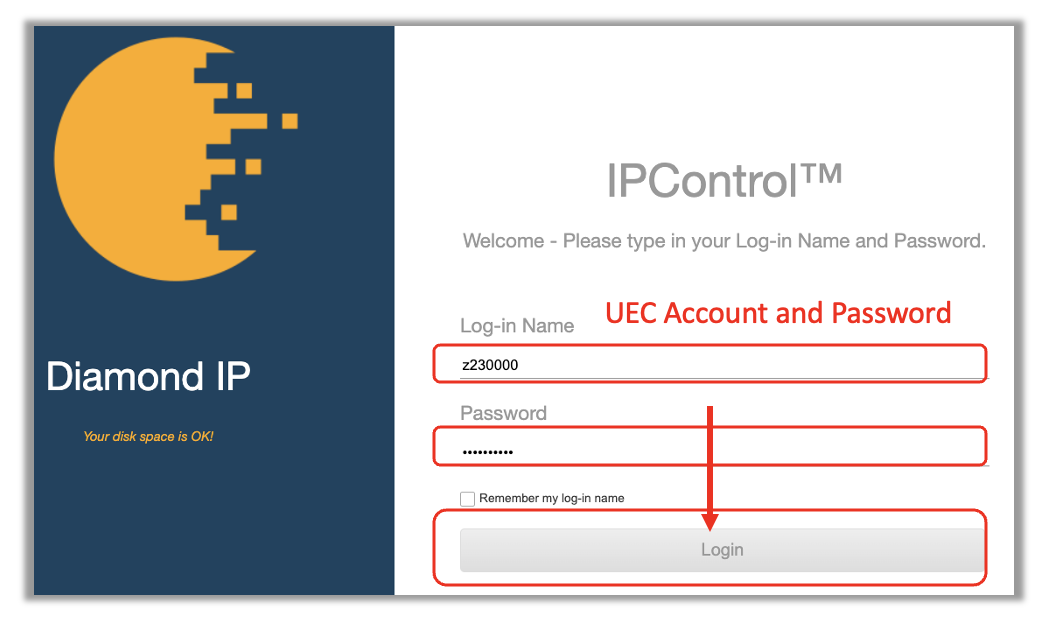
Access the subdomain DNS record management system (on-campus only) and log in with the UEC account of the subdomain manager or subdomain administrator. You cannot log in with any UEC account other than these.
the subdomain DNS record management system (on-campus only)
Hint
Please use L2TP VPN when accessing from off-campus
If you are unable to log in with the subdomain manager’s or subdomain administrator’s UEC account, please contact support@cc.uec.ac.jp to confirm registration.
Register/Change Records
Login
Login with the UEC account of the subdomain manager or administrator.
the subdomain DNS record management system (on-campus only)
Registering/Changing and Saving Records
Please follow the steps below to register or change the record and save the contents.
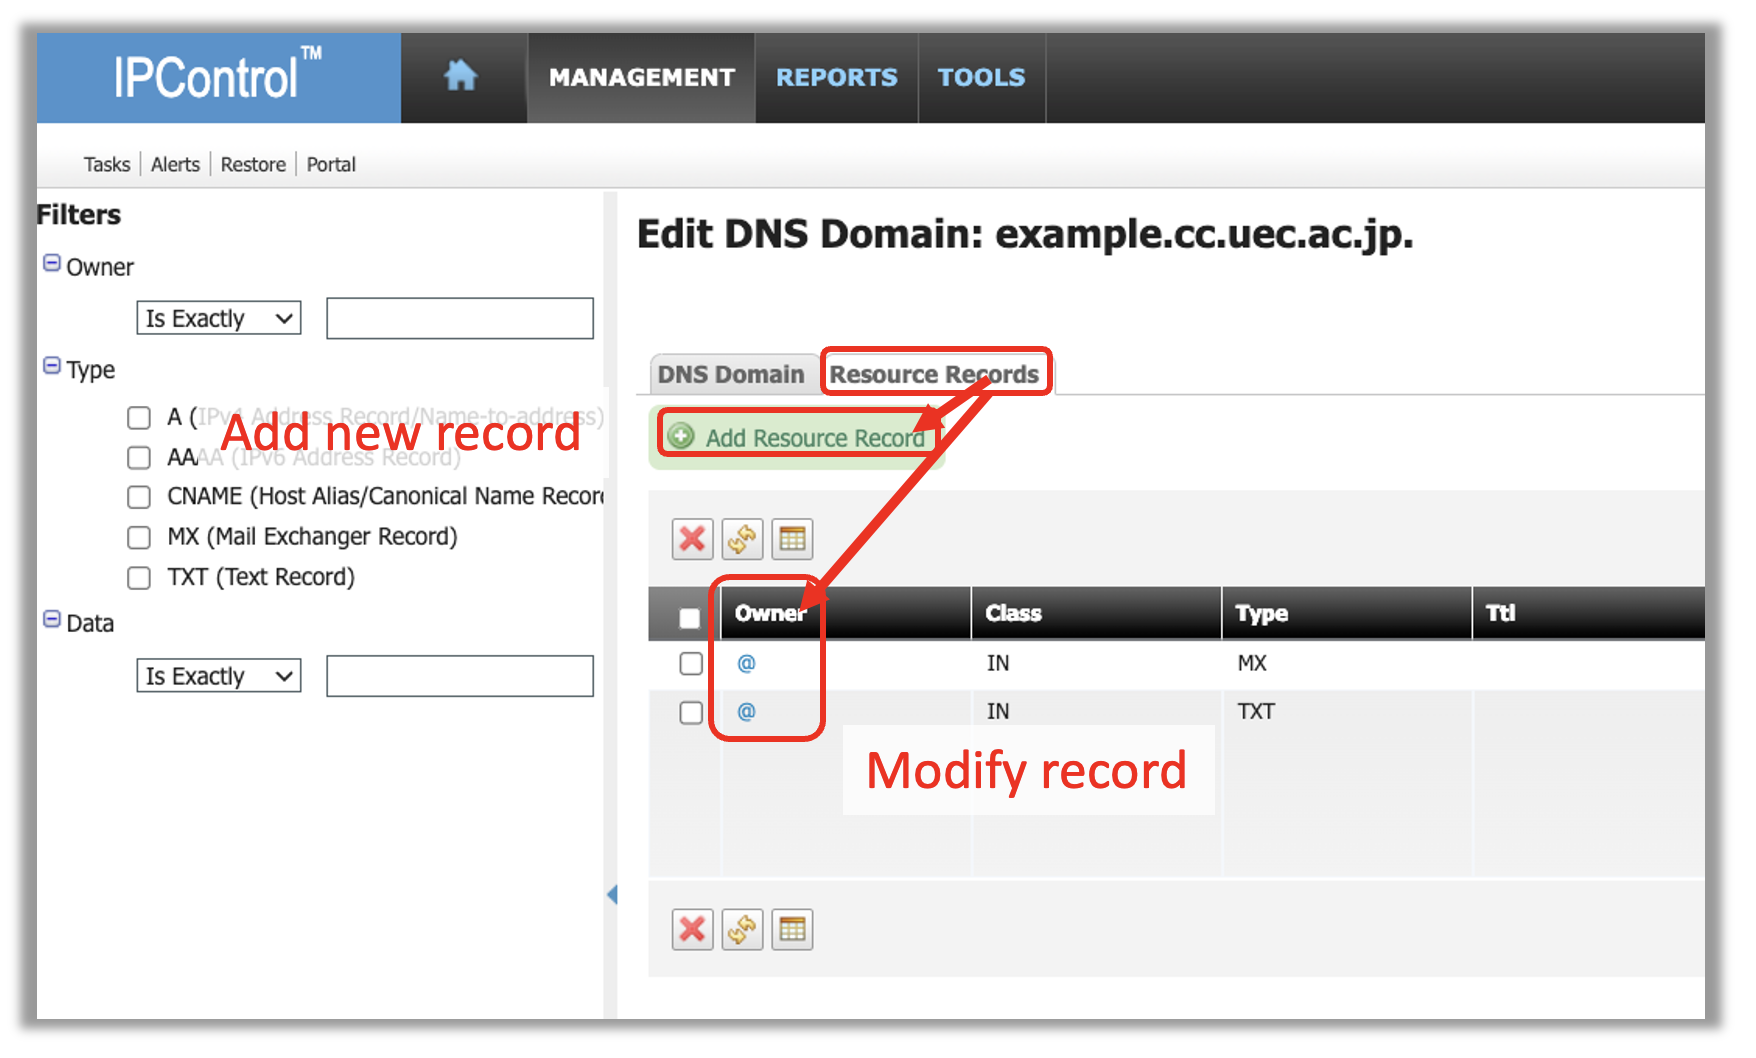
Click MANAGEMENT \(\Rightarrow\) Domains , and then click the zone you want to change from the list of zones.
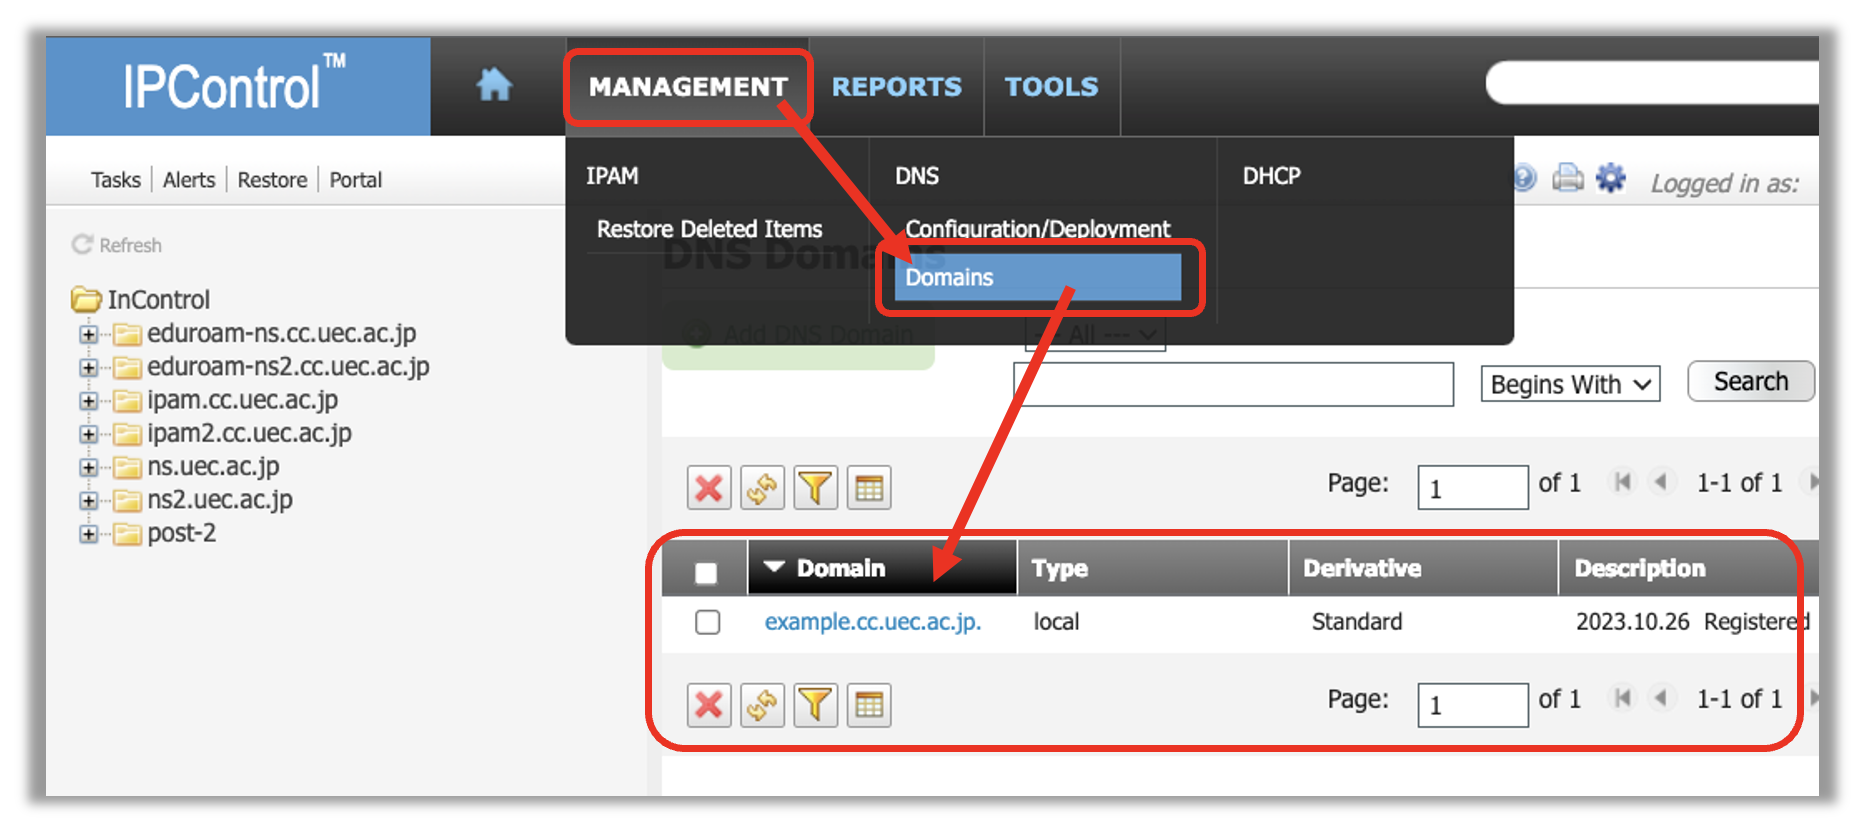
Those whose Type column is local are used for responses to DNS requests from within the university, and those whose Type column is set to world are used for responses to DNS requests from outside the university.
Next, click the Resource Records tab.
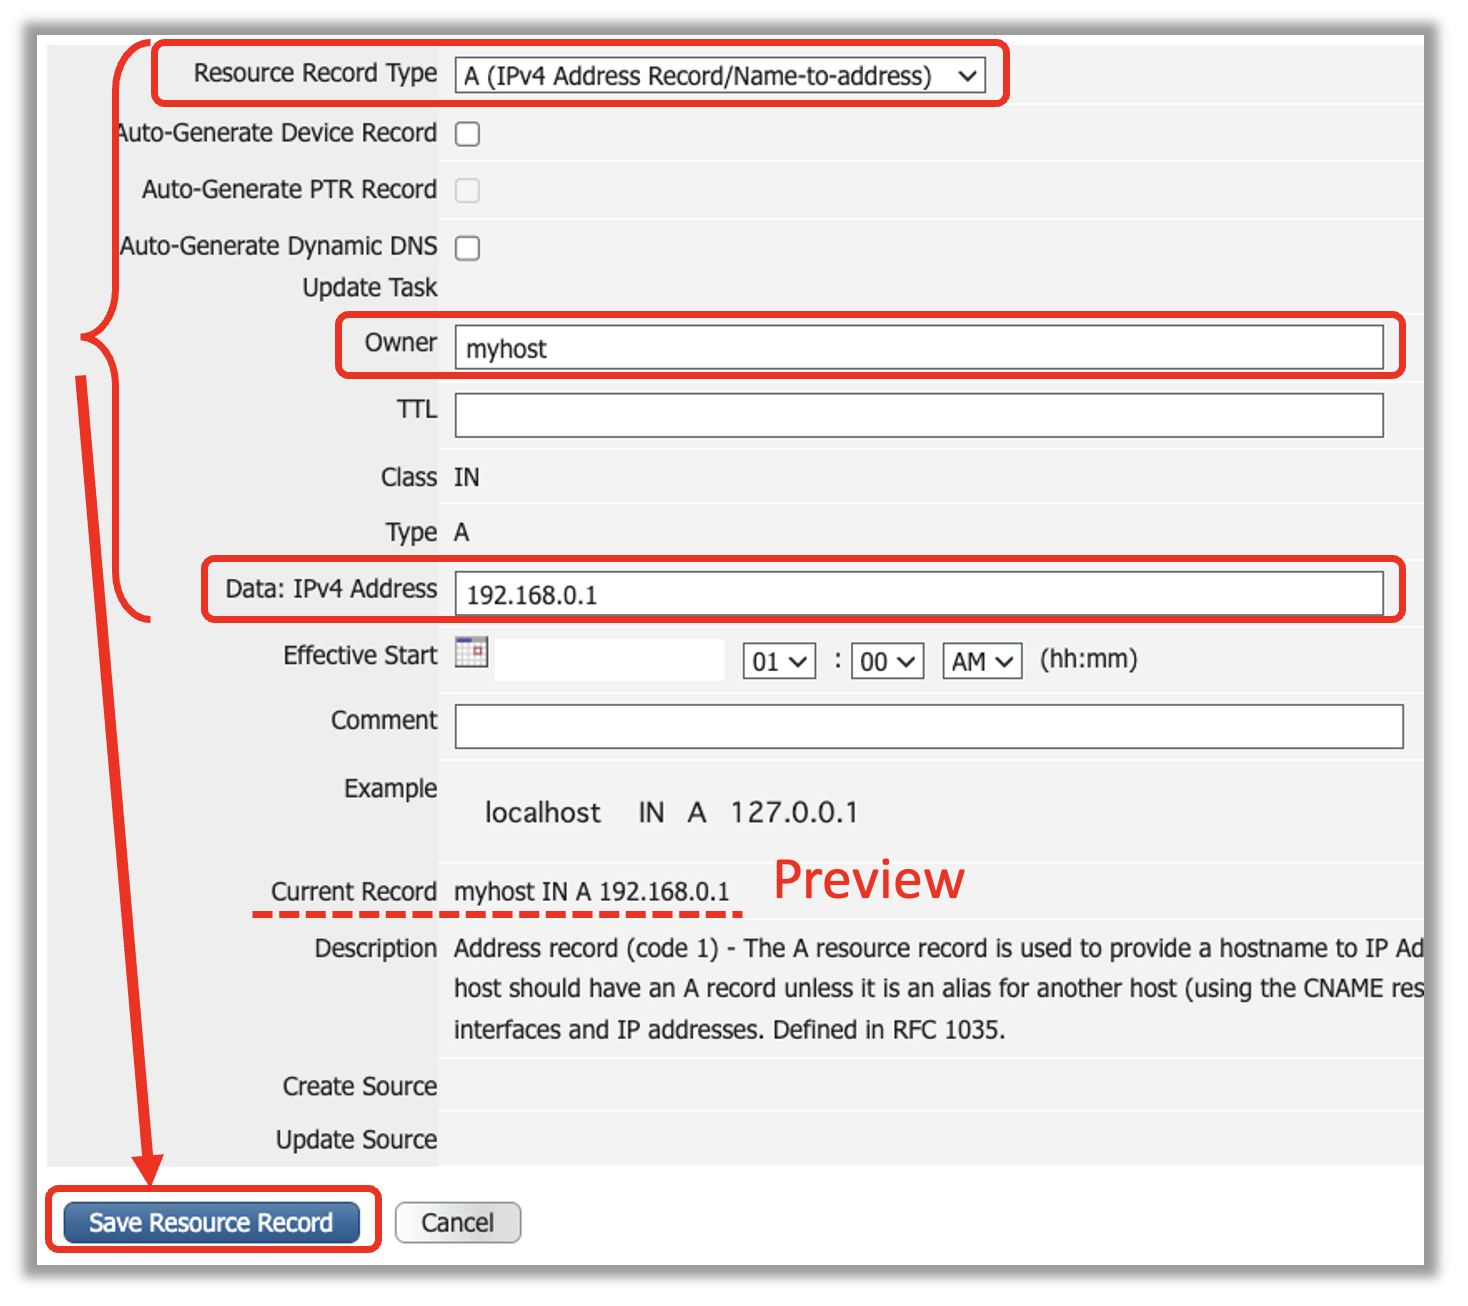
Next, enter the following information on the record editing screen. After entering the information, check the contents and Save Resource Record .
Resource Record Type : Type of record you want to add/change
Owner : Depending on the record type
Data : Depending on record type
Hint
To avoid complicated settings, we have limited the types of DNS records that can be managed from the system. If you wish to register DNS records other than those that can be selected on the screen, please contact support@cc.uec.ac.jp.
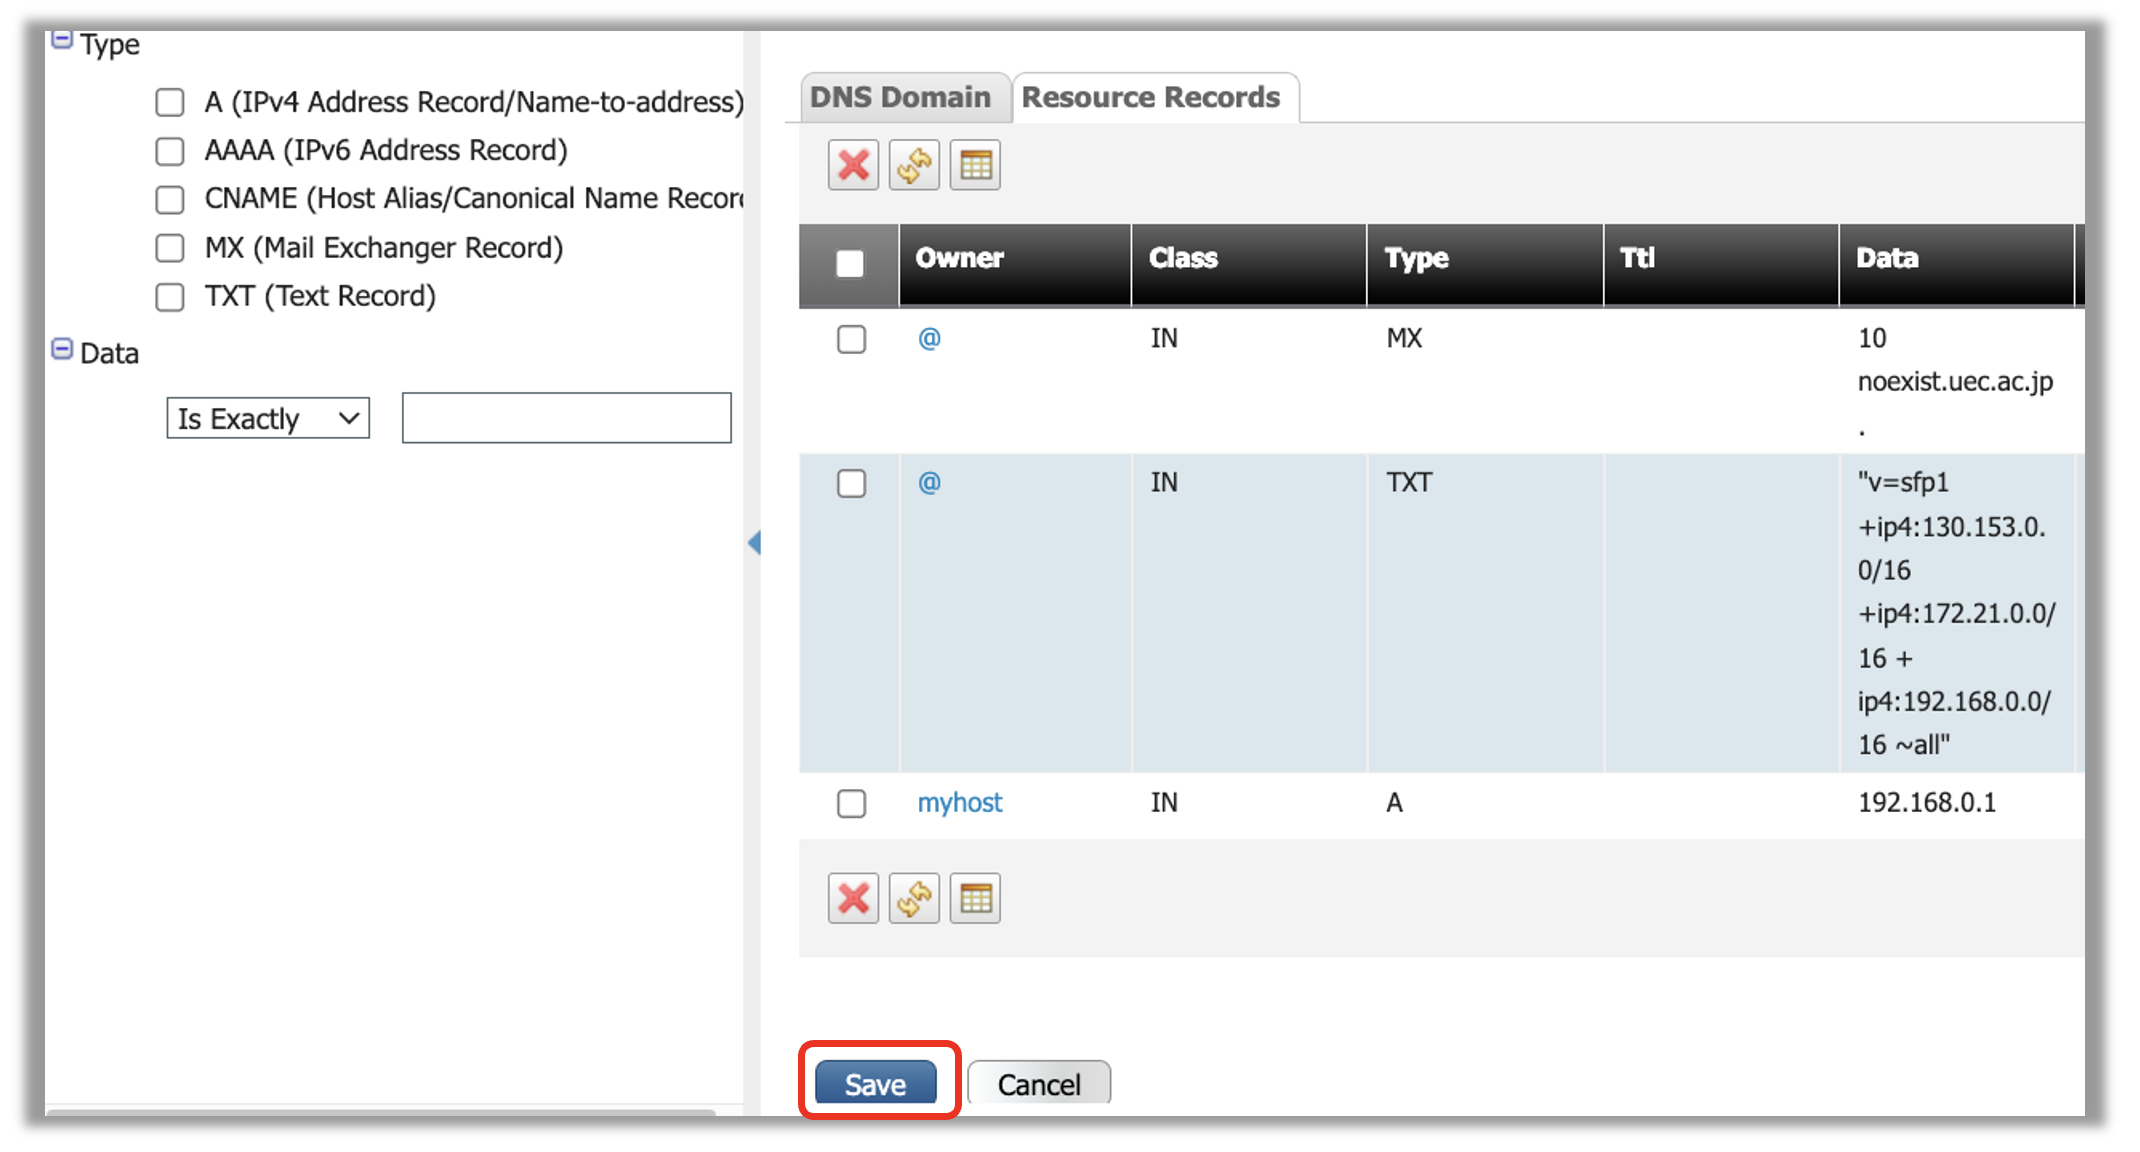
Once you have selected all the records you need, click the Save button to save.
Reflecting Changes
Follow Reflecting Changes to apply the saved settings
Delete Record
Login
Login with the UEC account of the subdomain manager or administrator.
the subdomain DNS record management system (on-campus only)
Deleting and Saving Records
Follow the steps below to delete the record and save the settings.
Click MANAGEMENT \(\Rightarrow\) Domains , and then click the zone you want to change from the list of zones.

Those whose Type column is local are used for responses to DNS requests from within the university, and those whose Type column is set to world are used for responses to DNS requests from outside the university.
Next, click the Resource Records tab. Next, check the records you want to delete and press the x button.
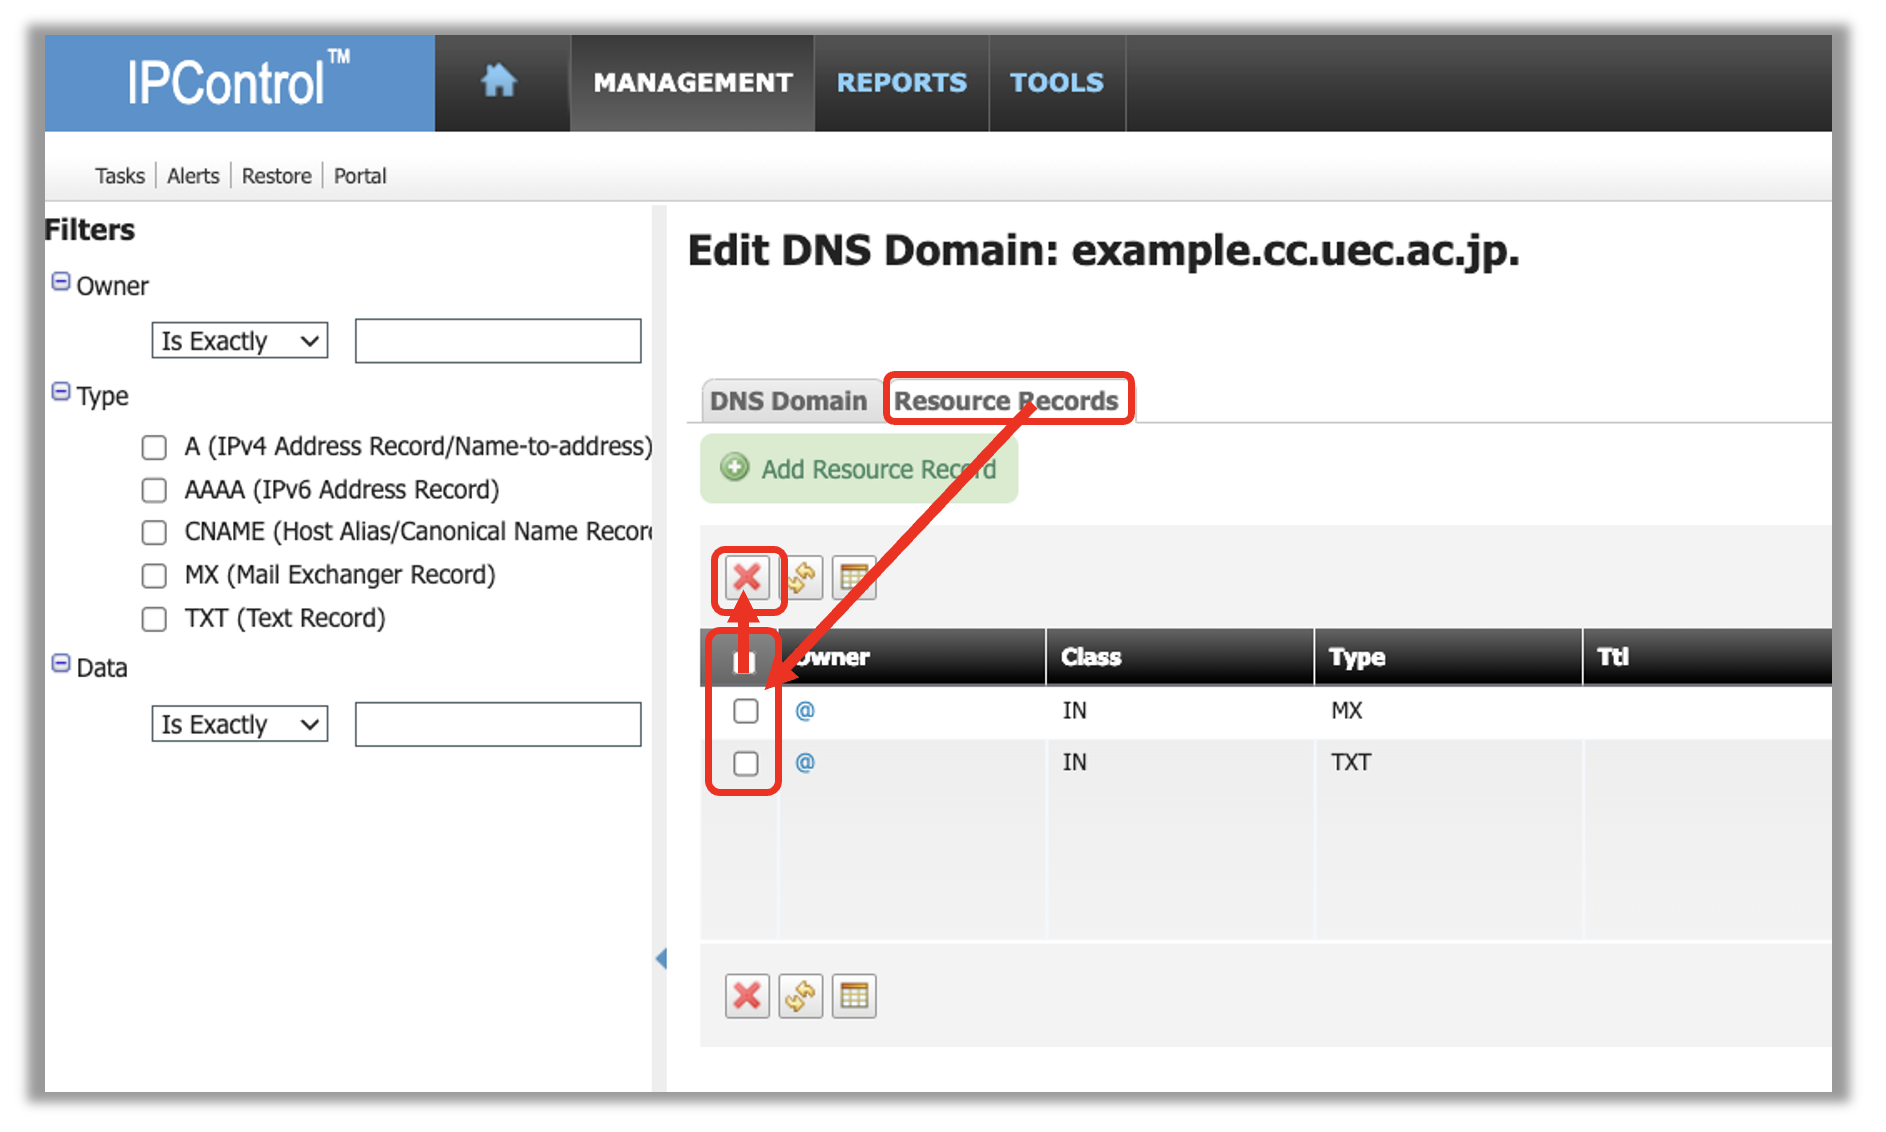
After deleting all the necessary records, click the Save button to save.
Reflecting Changes
Follow Reflecting Changes to apply the saved settings
Reflecting Changes
In order to reflect the saved settings, the following operations are required.
Request the setting update process
Click MANAGEMENT \(\Rightarrow\) Configuration/Deployment

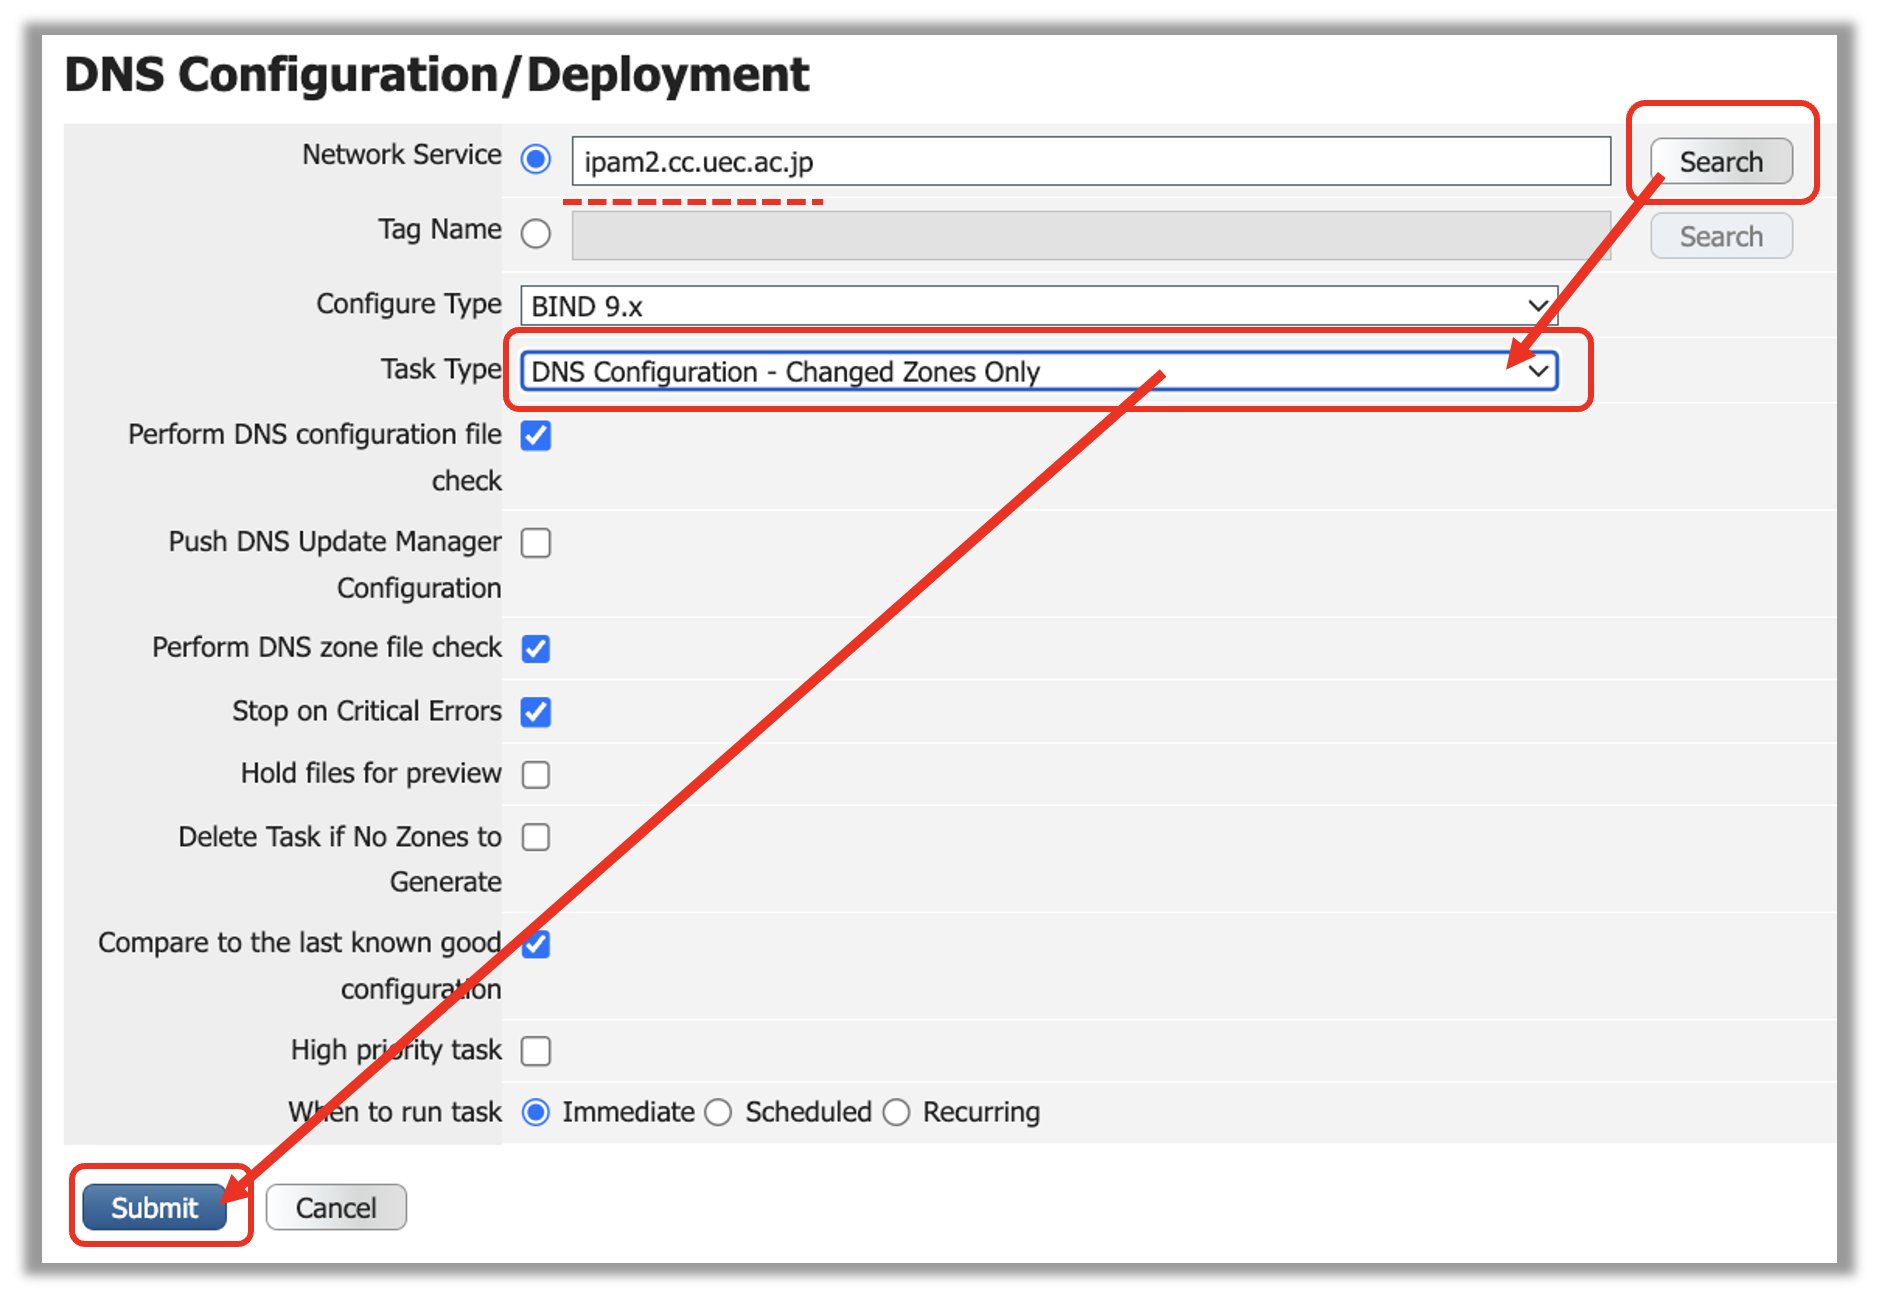
Enter the following information into each field on the following screen, then click Submit .
Network Service: Click Search and select ipam2.cc.uec.ac.jp
Task Type: Select DNS Configuration - Changed Zones Only
Hint
Please make sure to specify ipam2.cc.uec.ac.jp
ipam2.cc.uec.ac.jp is the DNS primary server, and ipam.cc.uec.ac.jp is the DNS secondary server.Once you apply the settings to the primary server, the settings will be automatically transferred to the secondary server after a certain period of time.
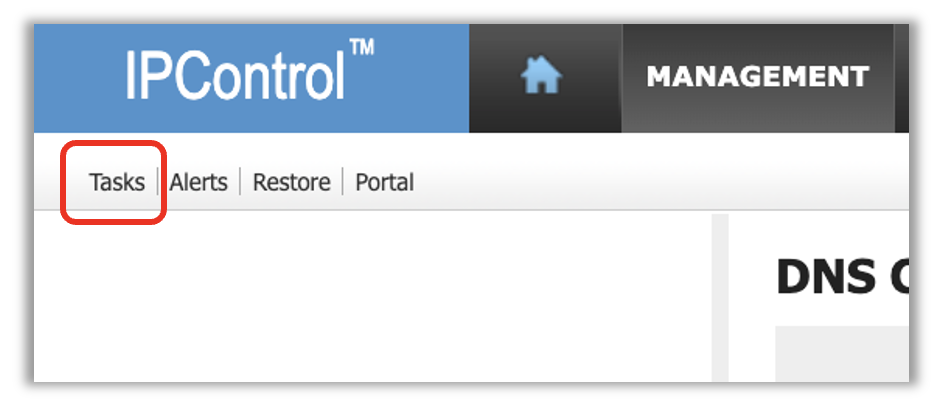
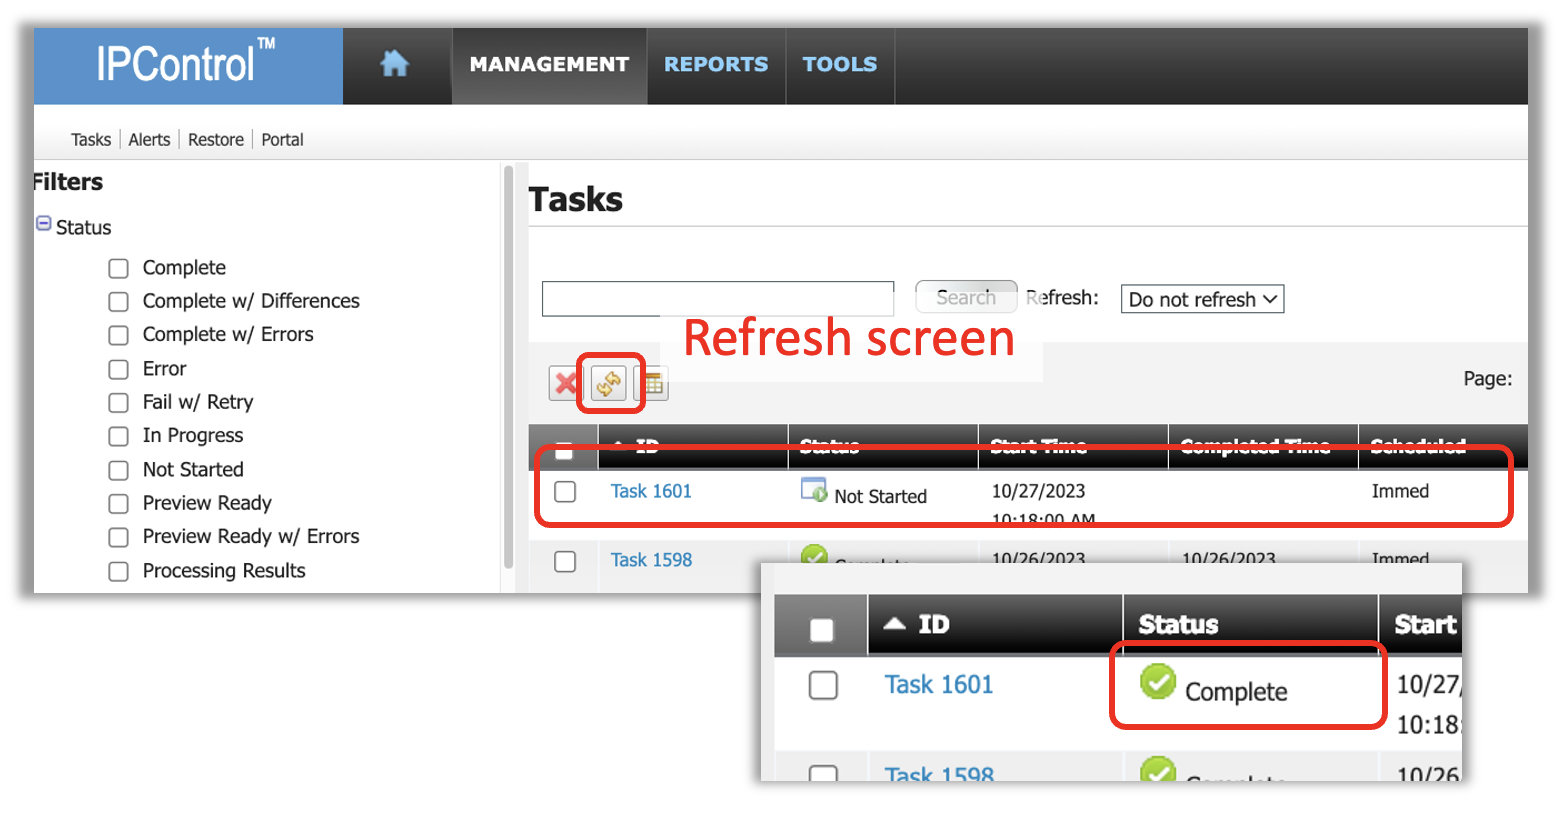
Check that the process is complete
